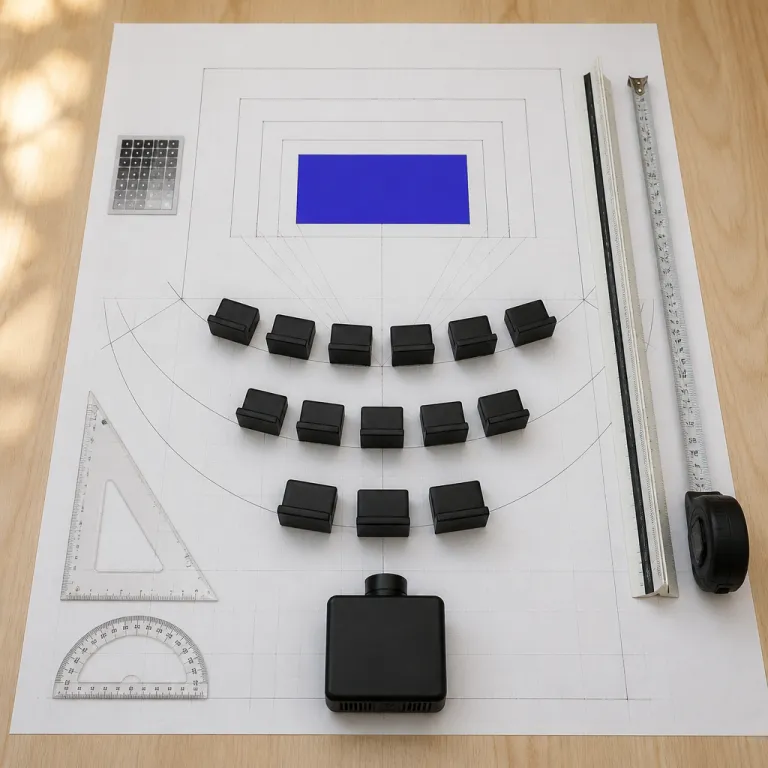
Projector screen size calculator: how to get distance and image size right
Why a projector screen size calculator matters more than lumens
Most people buy a projector, then guess the screen size. A good projector screen size calculator flips that logic and starts from your viewing distance, seating layout, and wall constraints, so the image actually fits your room and your eyes. When you live in a small apartment and treat the projector as a TV replacement, that math decides whether you enjoy a cinematic view or stare at a washed out, pixelated display.
Think of the screen as part of the optical system, not just a big white surface. The projector, the projection lens, the throw distance, and the screen surface all interact to set image size, brightness, and perceived sharpness, and a calculator simply makes those relationships visible. Without those tools you are gambling with throw ratio, viewing distance, and ambient light, and the odds are stacked against renters who cannot move walls or mount speakers freely.
Industry guidelines help anchor the numbers before you even open a size calculator. THX home theater recommendations aim for a viewing angle of roughly 36–40 degrees, which at a 3.0 m viewing distance translates to about a 2.2–2.4 m wide screen, while the SMPTE minimum of around 30 degrees gives you roughly 1.9 m width. Calibrators often use an Imaging Science Foundation (ISF) style rule of thumb that screen width should be about 0.625 times the viewing distance; this aligns closely with those cinema design targets and keeps the image size in a comfortable range. These figures are approximate summaries of published home cinema design practices, not strict medical or engineering limits.
Once you know the target width, the rest of the design falls into place. You can check whether your projector throw and the available throw distance can actually create that screen size without pushing the projector into its optical extremes, where focus uniformity and brightness often suffer. You can also decide whether a 16:9 aspect ratio projector screen or a wider 2.35:1 design makes sense for your mix of streaming series, games, and scope films, instead of just buying the biggest screen that fits the wall.
For renters, the calculator also protects you from overcommitting to a massive screen that your room and power layout cannot support. A 120 inch screen sounds modest until you realize that at 2.5 m viewing distance on a 1080p projector, individual pixels and compression artifacts in low bitrate video become obvious and distracting. The right screen size math gives you a balanced image where resolution, viewing distance, and projection brightness all work together rather than fight each other.

From viewing distance to screen size: the actual formulas
The core of any projector screen size calculator is the relationship between viewing distance and screen width. For home cinema, a reliable starting point is:
Screen width (m) ≈ Viewing distance (m) × 0.625
This gives you a viewing angle near the THX sweet spot and keeps the image immersive without causing eye strain. If you sit 2.4 m from the wall, that formula suggests a screen about 1.5 m wide, which corresponds to roughly a 70 inch diagonal at a 16:9 aspect ratio.
Let us run the same math for common sofa distances that many small space renters face. At a 2.5 m viewing distance, a 1.6 m wide screen (about 75 inches) hits the cinema target, while at 3.0 m you land around 1.9 m width (roughly 90 inches) and at 3.6 m you reach about 2.25 m width (around 105 inches), all assuming a standard 16:9 projector screen. If you stretch to 4.5 m viewing distance, the same ratio yields a 2.8 m wide image, which is about a 125 inch screen size and already demanding in terms of projector power and ambient light control.
These formulas also expose why ultra short throw projection can be tricky in tight rooms. A UST projector throw ratio around 0.25 means that to create a 2.2 m wide image you need the projector only about 0.55 m from the wall, but your sofa still needs to sit at least 3.0 m back to maintain the recommended viewing distance. If your living room is only 3.2 m deep, a size calculator will show that a 100 inch display is more realistic than a 120 inch one, because you simply cannot push the seating far enough back without sitting in the kitchen.
Height is the other half of the geometry that people forget until neck pain appears. For a 16:9 screen, the width–height relationship is fixed, so a 2.2 m wide image is about 1.24 m tall, and you want the bottom of that screen roughly 60–90 cm above the floor so that seated eye level hits the lower third of the image. A good projector calculator or display configurator will output both width and height, letting you check whether the top of the image collides with a low ceiling or a stacked video wall of shelves.
When you look at motorized screens or fixed frames, always cross check the manufacturer’s listed image size against your own distance calculator results. A 120 inch electric projector screen might fit your wall physically but force you into a 2.0 m viewing distance that is too close for 1080p content, especially with LED video sources that reveal every compression artifact. Before you click buy on any automatic projection screen, run the numbers and make sure the viewing distance, throw distance, and aspect ratio all line up with your actual room.
For a detailed example of how a 120 inch motorized model behaves in a real room, you can look at this in depth test of a 120 inch electric projector screen. That kind of review shows how screen surface, mounting height, and projection distance interact beyond what any simple size calculator can express. Use those case studies alongside your own calculator tools to avoid surprises once the screen is on the wall.

Resolution, image size, and when 4K actually matters
Screen size math does not stop at geometry, because resolution and pixel density decide whether the image looks cinematic or coarse. Human visual acuity research used in cinema design suggests that at roughly 1.5 times the screen height, most people can no longer distinguish individual 4K pixels, while at about 2 times the screen height even a well mastered 1080p video looks subjectively sharp. A projector screen size calculator that includes resolution awareness helps you avoid paying for 4K you cannot see or stretching 1080p beyond its comfort zone.
Take a 2.0 m wide 16:9 screen, which is about 1.12 m tall, and imagine a 1080p projector filling it. If you sit at 2.2 m viewing distance, that is roughly 2 times the screen height, which is ideal for 1080p and still lets 4K show a subtle improvement in fine textures and film grain. Move the sofa to 3.0 m and the same image size now sits at about 2.7 times the height, where the difference between 1080p and 4K shrinks dramatically and the extra resolution mostly helps with very large subtitles or aggressive video processing.
The opposite mistake is more common among renters chasing a giant image from a compact projector. A 150 inch screen at 2.4 m viewing distance on a 1080p display means you are sitting close enough to see the pixel grid, especially on single chip DLP models where the pixel structure is crisp and the rainbow effect can add distraction. A good projector calculator or distance calculator will flag that combination as aggressive, and you should either reduce the screen size, increase the viewing distance, or step up to a 4K projector with a finer pixel pitch.
Ultra short throw projectors complicate this because their throw ratio encourages very large images at modest distances. A UST projector throw that creates a 120 inch image from a few dozen centimeters off the wall can look spectacular with 4K content, but only if your seating is far enough back to keep the angular resolution in check and your ambient light is controlled. If you must sit at 2.0 m from a 120 inch screen, a size calculator will show that 4K resolution is not optional but essential to avoid visible pixel structure.
Remember that resolution is only one part of perceived detail, and contrast and motion handling matter just as much. A smaller 100 inch screen with a high contrast projector, a well chosen screen surface, and calibrated video processing can look more detailed than a larger 130 inch image driven by a dim projector with poor black levels. When you use a projector screen size calculator, treat resolution, image size, and viewing distance as a triangle, and do not let any single corner dominate your decision.
For curated examples of how different screen sizes pair with specific projectors in real rooms, you can consult this guide to top home theater projector screens. Those comparisons show how the same projector can feel either razor sharp or slightly soft depending on the chosen screen size and seating layout. Use that insight to sanity check your own calculator results before committing to a particular display design.
Seating geometry, viewing angles, and small space compromises
Even the best projector screen size calculator assumes a perfect central seat, but real living rooms rarely cooperate. When you stretch a sofa across the room, people at the edges see a different image than the person in the middle, because the viewing angle, perceived brightness, and even the effective aspect ratio shift with position. That is why seating geometry belongs in the same conversation as screen size, viewing distance, and projection distance.
Imagine a 2.2 m wide screen in a 3.0 m deep room, with a 2.0 m wide sofa pushed against the back wall. The central seat sees a viewing angle around 37 degrees, which is right in the THX target, but the person at the far left might be looking at the screen from a 25 degree horizontal offset, which can exaggerate any hotspotting in the screen surface and reduce perceived contrast. If you use a high gain projector screen to fight ambient light, that off axis seat may see a dimmer image and slightly distorted geometry, especially with ultra short throw projection where the light hits the screen at a steep angle.
For renters who cannot move walls, the practical fix is to let the screen size be driven by the worst seat, not the best. A projector screen size calculator that lets you input both viewing distance and horizontal offset can show how a slightly smaller image improves uniformity across the sofa, because the edge seats no longer exceed the recommended viewing angle. In some cases, shifting the screen a few centimeters on the wall or angling the projector mount can also balance the view without sacrificing too much image size.
Height geometry matters just as much as horizontal placement, especially in rooms where the projector must sit on a low shelf or coffee table. The bottom of the screen should usually sit just above the center channel speaker or soundbar, with seated eye level hitting about one third of the way up the image to avoid neck strain. If your calculator tells you that a 120 inch screen will push the top edge dangerously close to the ceiling, consider dropping to 100 inches so that the width–height ratio still fits the room and the viewing distance remains comfortable.
Do not forget the practicalities of cables, power, and tech support when planning seating and screen geometry. Running HDMI and USB cables cleanly to a projector in the middle of the room is harder in a rental, and a smaller screen that allows the projector to sit near a wall can simplify both cable management and access to live chat or remote tech support if something goes wrong. The right design is the one that balances image size, viewing distance, and day to day usability, not just the one that looks impressive in a diagram.
Audio also interacts with seating geometry in ways that a pure size calculator will not capture. If your speakers must flank the screen or sit on a media console, an oversized image can push them too far apart or force them behind the screen edges, which hurts stereo imaging and dialogue clarity. Treat the screen, projector, and speaker layout as a single system, and let the seating plan guide where each piece belongs.
Throw distance, throw ratio, and fitting a projector into a rental
Once you know your ideal screen size from a projector screen size calculator, the next constraint is throw distance. Throw distance is the space between the projector lens and the screen, and throw ratio is the simple fraction that links that distance to the image width, so a ratio of 1.5 means you need 3.0 m to create a 2.0 m wide image. In small apartments where the sofa already eats half the room, those numbers decide whether a traditional long throw projector works or whether you need a short throw or ultra short throw design.
Most mainstream projectors have a throw ratio around 1.2–1.6, which gives some flexibility but still expects a few meters of clear space. If your living room is 3.5 m deep and your viewing distance is 2.7 m, a size calculator will show that you can probably hit a 90–100 inch screen without pushing the zoom to its extremes, but a 120 inch image would require more distance than the wall allows. Short throw models with ratios around 0.8 can create the same image size from closer to the wall, but they are more sensitive to small changes in placement, so a distance calculator becomes essential for precise setup.
Ultra short throw projectors flip the script by sitting almost against the wall and projecting upward onto a dedicated screen surface. Their throw ratio can be as low as 0.23, which means a tiny change in distance can shift the image size dramatically, and any unevenness in the wall or screen frame becomes visible as geometry distortion. A projector calculator that supports UST models will show how a few millimeters of movement translate into several centimeters of image size change, which is why rigid furniture and careful measurement matter more than raw projector power in these setups.
Brightness is the other side of the throw distance equation that many renters underestimate. As you increase image size at a fixed projector output, the light spreads over a larger area and the perceived brightness drops, which is why a 2.5 m wide image in a room with ambient light demands more lumens than a 2.0 m wide one. A good display configurator or projector calculator will estimate screen brightness in nits or foot lamberts based on throw distance, screen gain, and projector power, helping you avoid a dim, washed out display that no amount of video processing can rescue.
When you plan cable runs and power outlets, remember that the projector’s physical position is locked by throw distance math. If the calculator says the projector must sit 2.8 m from the wall to create your chosen screen size, that is where your HDMI cables, USB cables, and power strip need to reach without creating a trip hazard. In rentals, that often means using low profile cable raceways along the ceiling or baseboards, and choosing wireless audio for rear speakers to keep the floor clear.
For more complex systems with multiple sources, gaming consoles, and advanced audio formats, pairing the right receiver with your projector and screen can simplify the whole chain. A midrange Denon with features like wireless surrounds and gaming friendly video support, as discussed in this analysis of wireless surround and gaming ready receivers, can centralize HDMI switching and reduce the number of long cables snaking toward the projector. The less physical clutter you have between the sofa and the screen, the easier it is to respect the throw distance and viewing distance that your calculator recommends.
Ambient light, screen surfaces, and real world usability
Even perfect screen size math collapses if ambient light washes out the image. In rentals where you cannot blackout every window or repaint the wall in dark colors, the choice of screen surface and image size becomes a balancing act between brightness, contrast, and day to day usability. A projector screen size calculator that includes brightness estimates can help you see when a smaller screen will actually look better than a larger one in your specific lighting conditions.
Start by thinking about how much light hits the wall during your typical viewing hours. If you watch mostly at night with controlled lamps, a matte white screen with a gain around 1.0 will give you even brightness and wide viewing angles, and you can safely push the image size toward the upper limit that your viewing distance allows. If you watch sports or LED video content with the curtains open, an ambient light rejecting screen surface with higher gain can help, but it will also narrow the optimal viewing cone and make seating geometry more critical.
In those brighter rooms, a size calculator that outputs estimated nits or foot lamberts is more valuable than a simple diagonal number. A 2.0 m wide image at 80 nits will look punchier and more contrasty than a 2.5 m wide image at 50 nits, even if the larger screen feels more impressive on paper, and that difference becomes obvious with HDR video and high contrast games. When the calculator shows that your projector power is marginal for a given screen size in your ambient light, the smartest move is often to shrink the image rather than chase a brighter projector.
Wall quality also matters more than many renters expect, especially if you plan to project directly onto paint instead of using a dedicated screen. Small bumps, texture, and color variations in the wall can create subtle shadows and tint shifts that become visible at larger image sizes, and a projector calculator cannot correct for that. If you must use the wall, consider limiting the screen size to keep the image within the flattest, most uniform area, and use a neutral gray paint to improve perceived contrast in the presence of ambient light.
Support and configuration tools from manufacturers can help bridge the gap between theory and practice. Many brands now offer online display configurators, live chat, and remote tech support that let you plug in your room dimensions, desired screen size, and projector model to get tailored recommendations, including throw distance, mounting height, and even suggested cables. Use those tools as a second opinion on your own projector screen size calculator results, especially if you are pushing the limits of what your room can handle.
Finally, remember that usability includes how quickly you can go from pressing power to watching a film. If your setup requires dragging furniture, rerouting cables, and recalibrating the projector throw every time you want to watch a video, you will use it less, no matter how perfect the math looks. Aim for a design where the screen, projector, and seating stay fixed, the image size matches your viewing distance, and the only thing you adjust is the content you choose.
Putting it all together: a practical workflow for renters
Turning all this theory into a real home cinema starts with a tape measure, not a shopping cart. Measure the exact viewing distance from your main seat to the wall, then feed that number into a projector screen size calculator that respects THX, SMPTE, and ISF style guidelines, and note the recommended screen width and height. That gives you a target image size that your eyes will find comfortable before you even think about projector models or screen brands.
Next, check whether your room can physically support that screen size once you account for furniture, speakers, and doorways. Use a distance calculator or projector calculator to see where the projector must sit to create that image, and verify that you can run power and HDMI or USB cables to that spot without creating a hazard or violating rental rules. If the required throw distance lands in the middle of a walkway or conflicts with a ceiling fan, adjust the screen size downward until the geometry and the room layout align.
Then layer in resolution and content type, because a gamer sitting closer to the screen has different needs than someone watching compressed streaming video from the sofa. If your viewing distance is short and you crave a large image, prioritize a 4K projector and keep the screen size within the range where the pixels remain invisible, as shown by your calculator’s angular resolution estimates. If you sit farther back and mostly watch 1080p video, you can safely choose a slightly larger screen without chasing the highest resolution, as long as the projector power and ambient light still support that image size.
After that, refine the seating geometry and screen height to protect comfort and audio performance. Sketch your room or use a simple display configurator to place the screen, speakers, and seats, making sure that the bottom of the image sits just above the center speaker and that edge seats do not exceed recommended viewing angles. If you find that the ideal screen size from the calculator creates awkward seating or forces speakers into bad positions, trim the diagonal until the whole system feels balanced.
Finally, sanity check everything against real world reviews and manufacturer tools. Look for tests where reviewers measure actual throw ratio, brightness, and image size on different screen surfaces, and compare those results to your own calculator outputs to see whether your chosen projector and screen combination has enough headroom for your room. When in doubt, err on the side of a slightly smaller screen that your projector can light comfortably and your room can support gracefully, because a bright, sharp 100 inch image usually beats a dim, compromised 120 inch display.
In the end, the best projector setup is not the one that maxes out your wall, but the one where every seat sees a clean, comfortable image and the system disappears when the film starts. Screen size math, when combined with honest measurements of viewing distance, throw distance, and ambient light, turns that goal from guesswork into a repeatable process. What matters on movie night is not the lumens on the box, but the last row on movie night.
Key figures for screen size, distance, and resolution
- THX home theater recommendations often target a viewing angle of about 36–40 degrees for immersive home cinema, which corresponds to a screen width of roughly 0.6–0.7 times the viewing distance according to their published guidelines; treat these as practical design goals rather than strict rules.
- The SMPTE minimum standard of a 30 degree viewing angle translates to a screen width of about 0.55 times the viewing distance, which is why an 80 inch screen is often ideal at around 3.0 m in many living rooms.
- ISF style calibration practice commonly uses a rule of thumb where screen width equals 0.625 times the viewing distance, placing the home cinema sweet spot between the THX and SMPTE recommendations.
- At a viewing distance of about 1.5 times the screen height, most viewers cannot distinguish individual 4K pixels, while at roughly 2 times the height even 1080p appears sharp, based on angular resolution data used in cinema and display design literature.
- A 150 inch 1080p image viewed from 2.4 m has a pixel density low enough that the pixel grid becomes visible, which is why many experts advise limiting 1080p screens to around 100–120 inches at that distance.
- Ultra short throw projectors with a throw ratio near 0.25 can create a 100 inch image from roughly 0.5 m, but a small 1 cm shift in projector position can change the image width by several centimeters, making precise placement critical.
FAQ about projector screen size and viewing distance
How do I choose the right screen size for my room ?
Start by measuring the viewing distance from your main seat to the wall, then multiply that distance by about 0.6–0.65 to get an ideal screen width. Convert that width to a diagonal based on your chosen aspect ratio, usually 16:9, and check that the resulting height fits under your ceiling while leaving room for speakers.
When does 4K resolution make a visible difference over 1080p ?
4K shows a clear benefit when you sit closer than about 2 times the screen height, especially on large screens above 100 inches. If you sit farther back, the extra pixels become harder to see, and contrast, color accuracy, and motion handling matter more than resolution alone.
Is a bigger screen always better for home theater ?
A larger screen is only better if your projector has enough brightness, your room can control ambient light, and your viewing distance keeps the image sharp and comfortable. Oversizing the screen can lead to visible pixels, eye strain, and a dim picture, so it is safer to follow calculator based guidelines than to max out the wall.
How high should I mount my projector screen ?
For most setups, the bottom of the screen should sit about 60–90 cm above the floor so that seated eye level hits the lower third of the image. This reduces neck strain and leaves space for a center speaker or soundbar without blocking the picture.
Do I need a dedicated screen, or can I use a painted wall ?
A painted wall can work for smaller images and casual viewing, but texture and color inconsistencies become obvious as screen size grows. A dedicated projector screen with a suitable surface and gain will usually provide better contrast, uniformity, and viewing angles, especially in rooms with some ambient light.