

Understanding the 5.1.4 speaker configuration
What does 5.1.4 really mean for your home theater?
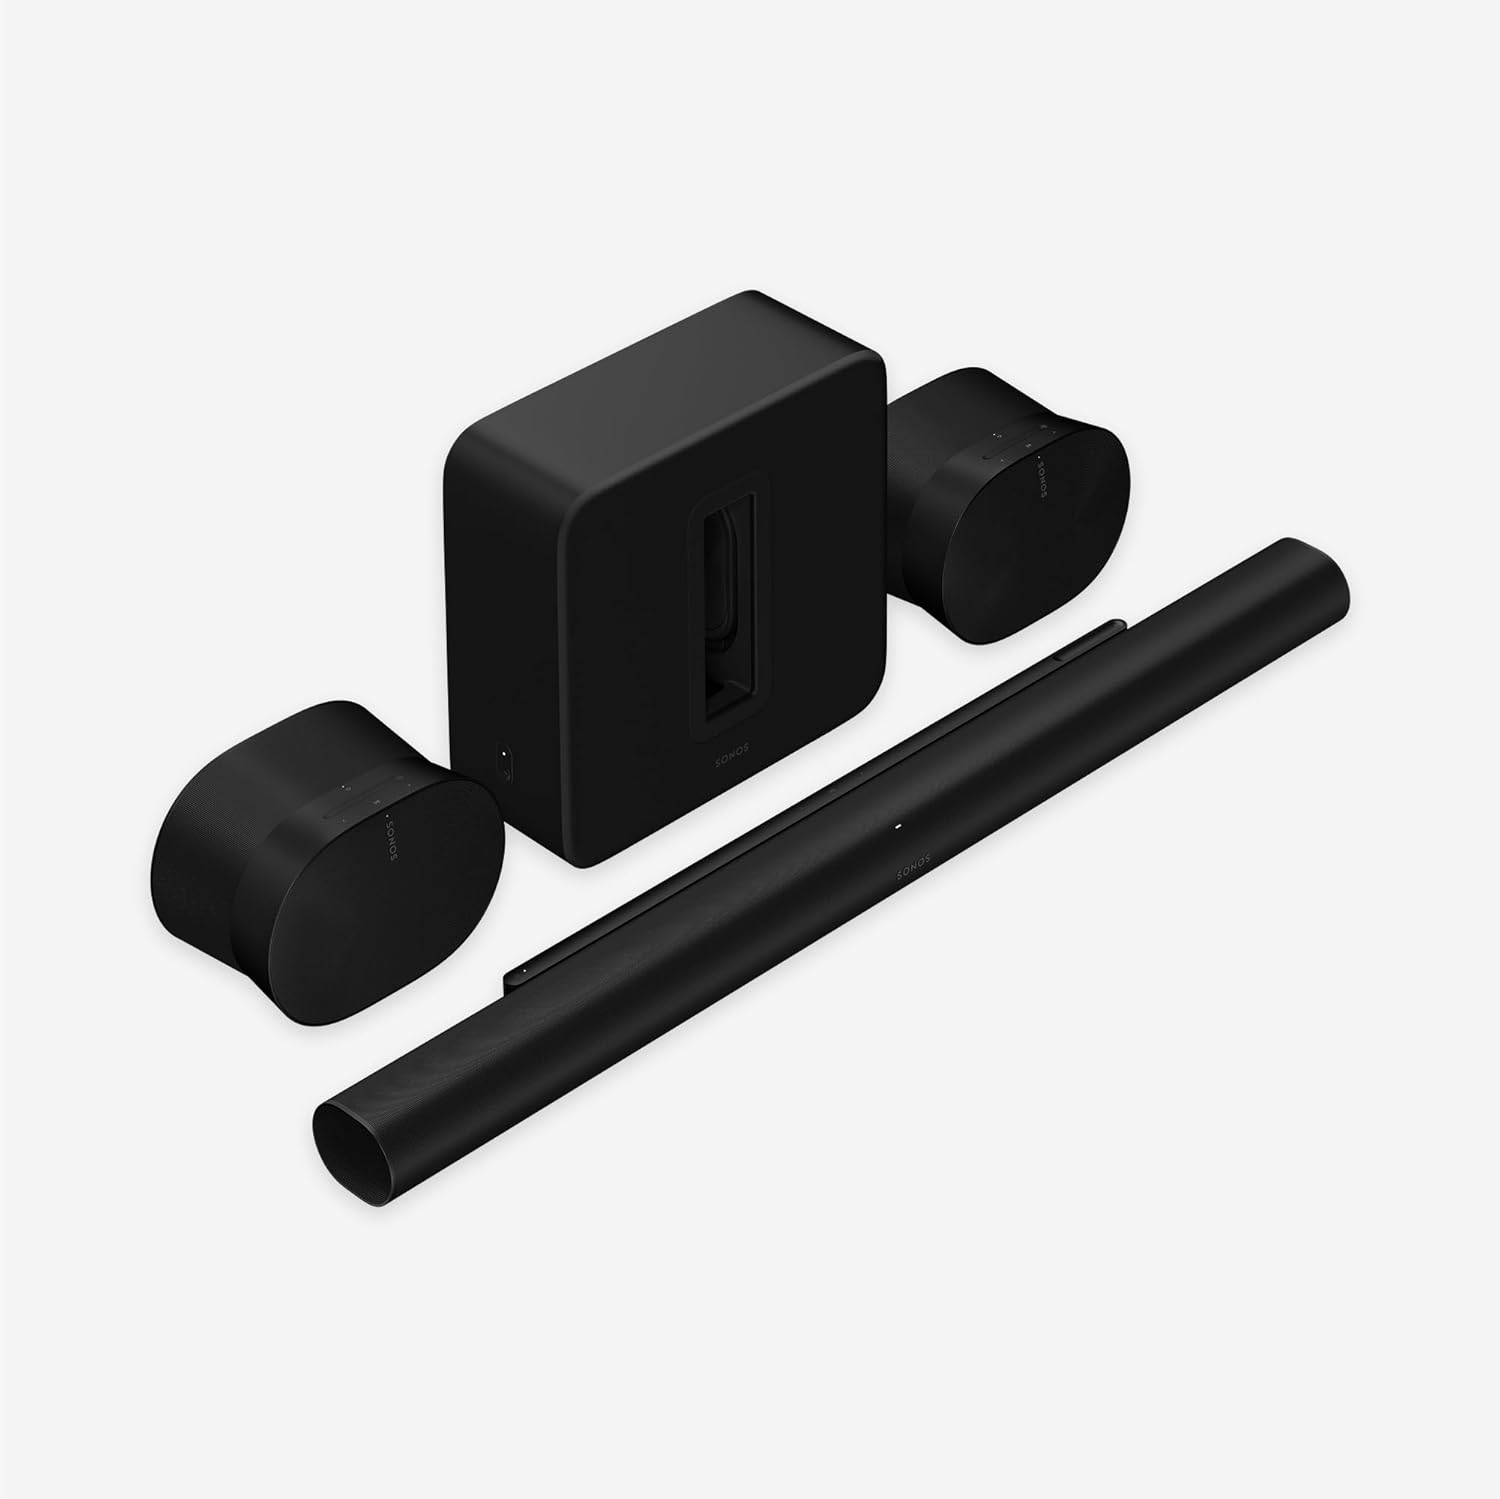
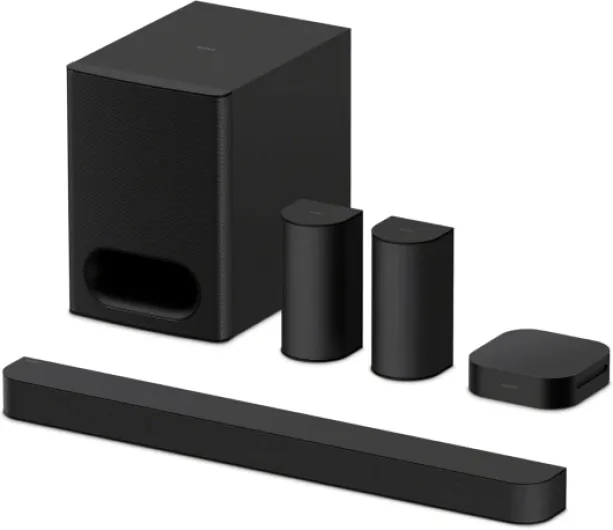
The 5.1.4 speaker configuration is a popular layout for home theater projector setups, especially for those aiming to experience true Dolby Atmos sound. This system uses five main speakers, one subwoofer, and four overhead or height speakers. Each speaker plays a specific role in creating a three-dimensional audio environment that matches the immersive visuals from your projector.
- Front left, center, and right speakers: These handle most dialogue, music, and main sound effects. Their placement is crucial for a balanced soundstage.
- Side and rear surround speakers: These speakers will deliver ambient sounds and directional effects, enhancing the sense of space in your room.
- Subwoofer: Responsible for deep bass, the subwoofer adds impact to explosions and musical scores.
- Overhead or Atmos speakers: These four speakers, often installed as ceiling speakers or mounted high on the wall, provide the vertical dimension in Dolby Atmos, making effects like rain or flying objects sound like they’re coming from above.
With this setup, the goal is to envelop you in sound from all directions, matching the action on your projector screen. The speaker layout and room acoustics will influence how well the system performs. For those new to surround sound, understanding the basics of connecting audio components can help you get started with your ideal setup.
As you plan your theater, keep in mind that the best results come from careful speaker placement and considering your room’s unique layout. The next steps will cover how your room shape, seating, and projector position affect the overall sound, and how to avoid common mistakes in speaker configuration.
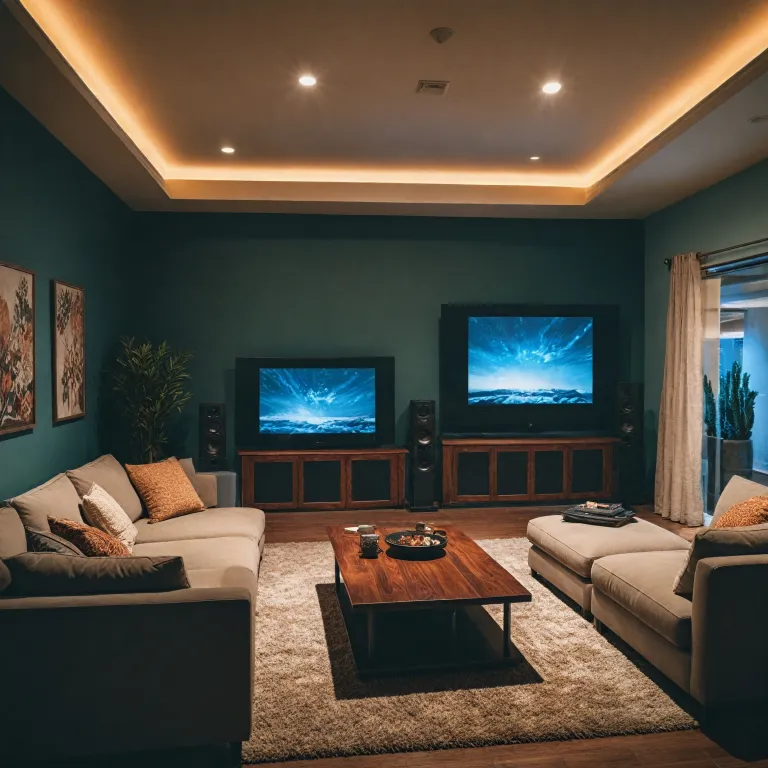
Room layout considerations for projector-based theaters
Evaluating Your Theater Room for Speaker Layout
When planning a home theater projector setup with a 5.1.4 speaker configuration, the room layout is a critical factor that will influence your audio experience. The shape, size, and features of your room directly impact how sound travels and how speakers should be positioned for the best Dolby Atmos performance.
- Room Dimensions: Larger rooms may require more powerful speakers or additional audio calibration. Smaller rooms can sometimes create challenges with speaker placement, especially for rear surrounds and overhead speakers.
- Ceiling Height: For Atmos speakers, ceiling height is important. Standard 8 to 10-foot ceilings work well for most ceiling speakers. If your ceiling is much higher or sloped, you may need angled speakers or wall-mounted Atmos speakers to direct sound properly.
- Wall Materials: Hard surfaces like glass or concrete can reflect sound, while carpets and curtains absorb it. This affects how your surround speakers and subwoofer perform. Consider adding soft furnishings to control unwanted echoes.
- Seating Position: Your main listening position should be centered between the left and right speakers, with the rear surrounds and side surrounds placed at ear level or slightly above. This ensures a balanced surround sound field.
- Projector and Screen Placement: The projector and screen location will influence where you can place your center channel and front left/right speakers. Avoid blocking speakers with furniture or the screen itself.
For rooms with unique layouts or open floor plans, you might need to get creative with your speaker configuration. Ceiling speakers for Atmos channels are ideal, but if installation isn’t possible, upward-firing Atmos speakers can be a good alternative. Always aim for symmetry in your speaker layout to maintain consistent audio imaging.
Power management is another aspect often overlooked in theater setups. For insights into protecting your audio system and projector, check out this resource on the role of a watt box in your home theater projector setup.
Remember, the ideal setup balances the technical requirements of Dolby Atmos with the practical realities of your room. The next step is to focus on the precise placement of your front, center, and subwoofer speakers to maximize your system’s potential.
Front, center, and subwoofer placement tips
Getting the Most from Your Front, Center, and Subwoofer Speakers
When setting up a 5.1.4 Dolby Atmos home theater system, the placement of your front, center, and subwoofer speakers is crucial for immersive sound. These channels form the backbone of your audio experience, especially in a projector-based room layout where screen size and seating distance play a big role.- Front Left and Right Speakers: Position these speakers at ear level, equidistant from the center of your screen. They should form an angle of about 22 to 30 degrees from your main seating position. This creates a wide soundstage and ensures audio pans smoothly across the front.
- Center Channel: Place the center speaker directly above or below your projector screen, aligned with the midpoint of your seating area. The center channel handles dialogue, so keeping it as close to ear level as possible is ideal for clarity. If your screen is acoustically transparent, placing the speaker behind it can be the best option.
- Subwoofer: The subwoofer delivers low-frequency effects, adding impact to movies and music. Its placement is more flexible, but avoid corners, which can cause boomy or uneven bass. Try placing it along the front wall, then experiment with small adjustments to find the spot where bass sounds tight and balanced throughout the room. Some enthusiasts use the “subwoofer crawl” technique—placing the subwoofer at your main seat, playing bass-heavy content, and walking around the room to find where the bass sounds best, then placing the subwoofer there.
Projector Screen and Speaker Integration
Theater rooms with projectors often have larger screens, which can impact speaker layout. Make sure your front speakers are not blocked by furniture or the screen frame. If you’re considering an outdoor setup, check out this guide on creating the perfect outdoor movie experience for tips on speaker placement in open spaces.Tips for Achieving the Ideal Setup
- Keep front and center speakers at the same height for consistent sound imaging.
- Avoid placing speakers directly against walls, which can cause unwanted reflections and muddy audio.
- Angle the left and right speakers slightly toward the main listening position for the best sound focus.
- Use speaker stands or wall mounts to achieve the correct height and orientation, especially if your projector screen is mounted high.
Surround and height speaker positioning
Positioning Surround and Height Speakers for Immersive Audio
Getting the placement right for your surround and height speakers is crucial for achieving the best Dolby Atmos experience in your home theater projector setup. The goal is to create a seamless, enveloping sound field that draws you into the action, whether you’re watching movies or listening to music.- Side Surrounds: Place your side surround speakers slightly behind your main seating area, at ear level. Ideally, these speakers will be at the same height as your left and right speakers, about 1-2 feet above seated ear level if possible. Mount them on the side walls, aiming them directly at the listening position for clear, directional sound.
- Rear Surrounds: In a 5.1.4 layout, rear surround speakers are positioned behind the seating area, spaced evenly apart. They should be at the same height as the side surrounds, creating a balanced surround field. Avoid placing them too close to the wall, as this can cause unwanted reflections and muddy the audio.
- Dolby Atmos Height Speakers: For the overhead or Atmos speakers, ceiling mounting is ideal. Place two pairs of speakers in the ceiling, aligned with the front left/right and rear left/right speakers. The front Atmos speakers should be slightly in front of your main seating, while the rear Atmos speakers go just behind. This configuration ensures that sound moves smoothly above you, enhancing the 3D audio effect.
- Ceiling Speakers vs. Upfiring Speakers: While ceiling speakers provide the most accurate overhead sound, upfiring Atmos speakers placed on top of your left and right speakers can work if ceiling installation isn’t possible. These bounce sound off the ceiling to simulate height effects, but room layout and ceiling material will impact their effectiveness.
Tips for Achieving the Ideal Setup
- Keep all surround and Atmos speakers at equal distance from the main listening position when possible. Use a tape measure for accuracy.
- Avoid placing speakers too close to corners or walls, as this can cause unwanted reflections and distortions in the sound.
- For ceiling speakers, ensure they are angled toward the seating area if possible. This helps direct sound where it’s needed most.
- Double-check that your speaker configuration matches your AV receiver’s channel assignments. Incorrect setup can result in missing or misplaced audio cues.

- + Dolby Atmos 5.1.4 setup for immersive overhead and surround sound
- + 760W total power for strong, room‑filling audio
- + Wireless surround speakers for flexible placement
- + 8\" subwoofer delivers deep bass impact
- + GaN amplifier for efficient, high‑performance amplification
Common mistakes in 5.1.4 speaker placement
Missteps That Can Undermine Your Dolby Atmos Experience
When setting up a 5.1.4 speaker system for a home theater projector, even small errors in speaker layout can have a big impact on audio quality. Here are some of the most common mistakes to watch out for:- Improper Height for Atmos Speakers: Placing overhead speakers too far forward or backward, or not aligning them with the main seating area, can reduce the immersive effect of Dolby Atmos. Atmos speakers should be positioned directly above the listening area, not just anywhere on the ceiling.
- Incorrect Ear Level for Surrounds: Side surrounds and rear surrounds should be at ear level when seated. Mounting these speakers too high or too low can cause sound to feel disconnected from the action on screen.
- Unbalanced Speaker Distances: If your left and right speakers are not equidistant from the main listening position, or if the rear speakers are too close to the wall, the soundstage will be skewed. Use a tape measure to ensure symmetry in your speaker configuration.
- Neglecting Room Layout: Ignoring the unique shape and size of your room can lead to poor acoustics. For example, placing speakers too close to reflective surfaces like windows or bare walls can cause unwanted echoes and muddiness in the audio.
- Overlooking Subwoofer Placement: The subwoofer should not be hidden in a corner or behind furniture. This can cause boomy or uneven bass. Experiment with placement to find the spot where bass sounds tight and balanced throughout the room.
- Using the Wrong Speakers: Outdoor speakers or bookshelf models not designed for theater use may not deliver the best results indoors. Choose speakers that match your system’s requirements for optimal sound quality.
- Ignoring Calibration: Failing to calibrate your system after setup can leave channel levels mismatched. Use your AV receiver’s setup tools to balance speaker levels and adjust delays for the ideal setup.
Fine-tuning audio for your projector setup
Calibrating Your System for Balanced Sound
After you’ve set up your speakers in the ideal layout for your 5.1.4 Dolby Atmos system, it’s time to fine-tune the audio. Even with the best speaker placement, calibration is essential for immersive sound. Here’s how to get the most out of your theater setup:
- Use your AV receiver’s auto-calibration: Most modern receivers include a microphone and setup program. Place the mic at your main listening position (ear level) and follow the prompts. This process adjusts each channel’s volume, distance, and delay to match your room’s acoustics.
- Manually check speaker levels: Sometimes, auto-calibration isn’t perfect. Play a test tone through each speaker—front, center, surrounds, rear surrounds, and ceiling speakers. Make sure the sound is balanced and not too loud or soft from any direction.
- Adjust crossover settings: Set the crossover frequency so your subwoofer blends smoothly with your main speakers. A typical starting point is 80 Hz, but your room and speakers may need a different setting.
- Fine-tune Atmos speakers: Overhead and ceiling speakers should create a seamless dome of sound. If effects seem too localized or disconnected, adjust their levels or angles. The goal is for Atmos speakers to add height and spaciousness without drawing attention to themselves.
- Check for phase issues: If bass sounds weak or dialogue seems hollow, double-check that all speakers are wired in phase. Reversed polarity can cause sound cancellation, especially between subwoofer and main channels.
Optimizing for Your Room’s Acoustics
Every room is different, and your speaker configuration will interact with walls, ceilings, and furniture. Here are some tips to get the best sound in your specific space:
- Minimize hard surfaces: Bare walls and floors can cause echoes. Add rugs, curtains, or acoustic panels to absorb excess sound reflections.
- Consider speaker toe-in: Slightly angling your left and right speakers toward the main seating area can improve imaging and clarity.
- Experiment with subwoofer placement: Moving the subwoofer just a few feet can dramatically change bass response. Try different spots along the front wall or even a side wall for the smoothest low-end.
- Don’t forget the rear surrounds: Rear speakers should be at or just above ear level, aimed toward the center of the seating area. Avoid placing them too high or too far behind.
Listening and Making Adjustments
Once you’ve completed the technical setup, spend time listening to a variety of content—movies, music, and games. Pay attention to how sound moves around the room, especially with Dolby Atmos mixes. If something feels off, don’t hesitate to tweak speaker levels, positions, or settings. The ideal setup is the one that sounds best to you in your room.