From box to wall: a step guide to your first projector setup
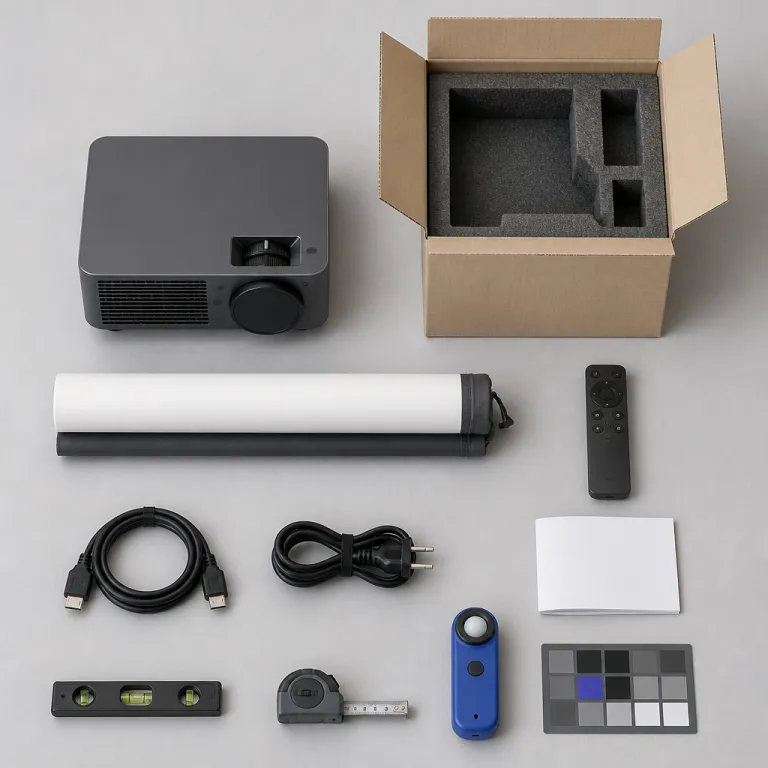
You start learning how to set up a projector the moment you cut the tape on the box. Before you rush the projector into your living room or theater room, clear a space, find a stable surface, and decide whether this will be a temporary test or the first step toward a ceiling mount. That early choice shapes your viewing experience, cable runs, and even which screen size will actually work in your space.
For a first night, place the projector on a solid table roughly at the height of the bottom of your future projection screen. Avoid the classic coffee table mistake, because a low screen projector position forces aggressive keystone correction and ruins image quality by throwing away pixels. Aim the lens straight at a blank wall or temporary screen, power up, and let the default picture mode show you the basic image before you touch any settings menu option.
Most projectors offer an initial wizard that walks through language, network, and basic picture setup, and this is where you should already think about throw distance and future mounting. When the projector menu appears, resist the urge to crank brightness contrast or sharpness, because factory presets are usually closer to reference than your eyes think in the first ten minutes. Right now your goal is geometry, not perfection, so use the physical feet, lens shift if available, and careful placement to square the image on the wall before you even look at digital keystone correction tools.
Finding the best spot: throw distance, room layout, and screen size
Room dimensions quietly dictate how to set up a projector long before you choose screen fabric or paint. Measure your space from the back wall to the planned projector screen position, then divide that distance by the desired image width to see if your projector’s throw ratio can actually hit a 100 to 120 inch picture. For a typical living room with 3,8 to 4,5 meters of depth, most home theater projectors offer a comfortable throw distance for a 2,5 to 3 meter wide projection screen without pushing the zoom extremes.
As a rule of thumb, a standard 1,2 to 1,5 throw ratio projector will fill a 100 inch screen from roughly 3 to 3,5 meters, which is why that 12 to 15 foot range keeps appearing in serious setup guides. Use an online throw ratio calculator or a dedicated resource that explains how to size any projector to any room, then confirm by physically placing the unit and checking the image edges. If you push the zoom to its maximum to reach a huge screen, you sacrifice light output and image quality, so the best choice is often a slightly smaller screen that keeps brightness and contrast in a healthier range.
When you choose screen dimensions, match them to both seating distance and projector brightness, because a dim 150 inch image looks worse than a punchy 110 inch one. Sit roughly 1,5 times the screen width away for a balanced viewing experience, then mark that seating position and verify that the projector setup does not force people under the beam or against the back wall. Once you lock in throw distance, you can decide whether a fixed projection screen, a pull down screen projector, or a bare wall with projector paint makes the most sense for your room and item price expectations.
Ceiling, shelf, or table: choosing the right mounting strategy
Mounting position is where how to set up a projector stops being abstract and starts involving drills, brackets, and cable runs. A ceiling mount gives the cleanest viewing experience because the projector stays out of the way, the beam clears heads, and the image geometry stays fixed once dialed in. The tradeoff is planning for power, HDMI, and possibly video audio cabling in the ceiling, which adds cost but pays off every movie night.
A rear shelf or high cabinet can be the best compromise for renters who cannot punch holes in the ceiling but still want a stable projector setup. Place the projector near the back wall at roughly the top edge of the screen height, then use lens shift if available to center the image vertically without resorting to keystone correction. This approach keeps fan noise behind you, shortens cable runs to an AV receiver, and avoids the wobble that plagues projectors sitting on lightweight furniture.
Temporary table setups work for testing or for a backyard cinema on a budget, especially when you follow a practical guide to outdoor projector gear and setup problems. Indoors, though, a low table often means people walking through the light beam, frequent bumps, and constant re alignment of the picture on the wall or screen. If you must start on a table, mark the feet positions with tape once you like the image, so you can return the projector to the same spot and preserve your carefully tuned throw distance and aspect ratio.
Dialing in the picture: basic settings that transform image quality
Once geometry is right, the next step in how to set up a projector is taming the picture controls so the image looks cinematic rather than showroom harsh. Switch to the projector menu and choose the most accurate picture preset, often called Cinema, Movie, or Filmmaker, because these modes prioritize balanced light output and color over eye searing brightness. From there, a five minute pass through the settings menu can deliver 80 percent of the image quality of a full professional calibration.
Start with brightness contrast, using a simple test pattern from a Blu ray disc or streaming app, and adjust until you see shadow detail without washing out blacks and highlight detail without clipping whites. Then set color temperature to Warm or 6500K, which aligns with film mastering standards and usually removes the blue tint that many projectors offer by default. Keep sharpness lower than you think, because excessive edge enhancement creates halos around objects and makes the screen texture or pixel grid more visible at normal viewing distances.
Aspect ratio should stay at 16:9 for most content, with the projector set to display the full frame without stretching or zoom tricks that cut off parts of the image. Avoid digital keystone correction unless geometry is impossible to fix physically, because every click of keystone throws away resolution and softens the picture across the entire screen. If your projector includes advanced options like dynamic iris, motion smoothing, or noise reduction, disable them initially, then re enable one by one only if they genuinely improve your viewing experience in your specific room and ambient light conditions.
Light, sound, and the room itself: turning a space into a theater
Projector performance lives or dies on the room, which is why how to set up a projector always includes managing ambient light and reflections. Any stray light hitting the screen, whether from windows, lamps, or white walls, flattens contrast and robs the image of depth. Blackout curtains, dimmable warm lighting behind the seating, and darker paint on the wall opposite the projector screen can raise perceived image quality more than a big spec bump on paper.
When you choose screen material, match it to both projector brightness and room control, because a high gain projection screen in a bright living room behaves very differently from a neutral matte white screen in a dark theater room. Ambient light rejecting screens help in mixed use spaces, but they cost more and narrow the optimal viewing cone, so check item price and seating layout before committing. In a fully light controlled space, a simple fixed frame screen projector with 1,0 to 1,3 gain often delivers the best balance of brightness, uniformity, and color accuracy.
Audio is the other half of the viewing experience, and the tiny speakers inside most projectors offer only emergency sound. Route video audio through an AV receiver or a quality soundbar using HDMI ARC or optical, and treat the projector as a pure image device. Even a modest 3.1 system with a center channel anchored under the screen will make dialogue clearer and the overall theater feel more convincing than any built in audio solution, especially once you tame room echoes with rugs, curtains, and soft furnishings.
Common first timer pitfalls: what to avoid on day one
Knowing how to set up a projector also means knowing which tempting shortcuts quietly wreck the picture. The biggest offender is overusing digital keystone correction instead of moving the projector or using lens shift, because keystone literally discards pixels and interpolates the remaining image into a softer trapezoid. If your projector offers both vertical and horizontal keystone, treat them as last resort tools, not everyday adjustments.
Another frequent mistake is chasing the brightest possible image in the settings menu, which often means cranking lamp power and contrast until blacks turn gray and colors clip. A better approach is to accept a slightly smaller screen size that your projector can light properly, then optimize ambient light control to preserve contrast. Remember that projectors offer their rated lumens in the harshest, least accurate mode, so real world calibrated brightness is lower and should guide your screen choice and seating distance.
Finally, do not ignore fan noise, rainbow artifacts on single chip DLP projectors, or visible pixel structure on some LCD models, because these issues can ruin long sessions even if the static image looks sharp. If you notice rainbows when your eyes dart across bright subtitles, consider exchanging for a different projector technology rather than suffering through every film. And if you are thinking about a laser light source, read a detailed analysis of how long laser projectors actually last and what shortens their lifespan before you decide whether the higher item price makes sense for your viewing habits and room conditions.
Key figures for smarter projector and room setup decisions
- For a typical 100 to 120 inch screen, a throw distance of about 3 to 4,5 meters suits most home theater projectors, which aligns with the common 1,2 to 1,5 throw ratio used in mainstream models from brands like Epson and BenQ.
- Many consumer projectors lose roughly 25 to 35 percent of their rated lumen output when switched from the brightest mode to a calibrated cinema mode, which means a 2 500 lumen specification often translates to around 1 600 to 1 900 usable lumens for accurate movie viewing.
- Active optical HDMI 2.1 cables are typically recommended for runs longer than 5 meters, because passive copper cables frequently struggle to maintain stable 4K at 60 Hz signals beyond 3 meters, especially with high bandwidth HDR content.
- Seating distance guidelines suggest sitting at roughly 1,2 to 1,6 times the screen width, so a 2,6 meter wide 120 inch screen pairs well with a viewing distance between about 3,1 and 4,2 meters for a balanced field of view.
- Ambient light can cut perceived contrast by more than half compared with a fully darkened room, which is why even modest steps like blackout curtains and dimmable bias lighting behind the screen can dramatically improve the perceived image quality of the same projector.
FAQ: practical questions about first time projector setup
How big should my screen be for a small living room ?
In a compact living room, aim for a 90 to 110 inch screen, which usually means a width of about 2 to 2,4 meters and a seating distance of 2,5 to 3,5 meters. This size keeps the image immersive without forcing you to sit too close, which can reveal pixel structure and motion artifacts. Always confirm that your projector’s throw distance range can fill that screen size from your planned mounting position before buying the screen.
Is a plain wall good enough, or do I need a projector screen ?
A smooth, matte, neutral colored wall can work for a first setup, especially while you learn how to set up a projector and finalize throw distance. However, a dedicated projector screen usually offers better uniformity, gain control, and color neutrality, which improves both brightness and contrast. If you start with a wall, avoid glossy paint and strong color tints, then upgrade to a fixed or pull down screen once you lock in your room layout.
Should I always use ceiling mounting for the best results ?
Ceiling mounting often delivers the cleanest viewing experience because it keeps the projector out of the way and stabilizes geometry, but it is not mandatory. A rear shelf or high cabinet can perform just as well if the projector’s lens height aligns with the top of the screen and you avoid heavy keystone correction. Choose the mounting method that balances image quality, cable management, and your ability to modify the room structure.
What is the difference between keystone correction and lens shift ?
Lens shift is an optical adjustment that moves the projected image up, down, left, or right without distorting the shape or sacrificing resolution, so it is always preferable when available. Keystone correction is a digital process that reshapes a trapezoid into a rectangle by discarding and interpolating pixels, which softens the image and can introduce artifacts. For the sharpest picture, position the projector physically so the lens points straight at the screen, then use lens shift if needed and reserve keystone for minor emergency tweaks only.
How dark does my room need to be for a good viewing experience ?
The darker the room, the better the perceived contrast and depth, but you do not need a pitch black cave to enjoy films. Aim to eliminate direct light on the screen with blackout curtains or blinds, then use dim, warm bias lighting behind or beside the screen to keep the room comfortable without washing out the image. If you must watch with more ambient light, consider a brighter projector and possibly an ambient light rejecting screen to preserve image quality.