Understanding Projector Wall Paint
Exploring the Importance of Projector Wall Paint
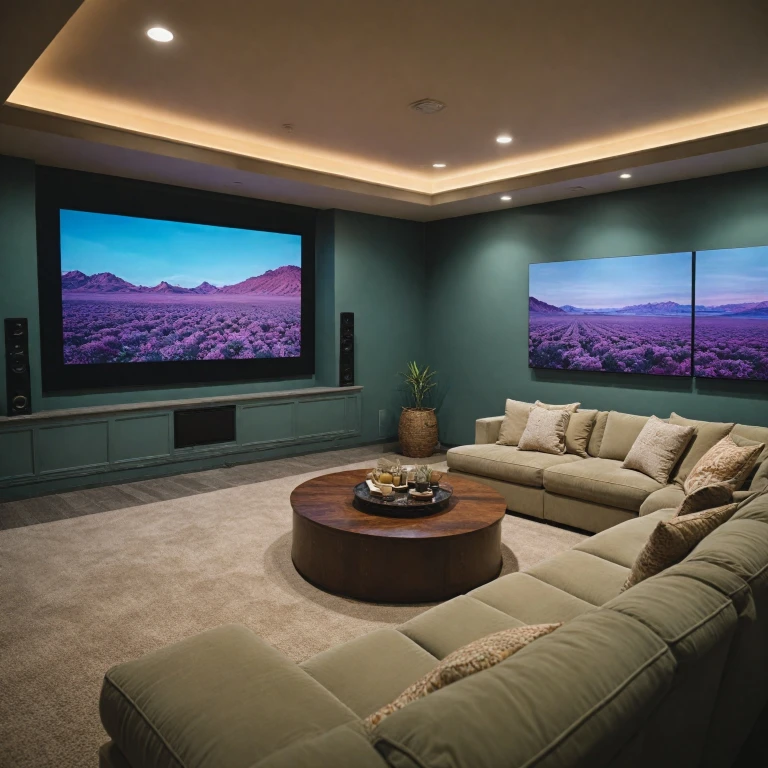
Creating the perfect viewing environment is crucial for any home theater setup, and your projection surface plays a pivotal role. While many enthusiasts might quickly gravitate towards a traditional screen, painting a wall can be a cost-effective and efficient alternative. But, before diving in, it's essential to understand the nuances of projector wall paint. Projector paints are specifically designed to optimize the way light reflects off the wall. Unlike typical wall paints, these are made to handle the distinct requirements of projection, such as hues and brightness. The right paint can significantly enhance image quality, impacting factors like contrast and color accuracy. Choosing a paint screen offers benefits like a customizable size tailored to your room's dimensions, which can be advantageous if you're using a short throw or ultra-short throw projector. Additionally, screen paint often presents a viable option for those looking to achieve optimal gain values in ambient light conditions. Understanding these properties ensures your projector wall will provide an excellent projection surface. When considering white paints, it's vital to note their ability to reflect light for a brighter image. However, whites might not always be the best choice, especially in rooms with high ambient light, where gaining that ultimate contrast can be challenging. In such cases, silver or other light rejecting paints might offer better results, especially with a projector screen that's subject to varying lighting conditions. One must also weigh in on the texture of the wall. A smooth surface is paramount to achieving a clear, crisp image. The texture of the wall paint must fill any irregularities without compromising the projector’s ability to deliver a sharp image. In summary, selecting the appropriate wall paint goes beyond mere aesthetics. It encompasses understanding how wall color and texture interact with the light from the projector to deliver lifelike images. For further insights, you might want to explore a comprehensive guide on mastering the art of projector installation which can also influence your decision-making process when setting up your projection space.Types of Paint Suitable for Projector Walls
The Variety of Paint Types for Projection Excellence
When it comes to selecting the right paint for your projector wall, the decision can significantly impact the overall quality of your projection. Ensuring the proper choice will result in a vibrant and immersive visual experience. Here’s what you need to know:- White and Silver Paints: These paints are among the most commonly used for projection screens. White paint offers a neutral base that enhances the brightness and ensures clarity, making it a good fit for rooms with controlled ambient light levels. On the other hand, silver paint is known for its superior light rejecting abilities, which makes it ideal for rooms where controlling the light is more challenging.
- Black and Gray Shades: For those looking to achieve high contrast and deeper blacks, black or dark gray paints can be incredibly effective. These paints fill the screen with richness, offering the ultimate contrast for viewing in dimly lit environments.
- Low Gain and High Contrast Paints: Some paints are designed specifically to offer low gain values, which can reduce the reflection just enough to enhance contrast without sacrificing brightness. High contrast paint screens are crafted to optimize images in ambient light settings, making them suitable for those aiming for a projector screen that performs well under most conditions.
- Specialized Projection Paints: There are also specialized projection paints available which are tailored for various projector specifications, such as short throw or ultra short throw projectors. These paints are chemically formulated to complement specific projector technologies, maximizing projection quality.
Factors to Consider When Choosing Paint
Key Considerations for Selecting the Perfect Paint
Choosing the right paint for your projector wall is crucial to achieving the best projection quality. When deciding on the ideal paint, several factors come into play, each influencing the overall viewing experience. Here’s what you need to consider:
- Color and Contrast: The color of the paint can significantly affect the contrast and brightness of the projected image. While white is a popular choice for its neutrality and brightness, a projection onto a white wall might not always be the best option if your room has a lot of ambient light. In such cases, a light gray or silver paint can enhance contrast and reduce glare.
- Gain Values: Gain refers to the reflectivity of the screen surface. Low gain paints are ideal for rooms with controlled lighting, while high gain paints are better suited for spaces with ambient light. Consider the brightness of your projector when selecting the gain value of your paint.
- Texture and Finish: A smooth, matte finish is generally preferred for projector walls as it minimizes reflections and hotspots. Avoid glossy paints, as they can cause unwanted reflections that disrupt the viewing experience.
- Room and Lighting Conditions: The amount of ambient light in your room will dictate the type of paint you should use. Light rejecting paints are designed to combat ambient light, making them a good choice for rooms that cannot be darkened completely.
- Type of Projector: The type of projector, whether it’s a short throw or ultra short throw, can also influence your paint choice. Some paints are specifically formulated to work with these types of projectors, ensuring optimal image quality.
By carefully considering these factors, you can select a paint that not only complements your projector but also enhances your overall home theater experience. For more insights on how to optimize your setup, check out this guide on speaker connectors in home theater projectors.
DIY vs. Professional Painting
DIY Approach vs Professional Painting: Making the Right Choice
When it comes to painting a wall for your home theater projector, deciding between a DIY approach and hiring a professional is crucial. Each option has its own set of advantages and challenges. Considering these can help you make an informed choice that aligns with your needs and budget. Choosing a DIY approach for painting your projector wall can be both rewarding and cost-effective. This method allows you to have full control over the selection process of the ideal paint and the application technique. For DIY enthusiasts, this opportunity is an excellent way to customize your projection surface, ensuring it meets the specific gain and contrast needs for their projector and room setup. However, it requires a certain level of skill and patience, particularly in surface preparation and even application of the paint screen. Advantages of DIY Painting:- Cost savings: Eliminates labor costs, making it a budget-friendly option.
- Customization: Full control over paint types and gain values that enhance the projector's brightness.
- Flexibility: Enables adjustments and trials to find the best paint combination for your projector screen.
- Expertise: Ensures optimal paint application techniques, leading to a smooth and even projector wall surface.
- Time-saving: Professionals work efficiently, freeing up your time for other tasks.
- Peace of mind: Reduces the risk of common errors that could affect the final result, such as uneven coating and inadequate wall fill.
Maintenance and Care for Painted Projector Walls
Proper Maintenance for Enhanced Projection
Maintaining your projector wall is crucial for guaranteeing that your home theater displays remain vibrant and clear, delivering the ultimate viewing experience. To ensure that your painted wall retains its projection capabilities, several key areas need your attention.- Regular Cleaning: Dust and debris have a tendency to quickly accumulate on surfaces. It's vital to regularly dust your projection screen to maintain optimal image quality. Use a dry microfiber cloth to gently wipe the painted surface ensuring you don’t scratch or damage the wall.
- Avoid Excessive Ambient Light: Ambient light can dramatically affect the contrast and brightness of your projection. Consider blackout curtains or specialized light-rejecting paint to minimize light interference. Adjusting room light conditions can preserve the quality of the projected images.
- Wall Inspection: Frequently inspect the wall for cracks or peeling paint that could disrupt projection performance. Address any imperfections promptly with touch-up paint, ensuring no gaps or damages that could impact the screen visuals.
- Repaint When Necessary: Depending on the paint type used and its exposure to elements like sunlight or frequent use, you may find it necessary to repaint the wall to maintain a good projection surface. Repainting ensures that the light from your projector is efficiently utilized, providing high contrast and proper brightness levels.
- Protect the Paint Finish: Using a protective coating specific for wall paints can help in preventing scratches and enhance the longevity of the screen paint. The texture remains smooth, ensuring the projector screen continues to offer a satisfactory projection surface.
Common Mistakes to Avoid
Avoiding Common Pitfalls
When selecting paint for your projector wall, certain common mistakes can hinder the performance of your projection screen and affect the overall viewing experience. Here's a guide to help avert these pitfalls and ensure an optimal projection surface.- Misjudging Brightness and Gain Values
- Selecting the incorrect gain values can lead to poor image quality. A high gain can enhance brightness, but may cause hot spots or uneven lighting. Conversely, a low gain might not reflect enough light, rendering the room too dark. Take into account the brightness of your projector and the ambient light conditions in your room.
- Ignoring the Texture of the Wall
- Overlooking surface texture can impact the projection quality significantly. A smooth wall is vital to avoid any distortions or shadows on the screen. Ensure that the wall is adequately sanded and primed before applying paint.
- Underestimating Paint Color Options
- Picking the right paint color, such as matte white or light gray, is crucial for good contrast and color accuracy. Consider using specialized screen paints designed for minimising reflectivity and enhancing contrast, especially if you're working with ultra short throw projectors.
- Neglecting Light Reflective and Rejection Properties
- Paint that reflects too much ambient light can wash out images. Opt for paints with light rejecting properties to maintain a crisp image even in well-lit rooms. High contrast projection paint can be ideal for maximizing depth and vibrant colors in your imagery.
- Misapplication of Paint
- Whether you're DIY painting or hiring professionals, incorrect application can cause uneven surfaces. Pay attention to the number of coats and drying time, and follow a systematic approach to ensure an evenly coated surface. Arming yourself with knowledge on DIY vs professional painting can be beneficial in making an informed decision.