Understanding Your Projector's Ports
Identifying the Ports and Connections
Before you can start connecting your home theater projector, it's crucial to familiarize yourself with the variety of ports and inputs available on your device. Knowing which ports are available will help you select the correct cables and devices for connection.
Most modern projectors come equipped with several types of ports, including HDMI ports, USB ports, and sometimes VGA inputs. HDMI ports are typically the most common and versatile option, allowing you to connect a wide range of devices such as laptops, computers, smartphones, or tablets.
If you're planning to connect a smartphone to your projector, check if your projector supports screen mirroring or wireless connection options like Bluetooth. Alternatively, you might need a specific adapter or cable.
- HDMI Ports: Best for high-quality video and audio, often used for connecting laptops and game consoles.
- USB Ports: Useful for direct media playback or firmware updates.
- VGA Inputs: Older technology often used in older computers; not as common today.
Understanding these ports and their uses will make the rest of your setup process much smoother. Once you've got a handle on this, you can move on to the nitty-gritty of choosing the right cables and actually connecting your devices.
Choosing the Right Cables
Choosing the Appropriate Connection Cables
Selecting the right cable is crucial for a seamless connection experience when setting up your home theater projector. Understanding the types of cables available will ensure that you can connect a variety of devices, from computers and laptops to smartphones and other media players. Let's dive into the most common cables and their uses:
- HDMI Cable: Widely used for connecting high-definition devices, HDMI cables transmit video and audio signals efficiently. Ensure your projector has an HDMI port for the best compatibility with modern laptops, computers, and media players.
- USB to HDMI Converter: If your laptop or computer lacks an HDMI port, a USB HDMI converter can be a solution. It allows you to connect through a USB port while adapting the signal to an HDMI output.
- VGA Cable: For older devices lacking HDMI support, the VGA cable remains a dependable option for video connection. However, keep in mind that VGA cables carry video signals only, requiring a separate audio connection.
- Bluetooth: Some modern smartphones and laptops offer wireless connectivity options, including Bluetooth capability. This can be used to connect to certain wireless projectors, eliminating the need for physical cables.
While selecting cables, inspect the ports on your projector and devices. Verify compatibility to avoid unnecessary purchases. A successful connection can enhance your viewing experience, whether you're using a smartphone projector or a laptop screen projection.
Remember, when connecting your devices, ensure any necessary settings, like display settings, are configured appropriately. Adjust inputs such as projector input and input source for optimal performance.
Connecting to a Media Source
Linking Your Devices to the Projector
Once you have familiarized yourself with the available ports and chosen the appropriate cables, it's time to connect your media source to your home theater projector. This step is crucial to ensure a seamless home theater experience.
For most setups, you will be using an HDMI cable as it's a common and reliable choice for transmitting both audio and video to your projector. Follow these steps to connect:
- Start by plugging one end of the HDMI cable into the HDMI port of your media source, which could be a laptop, computer, or gaming console.
- Insert the other end into the projector's HDMI input. Make sure it's securely in place to avoid any loose connections that might disrupt the display quality.
- Turn on the projector as well as your media source device.
- On your projector, navigate through the input source options using either remote control or panel buttons, and select the HDMI input to begin displaying the content.
If you're using a wireless method, such as screen mirroring from a smartphone or laptop, ensure your devices support this feature. Activate the display settings on your source device, often found in "Settings" or "Display Settings," and choose the mirror or share screen option. Follow your device’s pairing instructions to establish a stable connection.
In the case of connecting other devices like smartphones, and when your projector lacks built-in wireless capabilities, you might require additional adapters or converters. A USB HDMI adapter could be necessary for a smartphone connection to facilitate the transfer of video signals to the projector.
Be aware that different devices might present unique challenges. For instance, if you're using a Windows laptop, you may need to adjust the display settings to duplicate or extend the display to the projector. When using a MacBook or iOS device, third-party apps can sometimes assist in establishing a Bluetooth or wireless connection. For those using a projector computer, Menu settings allow you to navigate and adjust the display preferences easily.
By carefully managing these steps and utilizing the proper equipment, your home theater will be ready to offer an immersive movie night or gaming session experience. Remember, each media source may require unique settings or adapters, so consult your device’s manual or support resources if needed.
Adjusting Projector Settings
Fine-Tuning Your Projector's Display
Once you’ve connected all necessary cables and devices, it's time to ensure your projector displays the best possible image. First, make sure you have selected the correct input source on your projector. This could be the HDMI port where you connected your laptop or other device.- Selecting the Correct Input Source: Use the projector remote or the buttons on the projector to navigate through the menu and choose the exact input your device is connected to. For instance, if you attached an HDMI cable from your laptop to the projector, choose the matching HDMI input.
- Adjusting Display Settings: Access the display settings from your computer, laptop, or smartphone projector. For Windows users, right-click on the desktop, select "Display settings," and ensure your laptop screen extends or mirrors to the projector. If you're connecting a smartphone, ensure screen mirroring is activated.
- Resolution Check: Set the resolution on your laptop or device to match the projector's native resolution for optimal clarity. Refer to the projector manual for this information if unsure.
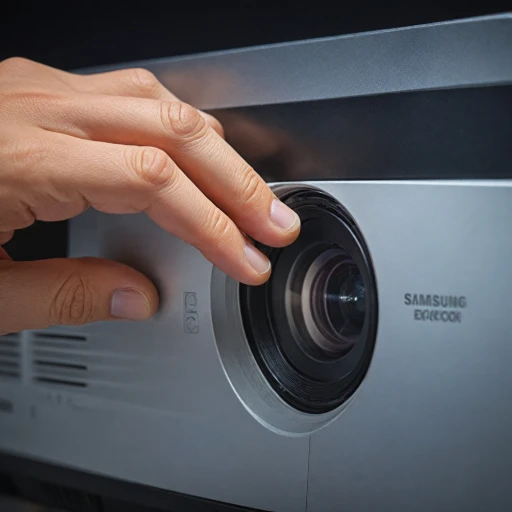
- Focus and Positioning: Use the focus ring on your projector to sharpen the image and adjust the position for a straight-on view of your screen or wall.
- Aspect Ratio: Configure the aspect ratio settings on both your device and projector to ensure the video output fills the screen correctly. Modern projectors often automatically adjust, but manual selection may improve the display.
Setting Up Audio
Optimizing the Audio Experience
Once you've successfully connected your devices to your projector, the next step is to ensure that your audio setup is just as impressive as the visual display. Here's how you can set up your audio system effectively. First, identify the audio output of your projector. Many projectors come equipped with basic audio output options, but for a truly immersive home theater experience, you'll want to connect to an external audio system. This could be a soundbar or a more advanced surround sound system. Most projectors provide an HDMI port as an output option, which can transmit both video and audio. If your projector supports HDMI ARC (Audio Return Channel), it can simplify the connection by reducing the number of cables needed. Simply connect one end of the HDMI cable to the projector and the other to your audio device. For projectors without ARC, you might need an optical audio cable to connect to your sound system. For users aiming for a wireless setup, Bluetooth connectivity is often available on many modern projectors and sound systems. Activate Bluetooth on both devices, and look for the appropriate settings menu to pair the devices. Once paired, select the audio device as the audio output source. Don’t forget the importance of adjusting the audio settings on both the projector and your sound system. Navigate to the display settings on your projector to ensure the correct input source is selected for audio playback. Additionally, fine-tune the audio settings on your sound equipment to achieve the best sound quality. Lastly, test different audio sources by playing various types of video content. This approach allows you to adjust the sound settings until the optimal balance is achieved. Effective audio setup can transform your home movie viewing, providing deep immersion into whatever content you're enjoying on the big screen.Troubleshooting Common Issues
Solving Frequent Connection Problems
If you're encountering issues with your home theater projector, understanding common problems and their solutions can get your setup working smoothly again. Below are a few hurdles you might face and ways to address them.
- No Display on Screen: Ensure that the projector and source devices, whether it's a laptop, smartphone, or other device, are turned on. Double-check the connection. For HDMI and other cables, ensure they are securely connected to the appropriate ports.
- Incorrect Input Source: Use the projector's remote to select the correct input source. If you're using HDMI, choose the HDMI input. For wireless connections involving screen mirroring, ensure your device is synced properly with the projector.
- Display Issues: If the display is not clear or distorted, adjust the projector's display settings. Fine-tuning settings like keystone correction or focus can often resolve visual problems. Be sure to check your computer or laptop’s display settings as well.
- Audio Problems: If there's no sound, verify the audio cables are correctly connected to both the projector and audio output devices. If using Bluetooth, ensure the projector is paired with your audio device.
- Inadequate Connection: For those experiencing issues with a wireless projector connection, verify the wireless settings. Optimize your network connection and ensure strong Wi-Fi signals. A reset may sometimes rectify connectivity issues.
- USB Cable Problems: If connecting your phone via USB and encountering issues, reference a useful guide on connecting your phone to a projector.
Troubleshooting is a crucial part of maintaining your home theater system. By understanding these common concerns, you can enjoy seamless and high-quality video experiences from your projector setup.

