Understanding Your Space
Preparing Your Space for Optimal Projection
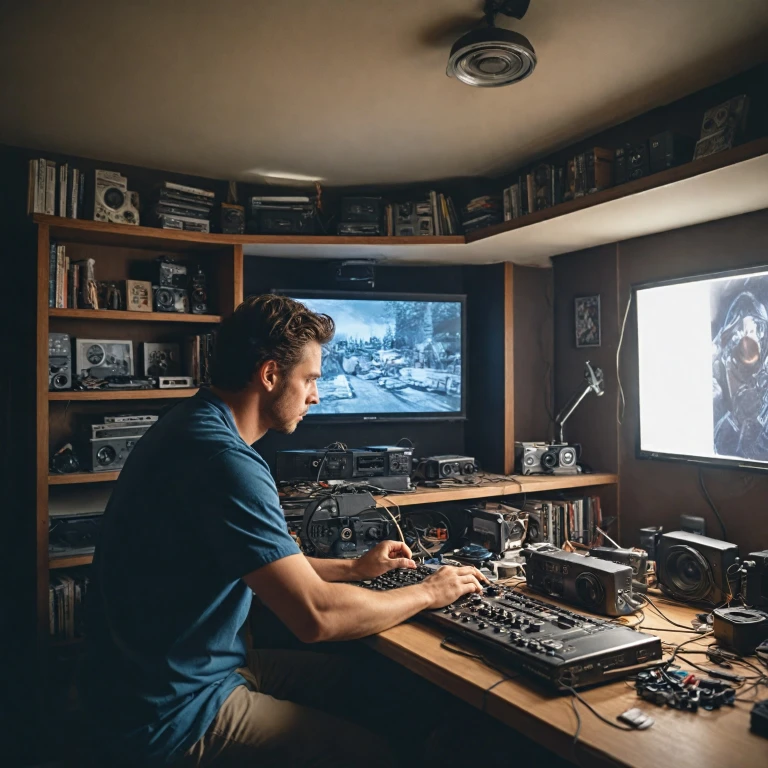
Understanding the layout of your room is crucial in creating a theater environment that truly immerses. The first step is to assess the dimensions and characteristics of your space. Key factors include the size, shape, and height of the room. These elements will directly influence the placement and type of screen and projector you choose. It's also essential to consider the wall where you intend to install your projector screen. Evaluating your room's dimensions will help you determine the ideal screen size, throw distance, and ceiling mount height. You should check if your projector model allows for adjustments like vertical lens shift or keystone correction, which can help align the image if space limitations prevent perfect placement.Analyze the Light Conditions
Understanding the ambient light conditions in your theater room will guide the choice of projector. In rooms with uncontrolled ambient light, opting for projectors with higher brightness ratings (measured in lumens) is advisable. Conversely, for a dark room, you can enjoy projectors with lower brightness, enhancing picture quality and detail. By dedicating some time to thoroughly analyze your space, you'll be well-equipped to choose the right projector, mount, and screen size. This preparation ensures your home theater setup is not only functional but also aesthetically pleasing. For those interested in extending this expertise, explore more about creating a pop-up movie theater experience here.Choosing the Right Projector Mount
Selecting an Appropriate Mounting Solution
When it comes to achieving the perfect home theater setup, choosing the right projector mount can make a significant difference. Understanding the various types of mounts available and how they interact with your projector, room layout, and ceiling height is crucial.
Firstly, consider the mounting location. Ceiling mounts are popular because they keep the projector out of the way, yet perfectly positioned for optimal viewing. Depending on your ceiling height, ensure there's enough height clearance for both the mount and the projector itself. If your room has a lower ceiling, you might need a mount with an adjustable arm to manage the projector throw distance effectively.
The throw ratio of your projector helps you calculate where to place it in relation to the screen. A short throw projector will be installed much closer to the screen than a standard one. Depending on the throw ratio and the size of your projector screen, ensure that your projector mount allows a good range of movement for lens alignment, especially when dealing with a wide screen.
Some mounts offer flexible positioning options via lens shift, both vertical and horizontal. While it doesn’t change the throw distance, it gives you leeway in positioning without distorting the image, minimizing the need for keystone correction. Always verify your project's specifications, such as model number and lens capabilities, to ensure compatibility with the chosen mount.
Finally, remember wall mounts can also be a great option, especially in rooms with unusual setups or unconventional screen positions, providing an alternative solution for small spaces or specific aesthetic requirements.
Before making a purchase, consider enhancing your entertainment space with an optimal setup. A well-chosen mount contributes significantly to your viewing experience, making your projector a seamless part of your home theater.
Gathering Necessary Tools and Materials
Essential Tools for a Seamless Installation
Embarking on the journey to install your new home theater projector requires a little more than just enthusiasm. You will need to gather the right tools and materials to ensure a smooth and stress-free process. Here’s a list of essentials you’ll want to have on hand before you start mounting your projector to the ceiling or wall of your theater room.
- Screwdriver Set: A variety of screwdrivers in different sizes is crucial for handling different screws associated with your projector mount and ceiling brackets.
- Drill with Appropriate Bits: Drilling into walls or ceilings will demand a powerful drill and suitable bits to create snug and secure mounting holes.
- Level: Ensuring your projector is perfectly level will help in maintaining the integrity of your projected image and prevent distortion.
- Measuring Tape: Accurate measurements are crucial, particularly when calculating the throw distance, screen height, and screen size to align with the projector's manual instructions.
- Stud Finder: A reliable stud finder helps you locate safe spots to secure your ceiling mount, ensuring stability and safety for your projector.
- Universal Remote: Having a remote handy allows you to manage the projector settings with ease and make adjustments to the throw ratio and lens shift.
- Keystone Correction Feature: Consider using your projector’s keystone correction feature to address any potential image distortion once mounted.
Having these tools ready will undeniably save you time and headaches. Remember, the goal is to achieve a seamless integration with your projector screen, ensuring the projector throw is optimal for your room size and setup. For more detailed guidance on what additional items might enhance your installation experience, you may find valuable insights on understanding the essentials of speaker connectors in home theater projectors.
Step-by-Step Mounting Process
Step-by-Step Guide to Securely Mounting Your Projector
Mounting your projector can transform your home theater setup, offering an immersive experience when done right. To ensure you achieve the best results, follow these steps for a secure and optimal installation.
1. Verify the Projector Mount and Ceiling Type
Start by confirming that your chosen projector mount is compatible with both the model number of your projector and your ceiling type. Generally, most mounts offer versatility for different projectors and ceiling materials, but it's crucial to double-check compatibility to avoid any mishaps.
2. Determine the Throw Distance
The optimal throw distance is essential for achieving a crisp, focused image. Measure the distance projector placement will be from the screen. The throw ratio of your projector will guide you on how far to position it from the screen. Ensure the projector's lens aligns perfectly with the center for the best projection.
3. Install the Ceiling Mount
Using the appropriate tools and safety gear, securely attach the ceiling mount to your ceiling. This process varies based on your ceiling type, such as concrete or drywall. Make sure the screws and bolts are tight, and the mount is level.
4. Attach the Projector
- Carefully place the projector on the mount, ensuring it's secure before releasing your grip.
- Adjust the projector to align with the screen, considering both vertical lens and horizontal lens shifts.
5. Adjust and Fine-Tune
Once the projector is firmly mounted, proceed with fine adjustments. Pay attention to:
- Keystone correction: This helps rectify any image distortion due to the projector not being perfectly perpendicular to the screen.
- Lens shift adjustments: Manually tweak the projector to ensure the image projection aligns with the screen's width and height.
Taking the time to carefully perform each of these steps will result in a professional-quality installation, optimizing your home theater experience while safeguarding your equipment.
Aligning and Adjusting the Projector
Fine-Tuning the Projector Image
Once your projector is securely mounted, it's time to align and adjust the image for the best viewing experience. This process involves several important factors, including throw distance, image size, and projector throw ratio.
- Positioning the Lens: Begin by ensuring that the projector's lens is centered with the screen. This may involve adjusting the distance projector placement from the screen to achieve the correct throw distance according to the projector's specifications.
- Adjusting the Screen Size: Use the zoom function to set the desired screen width and height. The throw ratio will guide you in determining how far back the projector needs to be to fill the screen properly.
- Using Lens Shift Features: Some projectors come equipped with vertical lens shift and horizontal lens shift capabilities. These features allow for adjustments without physically moving the projector. Align the image to the top screen and center it both vertically and horizontally on the screen.
- Attending to Keystone Correction: If the image appears trapezoidal due to the projector's position, keystone correction may be necessary. Many projectors offer digital keystone corrections that can adjust the image to a more rectangular shape.
- Fine-Tuning the Focus: Finally, adjust the focus to ensure that the projected image is sharp. It’s crucial that the text and images are crisp for the ultimate home theater experience.
After completing these steps, take a moment to read the product manual specific to your model number for any additional calibration options. Every projector varies, especially with advanced features commonly found in models available in the United States.