Understanding the Basics of Projectors
Introduction to Home Theater Projectors
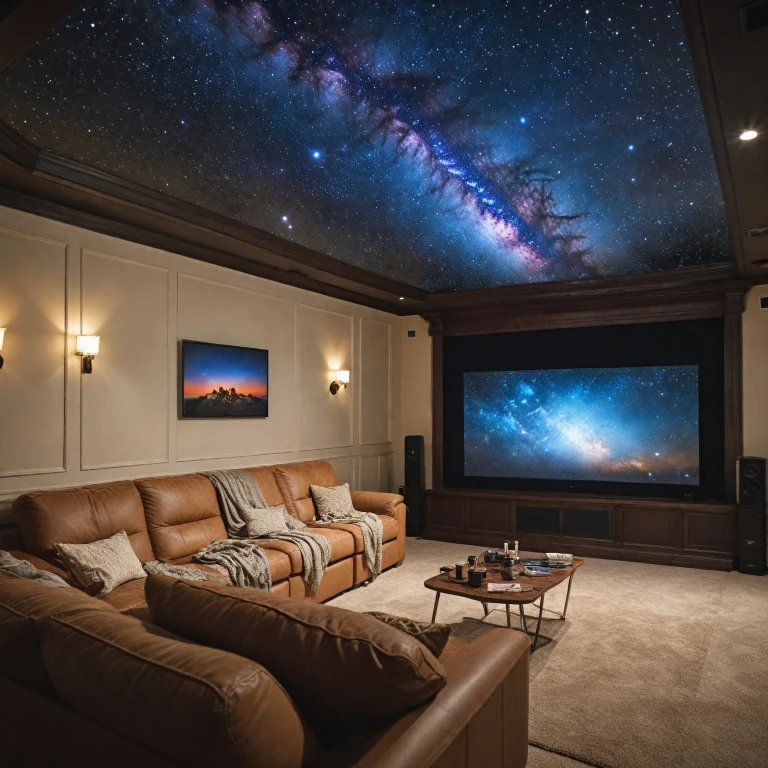
Home theater projectors have revolutionized the way we experience movies and shows in the comfort of our own homes. They offer a more cinematic feel compared to traditional television screens, especially when paired with a suitable environment. The right projector can transform a simple room into a stunning home theater.
When considering projectors, it's important to understand the different types available, such as LED projectors, laser projectors, and the relatively new ultra short throw projectors. Each type has its own strengths, particularly when it comes to image quality, color accuracy, and ease of setup.
The choice of a white wall as your projection surface can also significantly impact the viewing experience. White walls are often recommended for their ability to reflect light uniformly, enhancing both brightness and color representation. For those seeking a more professional setup, using a projector screen or applying screen paint can offer exceptional contrast and color fidelity.
When setting up a home theater projector, it's crucial to consider the ambient light in the room. Lower ambient light levels contribute to better black levels and image quality. Proper setup involves positioning your projector at the right distance for the best focus and image size, whether it be a short throw or standard projector.
To fully harness the potential of your home theater projector, visit our guide on wall-mounted projectors and explore more on achieving a better viewing experience.
Why Choose a White Wall for Projection?
Advantages of Using a White Wall
When considering projection surfaces for home theaters, a white wall is often a surprising but excellent choice. It serves as a cost-effective option while offering several notable benefits over traditional projector screens. Cost-Effectiveness- Eliminating the necessity of purchasing a screen can be a major budget-saver, as projector screens sometimes come with a hefty price tag.
- A white wall is readily available in most homes, avoiding extra expenses.
- A white wall can deliver impressive image quality due to its neutral tone which does not alter color accuracy during projection.
- It helps in preserving high contrast levels, ensuring that movies and video content remain bright and vibrant.
- Setting up your projector in a room with a white wall is straightforward, cutting down on setup time.
- A wall provides flexibility with size, eliminating concerns typical projector screens face of fitting specific dimensions.
- The reflective properties of a white surface can work favorably in well-contained environments, enhancing light distribution without the distraction of hotspots from traditional screen surfaces.
Setting Up Your Projector for Optimal Performance
Perfecting Your Projector Setup for an Unparalleled Experience
Setting up your projector correctly is paramount to maximizing your viewing experience. Unlike traditional TV setups, projectors require a bit of precision and planning to achieve optimal image quality. To start, consider the room dynamics: ensure the room has minimal ambient light to maintain vibrant colors and stark black levels. Light plays a vital role in in image quality, as excessive ambient light can wash out the colors. Utilize blackout curtains or shades to control the environment better. Next, you're looking at positioning. Depending on the type of projector you have - be it a laser projector, short throw or ultra short throw projectors - the optimal position may vary. Short throw and laser projectors offer better flexibility in tight spaces, whereas traditional projectors might need more room. This affects your placement choices and ultimately the size of the projection screen you can accommodate. On the subject of screens, while the allure of high-quality projector screens or ALR screens is high, projecting onto a white wall can also yield impressive results if set up properly. The white wall should be smooth and free from imperfections to avoid any distortion in color accuracy or image quality. Using a good quality paint specifically designed for projection can enhance this further. Our lighting optimization guide dives deeper into how to adjust your setup for both lighting and color quality. Keep these tips in mind and adjust as necessary, because each setup will be unique. The aim is to get the light, color, and contrast just right for you, amplifying every detail and ensuring that each viewing session is a captivating experience.Overcoming Common Challenges
Addressing Typical Projection Obstacles
When you project onto a white wall, several challenges might come your way. Understanding these obstacles is key to achieving superior image quality and maximizing your viewing experience. One of the most common issues is managing ambient light. Excessive ambient light can wash out the projection, reducing contrast and color clarity. To combat this, consider positioning your projector in a way that minimizes ambient light interference, such as using blackout curtains. Wall imperfections can also affect the projection outcome. White walls usually provide a good surface, but their texture and any blemishes can disrupt the image. Applying a quality projector paint might offer a smoother finish than a regular white wall, enhancing image sharpness and color accuracy. Projection alignment is another crucial factor. Misalignment can lead to a distorted or blurry image, which will detract from the overall viewing experience. Ensure the projector is properly aligned with the wall and make necessary keystone corrections to achieve a sharp and centered image. Furthermore, achieving high-quality black levels can be difficult with white walls, as they naturally reflect light. To enhance black levels and contrast, you might explore using an ALR screen, which is designed to reject ambient light. The selection of the right projector type, such as a laser projector or LED projector, can influence how well you overcome these challenges. A short throw or ultra short throw projector can aid in optimizing space and image size without comprising on quality. By addressing these common projection challenges, you'll be on your way to enjoying a high-quality home theater experience, even on a simple white wall.Enhancing the Viewing Experience
Boosting the Cinematic Experience
Setting up a projector on a white wall indeed holds the promise of a riveting cinematic experience. However, to unlock its full potential, certain elements come into play.- Adjust the Color Settings: Fine-tuning color accuracy is your stepping-stone to achieving realistic depictions. Depending on the brand and model, projectors have adjustments for color modes and temperature to align with the white wall.
- Control Ambient Light: Minimizing ambient light is essential to sharpening image quality. Choose the appropriate times of day, or employ blackout blinds to maintain high contrast and black levels.
- Screen Alternatives: While the white wall itself is a starting point, consider using a projection screen or specialized screen paint for intensified image clarity and depth.
- Optimize Room Layout: Placement of furniture and lighting plays a role in enhancing the effect of the projected image. Ensuring that the room setup minimizes distractions and reflections further elevates viewing.
- Select the Right Projector Type: Choosing among laser projectors, LED projectors, or ultra short throw types can greatly impact the visual quality, especially in optimized rooms for projector use.
Maintenance and Longevity Tips
Ensuring Longevity and Optimal Performance of Your Projector Setup
Taking care of your projector and maintaining it properly will ensure that your home theater continues to deliver high-quality visuals for years to come. Here are some essential maintenance tips to keep your projector running optimally:- Regular Cleaning: Dust accumulation can affect your projector's image quality and overall performance. Regularly clean your projector, including its air filters and lens, to prevent dust particles from affecting the projection.
- Proper Ventilation: Ensure that your projector is placed in an area with ample ventilation. This helps to prevent overheating, which can lead to a decline in performance and even damage your equipment over time.
- Environmental Considerations: Manage ambient light within your viewing area. Too much ambient light can wash out colors and affect contrast, reducing the overall viewing experience.
- Lamp and Bulb Care: Replace your projector lamp or bulb when necessary. A dimming light will affect image quality, and using it beyond its lifespan may cause damage. Keep track of usage and replace parts according to the manufacturer's recommendations.
- Screen Maintenance: If you're using a screen wall or a dedicated projection screen, ensure that it remains clean and in good condition. A pristine surface will help maintain the contrast and color accuracy of your projections.
- Software Updates: For projectors with smart capabilities, regularly update the software to ensure optimal performance and access to the latest features.