Understanding Compatibility
Checking Device Compatibility
When planning to connect your iPhone to a projector, it's essential to ensure compatibility between the two devices. The most straightforward aspect of compatibility is confirming that your specific projector model can support an iPhone connection through either wired or wireless means.
Different projectors offer various interfaces for connectivity. Common connection methods include HDMI and wireless options like AirPlay. Most modern portable projectors automatically support compatible connections with smartphones, allowing for convenient setups. However, others may require additional adapters, such as an HDMI adapter, to bridge any technological gaps.
For wired connections, you'll need to verify that both your iPhone and the projector have suitable ports. iPhones typically use a Lightning connector that may require an additional adapter to link with the projector's HDMI port.
Wireless options, such as AirPlay, can simplify the connection process, particularly with projectors that support screen mirroring. Wireless projectors often include built-in features that make it easier to mirror your iPhone screen, leading to a more seamless viewing experience.
Before attempting to connect, it's advisable to check the user manuals and support resources for your projector and iPhone model to determine any specific requirements or compatibility notes. This proactive step aids in a smooth setup process when you connect your device.
Wired Connection Methods
Connecting with Wired Solutions
To establish a stable and reliable connection between your iPhone and a projector, utilizing a wired method is often the go-to choice. Here, we'll outline the steps and tools you need to make this connection seamless.
- HDMI Adapter: Apple offers a Lightning Digital AV Adapter that enables you to connect your iPhone to HDMI-compatible projectors. This small accessory plugs into the Lightning port on your iPhone while the HDMI cable connects the adapter to the projector's HDMI port. This setup allows you to mirror your iPhone's screen directly onto the projector, offering clarity and stability for viewing photos, videos, and other content.
- VGA Adapter: For projectors that don't support HDMI, you may need a Lightning to VGA Adapter. While VGA does not support audio transmission, you can still enjoy visual content on the larger screen. An external speaker system can be used for audio output.
- Using a USB-C Connection: If you own a USB-C-based device or adapter, you may connect certain iPhones or iPads with this technology using the appropriate cable, though compatibility checks are essential.
It's crucial to ensure that your projector and connection devices are compatible with your iOS version to avoid potential issues, as operating system updates can sometimes affect connectivity.
To dive deeper into how different connectors and adapters work within your home theater setup, visit our guide on understanding the role of an RCA Y-Splitter in your home theater setup.
Wireless Connection Options
Wireless Solutions for Effortless Connectivity
Connecting your iPhone to a projector without the hassle of cables can elevate your home theater experience. Wireless options are ideal for those who value convenience and flexibility. Here’s how to make it happen:
The most straightforward method to connect your iPhone through wireless means involves using AirPlay. This Apple technology allows you to project your device’s screen onto compatible projectors. To start, ensure both the projector and your iOS device are connected to the same Wi-Fi network. This common network is crucial for your devices to communicate seamlessly.
Once you've established the network link, follow these steps:
- Access the Control Center on your iPhone or iPad by swiping down from the top-right corner of the screen.
- Select the 'Screen Mirroring' option.
- Choose your projector from the list of available devices. The device name should appear if it's AirPlay-enabled.
For those projectors that don't support AirPlay natively, you can use an Apple TV as an intermediary device. Connecting the Apple TV to the projector via an HDMI cable serves as a bridge, enabling wireless projection of your content through AirPlay.
Alternatively, some projectors offer proprietary apps for wireless connection. These apps often work over the projector’s Wi-Fi Direct or another direct connection type, enabling you to stream photos, videos, and presentations smoothly without an Apple TV or additional hardware.
Keep in mind that the quality of the wireless connection also depends on the strength of your Wi-Fi network. Ensuring a stable network can prevent lag and maintain a crisp, lag-free image on the screen.
Integrating wireless connectivity into your home theater can minimize clutter and provide a modern viewing experience. Whether through AirPlay or built-in apps from projector manufacturers, you have multiple options to explore.
Optimizing Display Settings
Fine-tuning the Visual Experience
Once you've successfully established a connection between your iPhone and projector, the next step in creating a captivating home theater experience involves optimizing the display settings. Ensuring that your visuals are crisp and vibrant can make a significant difference in your viewing pleasure.
Here's a step-by-step approach to enhance your display:
- Adjust Resolution: Many projectors automatically adjust to match your source device's resolution. However, it's a good idea to check your projector's settings to confirm it's optimizing the resolution appropriately for your iPhone's output. Most iPhone models, especially the latest iOS devices, support high-definition output.
- Burst of Colors with CLS Fill: The CLS fill feature can help in achieving richer colors. Some projectors come with this color correction feature, which adjusts the hue and saturation to better match the content being displayed. Check your projector's settings menu for this option if available.
- Center and Aspect Ratio Adjustments: Ensure your content fits the screen perfectly by adjusting the aspect ratio. Check for any black bars on the sides or top and bottom, and find the right setting that suits the screen size of your projection surface. This may involve fine-tuning settings both on your iPhone and within your projector's menu.
- Screen Mirroring Stability: If you're using screen mirroring, maintaining a stable connection is crucial. A seamless connection makes sure there are no delays between your actions on the iPhone and what's displayed. Make sure your wireless connection is strong; sometimes, adjusting your wireless router can minimize lag.
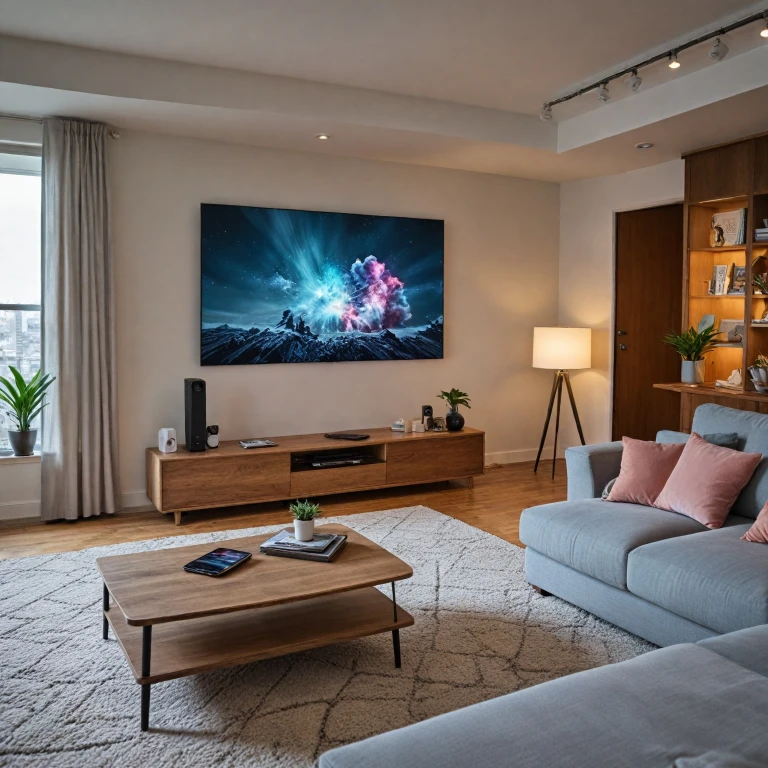
- Lighting and Environmental Factors: The ambient light in your room can dramatically affect how the projected images appear. Use blackout curtains or dim lights during viewing to enhance the contrast and clarity of the projected images. Additionally, try to position your screen protecting it from reflections or direct light sources.
Experimenting with these adjustments will help you perfect the visual quality of your setup. Remember, the goal is to create a personalized experience that suits both your content types, be it photos videos, and your viewing preferences. Elevating your home theater experience is as much about fine-tuning as it is about advanced technology features found in quality projectors like short throw and portable projectors. For further steps on dealing with wireless connections or using an HDMI adapter, refer back to your initial connection choices.
Troubleshooting Common Issues
Troubleshooting Steps for a Smooth Connection
Encountering hiccups while connecting your iPhone to a projector can be frustrating, but don’t worry; there are common solutions to these issues. Whether it’s a wired or wireless setup, troubleshooting can help restore your seamless viewing experience.
First, always ensure your devices are compatible. Verify that your projector’s inputs match the outputs from your iPhone. Using the right cable or adapter plays a critical role here, especially for a solid HDMI connection.
For wired connections, ensure the HDMI cable is fully plugged in, both to the iPhone adapter and the projector. Sometimes, a loose connection is all it takes for the display to falter. You can easily find any loose cables by checking if your iPhone's screen is mirrored correctly on the projector. Also, make sure your adapters are certified by Apple to avoid compatibility issues.
When using wireless options like AirPlay, ensure both your iPhone and projector are connected to the same Wi-Fi network. Any network discrepancies can disrupt the connection. If you’re experiencing lag, reducing the distance between your iOS device and the projector can strengthen the signal. The Control Center on your iPhone allows you to quickly test and modify your Wi-Fi settings.
If the projector still isn’t displaying content, it might be a settings issue. Check the projector’s input source settings and ensure they align with your connection method, be it HDMI or wireless. Revisit the steps with your projector’s control panel and see if the settings have been altered. You may also need to enable screen mirroring from the Control Center of your iPhone.
Regularly checking for iOS and firmware updates on both devices ensures all functionalities work in harmony. However, if troubleshooting doesn’t resolve the connection issues, consider reaching out to the manufacturer’s support team for personalized assistance.
Enhancing the Home Theater Experience
Taking Your Home Theater Experience to the Next Level
Enhancing the home theater experience after successfully connecting your iPhone to a projector involves several aspects that culminate in a more immersive viewing journey. Here's how you can transform your movie nights into cinematic adventures:- Adjusting Environment: Ensure the room lighting is ideal for a projector viewing. Dim the lights and block out external sources of light to enhance image clarity and contrast on the screen, maximizing the utility of your projector's capabilities.
- Optimizing Sound Quality: While visual experience is important, quality audio elevates the setup. Pair your projector and iPhone connection with a sound system, or portable Bluetooth speakers, to create a glorious audio landscape that matches the visuals.
- Fine-Tuning Projector Settings: Once you understand how to connect your iPhone through wired or wireless methods, dive into the projector's settings menu to adjust aspects like brightness, contrast, and aspect ratio. This personalized setting ensures content looks sharp and appealing.
- Utilize Screen Mirroring: With screen mirroring via iOS devices like iPhones and iPads, engage in seamless transitions between apps, and enjoy a variety of content without noticeable latency. Enhance content versatility by displaying both stored and streaming content.
- Interactive Apps and Media: Explore iOS-compatible apps that offer more interactivity. These can include educational apps or interactive games that transform your living room into an educational or gaming hub.
- Seek Professional Assistance: If setting up or maintaining your projector and its connection becomes overwhelming, consider seeking advice or services from a professional for optimal results.