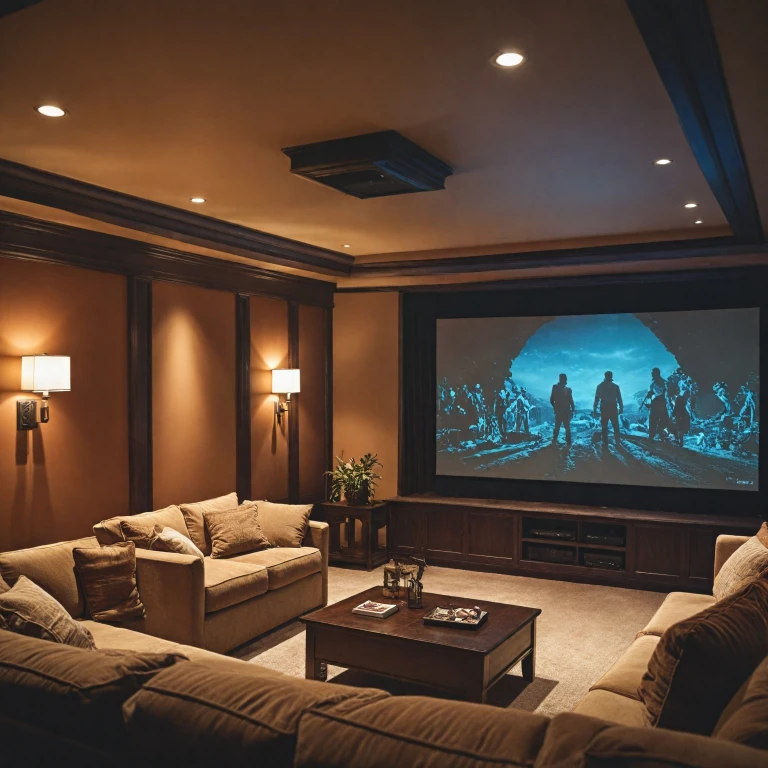
Understanding Your Projector and Room Layout
Evaluating the Projector Fundamentals
Before mounting projector units from the ceiling, understanding the basics of your home theater setup is crucial. This knowledge includes familiarizing yourself with projector types, dimensions of your room, and placement details to optimize the viewing experience.
Room and Projector Coordination
The first step in ceiling mounting projectors is assessing your room layout and the specific projector model number you possess. Considerations involve the following:
- Room Size and Shape: Determine your room dimensions, which aid in identifying the optimal screen size, throw distance, and screen width for your projector.
- Projector Specifications: Understanding your projectors' throw distance and throw ratio will guide you in achieving the desired image size.
- Seating Arrangements: Evaluate the seating configuration to ensure the projector is centrally aligned to the seating area for equal viewing experience across all seats.
Determining Screen and Projector Positions
A well-planned room layout extends to accurate positioning of the screen and projector. Key attention areas include:
- Screen Placement: Decide on the screen height and measure the distance from the ceiling; this is essential for calibrating the projector's lens shift and ensuring perfect screen alignment.
- Projector Positioning: Plan to mount your projector at the correct height with respect to your screen to exploit lens shift capabilities effectively.
For those using modern laser projectors, these projections often promise superior image quality irrespective of the mounting method. However, ensuring they are installed at the proper height is crucial.
If you are curious about advanced mounting solutions, explore the benefits of the Chief XTM1U. It’s an excellent product for those seeking an enhanced home theater projectors experience in the United States.
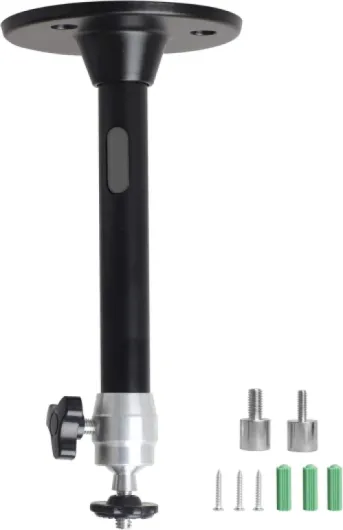
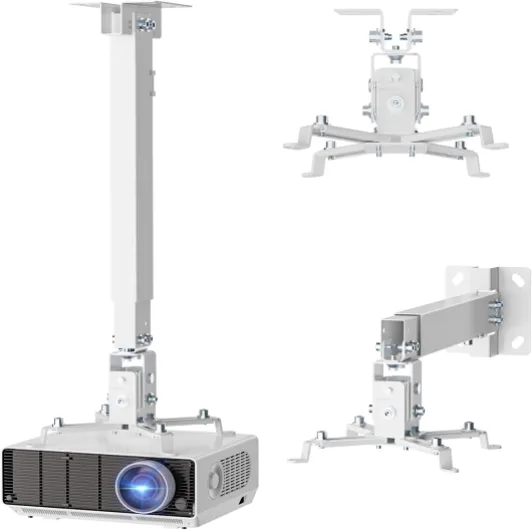
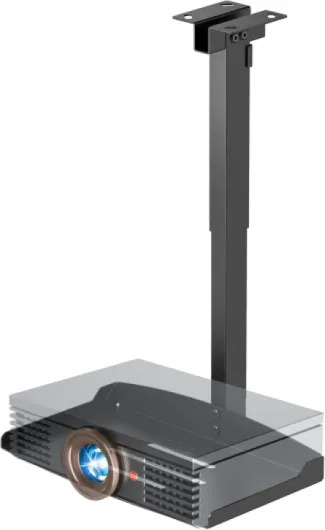
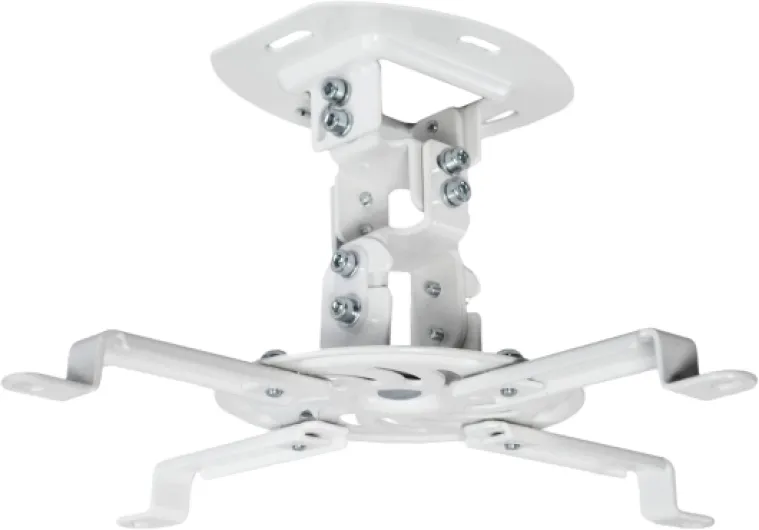
Choosing the Right Ceiling Mount
Picking the Ideal Support System
When setting up a home theater projector, a critical decision is selecting the right projector ceiling mount for your space. This choice determines your overall viewing experience, as the position and stability of your projector will affect the clarity and alignment of the projected image with your screen.
First, ensure that your chosen mount is compatible with the projector's model number. This compatibility is vital to safely support the projector's weight and maintain its position without tilting or shifting.
Several factors influence your mount choice:
- Weight Capacity: The mount must support the projector's weight. Check product specifications for enforced limits.
- Throw Distance: Determine how far the projector can be mounted from the screen to achieve the desired image size. This is influenced by the throw ratio and screen width.
- Height and Adjustability: A ceiling mount with adjustable height allows for alignment with the center of the screen, ensuring optimal screen size and image quality. Features like lens shift can further help align the image without physically moving the unit.
- Room Layout: Take into account the room's design, ceiling height, and available wall space. This can help decide between a standard or low-profile mount.
Additionally, consider ceiling mounting options like motorized or fixed mounts. While fixed options are popular for their stability, motorized versions offer flexibility, allowing projectors to retract when not in use, preserving aesthetics and space.
For more tailored solutions, explore dedicated accessories available for theater setups. Harnessing products like Chief TV Mounts can complement and enhance your overall setup seamlessly.
In conclusion, selecting the right ceiling mount ensures that your projector remains secure and sustains the viewing experience intended for your home theater. Proper planning and alignment will culminate in a flawless display effortless to adjust and maintain.
Tools and Equipment Needed
Essential Tools and Equipment for Successful Installation
To ensure a seamless ceiling mounting experience for your home theater projector, you'll need a selection of tools and equipment ready at hand. These will aid you in positioning your projector precisely, ensuring it aligns well with your projector screen. Here's what you need to gather:- Drill and Drill Bits: Essential for making holes in the ceiling to secure the mount.
- Screwdriver: Often required to tighten any screws for the mount projector installation process.
- Tape Measure: Useful for gauging the correct throw distance from the projector lens to the screen.
- Spirit Level: Ensures your mount is aligned horizontally for optimal viewing experience.
- Pencil: To mark precise mounting points on the ceiling or wall.
- Stud Finder: Identifies the most secure spots in the ceiling to support the weight of the projector ceiling mount.
- Adjustable Wrench: Great for tightening bolts to keep everything secure.
Step-by-Step Installation Guide
Installation Steps: From Ceiling to Screen
Mounting your projector on the ceiling might seem like a daunting task, but with careful planning, it can be a smooth process. Here's how to properly mount your projector to ensure the best theater experience in your room:- Secure the Mounting Location
- Identify the right position on your ceiling based on the projector's throw ratio and the screen size. It's vital to ensure that the distance between the ceiling mount and the screen aligns with your projector's throw distance specifications.
- Consider the height of the ceiling and the screen center to ensure a perfect viewing angle. The projector lens should be parallel to the top edge of the screen for optimal image quality.
- Drill and Prepare
- Use the projector ceiling mount template provided by the manufacturer to mark the drilling spots on the ceiling.
- Ensure you're drilling into a sturdy joist or similar support structure to avoid security issues. If your ceiling is not made of wood, consider installing a mounting plate.
- Attach the Mount
- Securely attach the mount to the ceiling with heavy-duty screws. Double-check the stability to avoid any accidents.
- Follow the specific instructions based on the mount product model number to avoid misalignment.
- Attach Projector to Mount
- Carefully follow your projector's instruction manual for attaching it to the ceiling mount. Different projectors have various mounting mechanisms.
- Check if your projector offers lens shift adjustment to tweak the image placement without needing to reposition the projector.
- Align and Adjust
- Power on your projector and align it accurately, using the screen width and height as a reference.
- Adjust the image size ensuring it fits perfectly onto the projector screen, fine-tuning the throw distance and lens shift as needed.
- Test the Setup
- Test the entire setup by projecting an image to cover potential misalignments or calibration errors. Make corrections to ensure the best viewing experience.
Cable Management Solutions
Efficiently Concealing and Organizing Cables
Proper cable management is a crucial aspect of ensuring your home theater projector setup looks organized and performs efficiently. Once you've ceiling mounted the projector and set the optimal throw distance, screen size, and throw ratio, it's important to address any unsightly cables to maintain a clean aesthetic and avoid potential tripping hazards. Here are some effective solutions:- Use Cable Covers: These enable you to neatly conceal cables against the wall or ceiling. Available in various colors and sizes to blend seamlessly with your decor, they're an excellent choice for running cables from the center of your ceiling mount to the power source or projector screen.
- In-wall Cable Routing: For a more permanent solution, consider routing cables through the walls. This method requires creating holes, so it's best suited for those comfortable with DIY or when consulting a professional installer. It offers a top-notch clean finish.
- Cable Management Boxes: Ideal for organizing multiple cables in one place, these boxes can keep excess cable lengths concealed, maintaining an uncluttered look.
- Cable Sleeves: These are flexible and allow you to bundle several cables into one sleeve, reducing the clutter and preventing tangles.
- Velcro Straps: These simple fasteners can help you bunch cables together and are easily adjustable if you need to make changes to your setup down the line.
- HDMI Extenders for Clean Connections: If the projector and video source in your room are far apart, consider using HDMI extenders to maintain a strong signal without having visible cables running between units. These products can enhance the overall viewing experience without clutter.
Adjusting and Calibrating Your Projector
Fine-Tuning Your Projector for Optimal Picture Quality
Once your projector is securely ceiling mounted, it's time to perfect the image for the ultimate viewing experience. Follow these steps to adjust and calibrate your projector:- Positioning and Alignment: Ensure the projector is properly centered to the screen. The lens should align with the center of the projector screen to minimize any image distortion. Use the lens shift feature, available on many ceiling mounted projectors, to adjust the image without moving the projector physically.
- Focus Adjustment: Adjust the projector's focus ring or digital focus adjustment to achieve a sharp image. This is crucial, as even a minor blur can detract from the overall viewing experience. Double-check the focus at different screen sizes to find the optimal setting for your projector's throw distance and screen width.
- Keystone Correction: If your ceiling mount isn’t perfectly level or the projector is at an angle, use keystone correction to ensure a rectangular image. However, use this feature sparingly, as excessive adjustment can reduce image quality.
- Calibrate Brightness and Contrast: Depending on the ambient light in your room, tweak the projector’s brightness and contrast settings. You want the projector image to be bright enough without washing out colors or losing detail in shadows.
- Color Test: Use color test patterns to calibrate your projector for accurate colors. Many modern projectors have built-in calibration tools. Consider professional calibration services if you wish to achieve the highest quality image.
