Understanding the Benefits of a Wall Projection Screen
The Advantages of Using a Wall Projection Screen
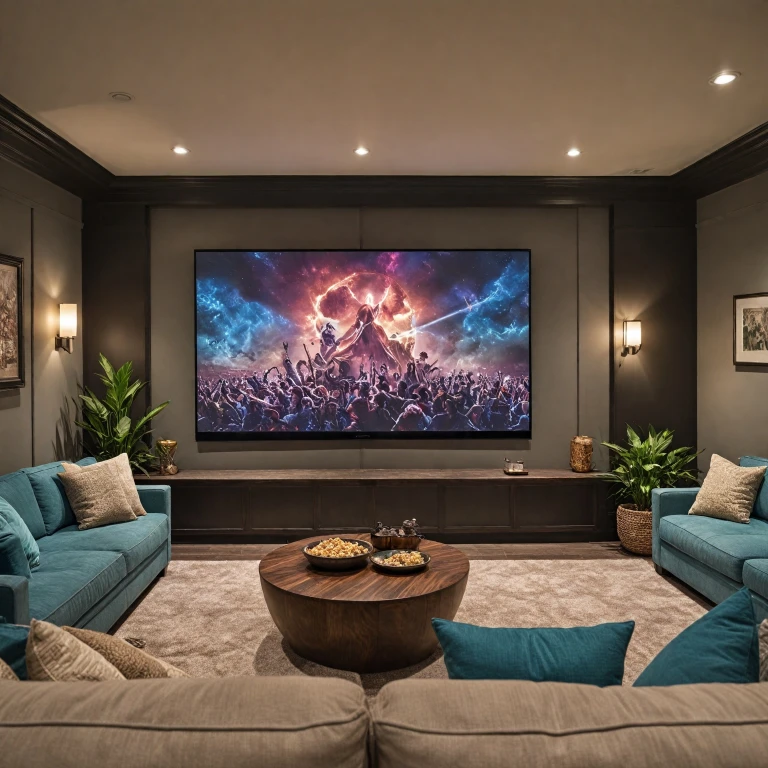
When it comes to creating a captivating home theater experience, a wall projection screen can be a game-changer. Unlike traditional TV screens, projection screens offer a larger viewing area, which can significantly enhance your movie nights or gaming sessions. Here are some key benefits of opting for a wall projection screen:
- Size Flexibility: Projection screens can be customized to fit the dimensions of your wall, providing a more immersive viewing experience compared to fixed-size TVs.
- Cost-Effective: While high-end TVs can be pricey, projection screens offer a more budget-friendly option without compromising on quality. The price screen for a wall projection setup can be surprisingly affordable.
- Space-Saving: A wall projection screen can be easily retracted or hidden when not in use, making it ideal for multi-purpose rooms.
- Enhanced Picture Quality: With the right setup, including a matte white screen or a high-gain screen, you can achieve superior image clarity and color accuracy.
- Versatility: Whether you prefer a fixed frame, tab tensioned, or manual screens, there are numerous options from manufacturers like Elite Screens, Draper, and Stewart to suit your needs.
Choosing the right wall and optimizing your setup are crucial steps in maximizing these benefits. Consider factors like ambient light and the type of projector you plan to use, such as short throw or ultra short throw projectors, to ensure the best possible viewing experience. As you explore the various options, keep in mind that the right combination of screen and projector can transform your home theater into a cinematic paradise.
Choosing the Right Wall for Your Projection Screen
Finding the Perfect Spot for Your Projection Screen
Choosing the right wall for your projection screen is crucial to maximizing your home theater experience. The wall you select can significantly impact the quality of your viewing, so it's essential to consider several factors before making a decision.
Consider Wall Color and Material
When selecting a wall, the color and material play a vital role. A matte white wall is often ideal as it reflects light evenly, enhancing the image quality. However, if your wall isn't white, you might consider using screen paint to achieve a similar effect. Avoid walls with textured surfaces as they can distort the image.
Assess Ambient Light Conditions
Ambient light can wash out the image on your screen, so it's important to choose a wall that minimizes light interference. A wall opposite windows or light sources is preferable. If this isn't possible, consider investing in blackout curtains or a tab tensioned screen to reduce light impact.
Evaluate Wall Size and Space
The size of the wall will determine the size of the screen you can install. Measure the available space to ensure your chosen screen fits comfortably. Remember, larger screens require more distance between the projector and the screen, so consider the throw distance of your projector.
Check for Structural Support
Ensure the wall can support the weight of a fixed frame or a ceiling projector setup. If you're considering a manual or remote-controlled projector screen, verify that the wall can accommodate the necessary hardware. For more insights, explore how a remote-controlled projector screen can enhance your setup.
Think About Future Adjustments
Consider the flexibility of your setup. If you plan to upgrade to a short throw or ultra short throw projector in the future, ensure the wall can accommodate such changes. This foresight can save you time and money down the line.
By carefully selecting the right wall for your projection screen, you lay the foundation for an immersive home theater experience. Keep these factors in mind as you explore options from manufacturers like Elite Screens, Stewart, and Draper, ensuring your setup is both functional and visually stunning.
Installation Tips for a Wall Projection Screen
Preparing Your Space for Installation
Before you begin the installation of your wall projection screen, it's crucial to prepare your space adequately. Start by selecting a suitable wall that is free from obstructions and has a smooth surface. A matte white wall is often recommended for optimal projection quality. Consider the color and texture of your wall as these can affect the image quality.
Gathering the Necessary Tools and Materials
Ensure you have all the necessary tools and materials before starting the installation. This includes a level, measuring tape, screws, and anchors. Depending on the type of screen, such as fixed frame or tab tensioned, you might need additional items like a drill or screwdriver. Check the manufacturer's instructions for any specific requirements.
Mounting the Screen
Once your wall is ready and you have all the tools, it's time to mount the screen. Begin by marking the spots where the brackets will be installed. Use a level to ensure that the screen will be perfectly horizontal. For fixed frame screens, attach the frame securely to the wall. If you're using a ceiling projector, ensure the screen is aligned with the projector's throw distance.
Adjusting for Optimal Viewing
After mounting, adjust the screen to achieve the best viewing angle. Consider the height and distance from the seating area. If you're using short throw or ultra short throw projectors, ensure the screen is positioned to accommodate the projector's specific requirements. This will help in optimizing the image quality on your wall projection screen.
Final Checks and Adjustments
Finally, perform a thorough check to ensure everything is securely installed. Test the screen with your projector to make sure the image is clear and well-aligned. Adjust the screen gain and ambient light settings if necessary to enhance the viewing experience. For more tips on enhancing your setup, consider exploring additional resources.
Optimizing Image Quality on a Wall Projection Screen
Fine-Tuning Your Projection Setup for Optimal Image Quality
Achieving the best image quality on your wall projection screen requires a combination of the right equipment and careful adjustments. Here’s how you can optimize your setup:
- Choose the Right Projector: The type of projector you use can significantly impact image quality. Consider using short throw or ultra short throw projectors if space is limited. Brands like Elite Screens and Screen Innovations offer models that work well in various settings.
- Screen Material and Color: The screen’s material and color play a crucial role. A matte white screen is often recommended for its ability to reflect light evenly. However, if you’re dealing with ambient light, consider a screen with a higher gain or a specialized material like those from Stewart or Draper.
- Adjusting the Projector: Ensure your projector is properly aligned with the screen. This includes adjusting the focus, zoom, and keystone settings. A fixed frame screen can help maintain alignment.
- Lighting Conditions: Control the lighting in your room. Too much ambient light can wash out the image. Consider blackout curtains or a tab tensioned screen to minimize light interference.
- Calibration: Regularly calibrate your projector to ensure color accuracy and brightness. This might involve adjusting the color settings or using a calibration tool.
By focusing on these elements, you can enhance the visual experience of your home theater setup, making movie nights more enjoyable.
Maintaining Your Wall Projection Screen Setup
Regular Cleaning and Dusting
Maintaining your wall projection screen is crucial for ensuring optimal image quality and longevity. Regular cleaning is essential, especially if your screen is a fixed frame model or a matte white type. Dust and dirt can accumulate over time, affecting the clarity of your projection. Use a soft, lint-free cloth to gently wipe the surface. For more stubborn spots, a mild soap solution can be used, but always check the manufacturer's guidelines first.
Protecting Against Ambient Light
Ambient light can significantly impact the performance of your projector screens. Consider using blackout curtains or shades to minimize light interference. If you're using a screen innovations model or a silver ticket screen, these are designed to handle ambient light better, but additional measures can still enhance your viewing experience.
Checking the Screen Tension
For those using tab tensioned screens, regularly check the tension to ensure the screen remains flat and wrinkle-free. This is particularly important for ceiling projector setups and ultra short throw projectors, where image distortion can be more noticeable. Adjust the tension as needed, following the instructions provided by the screen manufacturer.
Inspecting the Screen Frame
The frame of your projection screen, whether it's a draper or stewart model, plays a vital role in maintaining the screen's integrity. Periodically inspect the frame for any signs of wear or damage. Tighten any loose screws or bolts to keep the frame secure. This will help maintain the screen's shape and prevent sagging.
Updating Your Setup
Technology evolves rapidly, and so do projector screens. Keep an eye on the latest series from elite screens or other reputable brands. Upgrading your screen or projector might be necessary if you notice a decline in performance or if you're looking to enhance your home theater experience further. Consider the price and features of new items, such as short throw projectors or screens with higher gain, to determine if an upgrade is worthwhile.
Troubleshooting Common Issues with Wall Projection Screens
Addressing Image Distortion and Blurriness
One common issue with wall projection screens is image distortion or blurriness. This can often be attributed to the alignment of your projector. Ensure that your projector is positioned correctly, as discussed in the installation tips. The projector should be at the right distance from the screen, especially if you're using short throw or ultra short throw projectors. Adjust the focus and keystone settings on your projector to sharpen the image.
Dealing with Ambient Light Interference
Ambient light can significantly affect the quality of your projection. If you notice that the image appears washed out, consider using a screen with a higher gain or a matte white finish to enhance brightness. You might also want to explore options like tab tensioned screens or screen innovations that are designed to combat ambient light. Adjusting the room's lighting or using blackout curtains can also help improve image quality.
Handling Screen Material Issues
Sometimes, the material of the screen itself can cause issues. If your screen is not providing the expected image quality, check for wrinkles or damage. Fixed frame screens are less prone to these issues compared to manual screens. If you notice any damage, consult the manufacturer for repair options. Brands like Elite Screens, Draper, and Stewart offer reliable options that can minimize these problems.
Resolving Color Inaccuracies
Color inaccuracies can be a frustrating issue. Ensure that your projector's color settings are correctly calibrated. You may need to adjust the color balance or use a calibration tool. If your screen's color is off, consider repainting the wall with screen paint or investing in a new screen with a color-neutral surface. This can help achieve the desired color accuracy.
Troubleshooting Connectivity Problems
If your projector is not displaying an image, check all connections. Ensure that cables are securely connected and that the projector is set to the correct input source. If you're using a ceiling projector, verify that the cables are not damaged or loose. Sometimes, updating the projector's firmware can resolve connectivity issues.
Managing Screen Maintenance
Regular maintenance is crucial for the longevity of your projection screen. Dust and dirt can accumulate on the screen surface, affecting image quality. Clean the screen gently with a soft cloth and avoid using harsh chemicals. For fixed frame screens, ensure that the frame is secure and free from damage. Regularly check the screen's tension to prevent sagging.