
Understanding the role of a baffle wall in home theaters
What is a baffle wall and why does it matter?
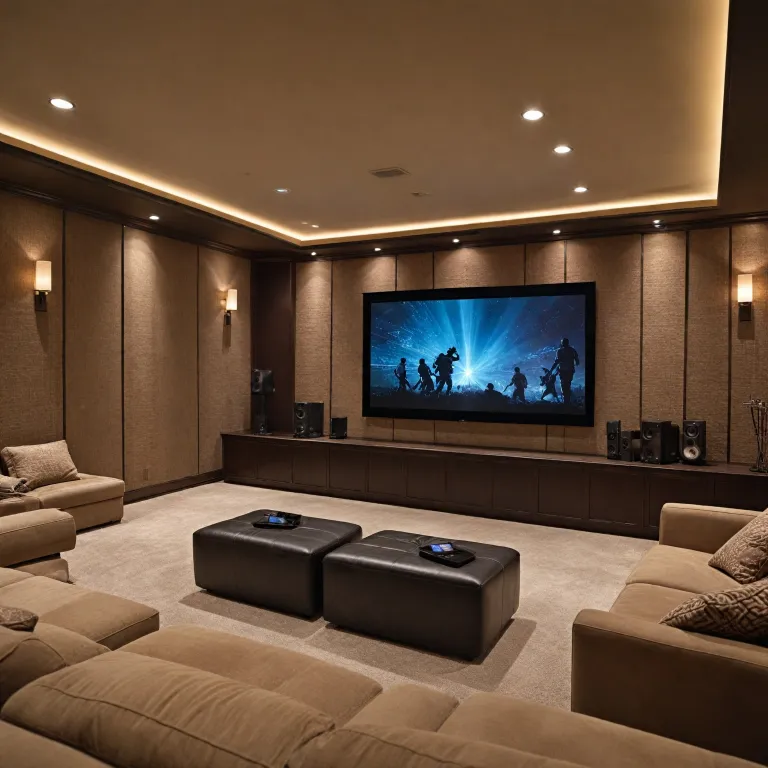
In a dedicated home theater room, a baffle wall is a specialized construction placed behind the screen. Its main purpose is to improve sound quality by providing an acoustic front for your speakers and subwoofers. Unlike a regular wall, a baffle wall is designed with acoustic treatment in mind, often using materials like fiberglass baffle panels or wall fiberglass sheets. These materials help control low frequencies and prevent unwanted sound reflections, which can muddy the audio experience.
The science behind baffle walls
Baffle walls act as both a physical and acoustic barrier. By mounting your speakers and subwoofers flush with the baffle wall, you reduce diffraction and improve the clarity of sound coming from the front of the room. This setup also helps with low frequency management, which is crucial for cinema-quality sound. Acoustic frontiers in home theater design often recommend baffle walls for their ability to enhance the performance of both speakers and the projector screen.
Materials and construction basics
Most baffle walls are built using high-density fiberglass baffle panels, which offer excellent sound absorption and resistance to moisture. The design and sizes of these panels can vary, but the goal is to create a seamless wall behind the screen that supports both acoustic treatment and the structural needs of your theater. Some products overview sheets, or data sheets, will provide NRC (Noise Reduction Coefficient) ratings to help you choose the right materials for your room.
Beyond sound: other considerations
While the main focus is on sound, a well-designed baffle wall also plays a role in the overall wall construction and water resistance of your home theater. Proper installation ensures that the wall does not become a source of water intrusion or damage. Additionally, integrating the baffle wall with your projector and screen setup is essential for achieving optimal image and audio alignment. For those interested in advanced control options, you can learn more about choosing the right PTZ camera controller for your home theater projector setup.
Key terms and data
- Baffle wall: Acoustic wall behind the screen for mounting speakers and subwoofers
- Fiberglass baffle: Sound-absorbing panel used in baffle wall construction
- NRC: Noise Reduction Coefficient, a measure of sound absorption
- Acoustic treatment: Methods and products used to control sound reflections and improve quality
Understanding the role of a baffle wall is the first step toward creating a cinema-quality experience at home. As you explore design, integration, and maintenance, keep in mind the importance of selecting the right products and following best practices for your specific room and needs.
- + 4K UHD resolution for stunning visuals
- + Dolby Sound for immersive audio experience
- + Built-in Streaming Apps for easy access to content
- + Wi-Fi & Bluetooth connectivity options
- + Compatible with game consoles and smartphones
Key benefits of installing a baffle wall
How a Baffle Wall Improves Sound and Visual Performance
Adding a baffle wall to your home theater isn’t just about aesthetics—it’s a strategic move to elevate both sound quality and the overall cinematic experience. The baffle wall acts as an acoustic treatment, managing how sound interacts with the room and the screen. By mounting speakers and subwoofers flush with the wall, you minimize unwanted reflections and diffraction, which can muddy low frequencies and reduce clarity. This design helps focus sound energy toward the audience, improving the accuracy of dialogue and special effects.
- Enhanced Sound Quality: A well-constructed baffle wall absorbs stray sound waves, reducing echoes and standing waves. This is especially important for low frequency control, where traditional walls often fall short. Materials like fiberglass baffle sheets are commonly used for their high NRC (Noise Reduction Coefficient) values, ensuring better absorption and less sound leakage.
- Improved Visuals: By integrating the speakers into the wall behind an acoustically transparent screen, you create a seamless front wall. This not only looks cleaner but also allows sound to pass through the screen without obstruction, keeping the audio perfectly aligned with the visuals.
- Flexible Design Options: Baffle walls can be customized in sizes and shapes to fit your room’s dimensions and your projector’s throw distance. Whether you’re working with a compact space or a dedicated cinema room, there are products and design approaches to suit your needs.
- Durability and Resistance: Quality baffle wall construction uses water-resistant materials and robust wall fiberglass panels. This ensures long-term performance and easy maintenance, even in rooms where humidity or water treatment might be a concern.
For a deeper dive into optimizing your space and understanding how baffle walls fit into the bigger picture of home theater design, check out this guide to optimizing your home theater space.
| Feature | Benefit | Common Materials |
|---|---|---|
| Acoustic baffle walls | Reduces echoes, improves clarity | Fiberglass, acoustic panels |
| Wall-mounted speakers | Better sound alignment with screen | Flush-mount enclosures |
| Water-resistant construction | Long-term durability | Water-treated wall fiberglass |
| Custom sizes and designs | Fits any room layout | Modular baffle products |
When considering a baffle wall, always review the data sheet for each product and consult case studies from trusted sources like Acoustic Frontiers. This ensures your wall construction meets both acoustic and visual goals, while respecting privacy policy and rights reserved guidelines for proprietary products overview.
Design considerations for your baffle wall
Choosing the Right Materials and Layout
When designing a baffle wall for your home theater, the materials and layout you select play a crucial role in both sound quality and the overall performance of your projector setup. The baffle wall acts as an acoustic treatment, helping to manage low frequencies and improve the clarity of your speakers and subwoofers. Selecting the correct wall fiberglass or fiberglass baffle products is essential, as these materials offer high resistance to sound transmission and can be tailored to different sizes and room requirements. Always review the data sheet of each product to understand its NRC (Noise Reduction Coefficient) and water resistance, especially if your room is prone to humidity.
Optimizing Placement for Projector and Speakers
The placement of your baffle wall should align with your screen and speakers to create a seamless front wall. This ensures that the acoustic baffle does not interfere with the projector’s image or the sound path. Consider the distance between the wall and your seating area, as well as the height and width of the wall screen. Proper wall construction will allow for hidden speakers behind the acoustic front, maintaining a clean look while optimizing sound dispersion. Acoustic frontiers recommend positioning speakers and subwoofers within the baffle wall to minimize reflections and enhance low frequency response.
Balancing Acoustic Performance and Visual Integration
Designing a baffle wall is not just about sound; it’s also about integrating with your room’s aesthetics and the projector’s requirements. Choose wall finishes and acoustic baffle products that complement your cinema will and privacy policy needs. For example, some baffle walls use modular panels or sheet products that can be easily upgraded or replaced as new technologies emerge. Reviewing a products overview or case study can provide valuable insights into successful wall designs and maintenance strategies. Remember, the goal is to create a wall that supports both the technical and visual aspects of your home theater, ensuring long-term performance and enjoyment.
Common mistakes to avoid when building a baffle wall
Frequent Pitfalls in Baffle Wall Construction
Building a baffle wall for your home theater projector setup can be a game changer, but there are common mistakes that can undermine your investment in sound and picture quality. Understanding these pitfalls helps ensure your wall delivers the acoustic treatment and performance you expect.
- Ignoring Proper Wall Placement: Placing the baffle wall too close or too far from the front screen can negatively affect sound dispersion and image alignment. The wall should be positioned to optimize both the acoustic front and the projector’s throw distance.
- Using Inadequate Materials: Not all products are created equal. Skimping on wall fiberglass or using non-acoustic sheet materials can reduce the wall’s effectiveness in absorbing low frequencies. Always consult a data sheet for NRC (Noise Reduction Coefficient) ratings and resistance to moisture or water, especially if your room is prone to humidity.
- Overlooking Speaker and Subwoofer Integration: Failing to properly integrate speakers and subwoofers into the baffle wall can cause sound reflections and phase issues. The baffle must allow for flush mounting and correct alignment with the screen to maintain sound quality and imaging.
- Neglecting Wall Sealing and Isolation: Gaps or poor sealing in wall construction can allow sound to leak, reducing the effectiveness of your acoustic baffle. Proper sealing also helps with water resistance and longevity of the wall and products used.
- Disregarding Room Size and Design: A one-size-fits-all approach rarely works. The design and sizes of baffle walls should match your room’s dimensions and the specific needs of your projector and speakers. Reviewing a products overview or a case study from trusted sources like Acoustic Frontiers can help guide your choices.
- Skipping Professional Guidance: DIY is tempting, but without expert input, you risk missing critical acoustic and structural details. Consulting data sheets, privacy policy, and rights reserved documentation from manufacturers ensures you use the right products and follow best practices.
By avoiding these mistakes, your baffle wall will contribute to better sound quality, improved low frequency control, and a more immersive cinema experience. Regularly reviewing maintenance and upgrade options will also help your setup perform at its best over time.
![[Built-in Official Apps/4K Support] Smart Outdoor Projector with WiFi and Bluetooth, 800ANSI Movie Projector, DoIby Audio with Dual Speaker, Auto Focus w/ YouTube&PrimeVideo Proyector, Upgrad P62 Pro Standard Black](https://www.home-theater-projector-guru.com/storage/677458/conversions/81GBqwrIy-L._AC_SL1500_-medium.webp)
- + 4K Support for high-resolution movies
- + Built-in Official Apps like YouTube & Prime Video
- + 800 ANSI Lumens for bright images
- + WiFi and Bluetooth connectivity
- + Auto Focus feature for easy setup
Integrating a baffle wall with your projector and speakers
Getting the Most from Your Projector and Speakers
Integrating a baffle wall with your home theater projector and speakers is a crucial step for achieving the best sound and image quality. The baffle wall acts as an acoustic treatment, reducing unwanted reflections and improving low frequency response. This setup ensures that your speakers and subwoofers deliver clear, accurate sound, while your projector benefits from a distraction-free wall surface behind the screen.
- Speaker Placement: The front speakers and subwoofers should be flush-mounted within the baffle wall. This minimizes diffraction and allows sound waves to travel directly into the room, enhancing clarity and imaging. Make sure the wall construction supports the weight and size of your chosen speakers.
- Screen and Wall Alignment: The screen should be positioned just in front of the baffle wall. For acoustically transparent screens, ensure the speakers are directly behind the screen, aligned with the listener’s ear level. This design lets sound pass through the screen without loss of quality.
- Material Selection: Use high NRC (Noise Reduction Coefficient) materials like fiberglass baffle panels or acoustic baffles to absorb stray sound energy. Check the data sheet for each product to confirm water resistance and acoustic performance, especially if your room faces humidity or water treatment concerns.
- Room Size and Speaker Data: Match the baffle wall and speaker sizes to your room’s dimensions. Larger rooms may require thicker walls or additional baffles for optimal low frequencies. Review manufacturer data sheets for recommended wall fiberglass thickness and speaker placement distances.
- Wiring and Access: Plan for cable management and future upgrades. Leave access panels or conduits in the baffle wall for easy maintenance or adding new products. This approach protects your investment and supports long-term performance.
For a deeper dive into acoustic frontiers and real-world results, look for a case study or products overview from reputable brands. Always review privacy policy and rights reserved statements when downloading technical data or product information. Proper integration of baffle walls, speakers, and your projector will transform your cinema experience, delivering both stunning visuals and immersive sound quality.
Maintenance and upgrades for long-term performance
Keeping Your Baffle Wall Performing at Its Best
Once your baffle wall is installed and integrated with your home theater projector and speakers, ongoing care is essential for maintaining sound quality and acoustic performance. A well-maintained baffle wall helps preserve the clarity of low frequencies and ensures your speakers and subwoofers deliver consistent results.
- Regular Inspection: Check the wall and acoustic baffles for dust, water damage, or signs of wear. Fiberglass baffle panels and acoustic treatment products can degrade over time, especially if exposed to moisture or improper cleaning products. If your room is prone to humidity, consider water-resistant materials or additional water treatment measures.
- Cleaning Tips: Use a vacuum with a soft brush attachment to remove dust from the acoustic front and wall fiberglass surfaces. Avoid harsh chemicals that could damage the fabric or reduce the NRC (Noise Reduction Coefficient) of the panels.
- Upgrading Components: As technology advances, you might want to upgrade your speakers, subwoofers, or even the projector. When doing so, review the data sheet for each product to ensure compatibility with your existing baffle wall design. Some new speakers may require adjustments in wall construction or mounting sizes.
- Monitoring Sound Quality: Periodically test your system with a variety of content. If you notice a drop in sound quality or uneven low frequency response, it may be time to reassess the acoustic treatment or consider adding more baffles. Resources like Acoustic Frontiers and case study downloads can provide valuable data for optimizing your setup.
- Documentation and Rights: Keep all product data sheets and installation guides in a safe place. This helps with troubleshooting and ensures you respect any privacy policy or rights reserved by manufacturers when sharing information or seeking support.
By staying proactive with maintenance and considering upgrades as your needs evolve, your baffle wall will continue to enhance your home cinema experience for years. Whether your room uses a wall screen or traditional projector setup, attention to detail in acoustic treatment and wall resistance will make a noticeable difference.

![[Built-in Official Apps/4K Support] Smart Outdoor Projector with WiFi and Bluetooth, 800ANSI Movie Projector, DoIby Audio with Dual Speaker, Auto Focus w/ YouTube&PrimeVideo Proyector, Upgrad P62 Pro Standard Black](https://www.home-theater-projector-guru.com/storage/677458/81GBqwrIy-L._AC_SL1500_.jpg)