Understanding Drop Ceiling Tile Projector Mounts
Drop Ceiling Projector Solutions
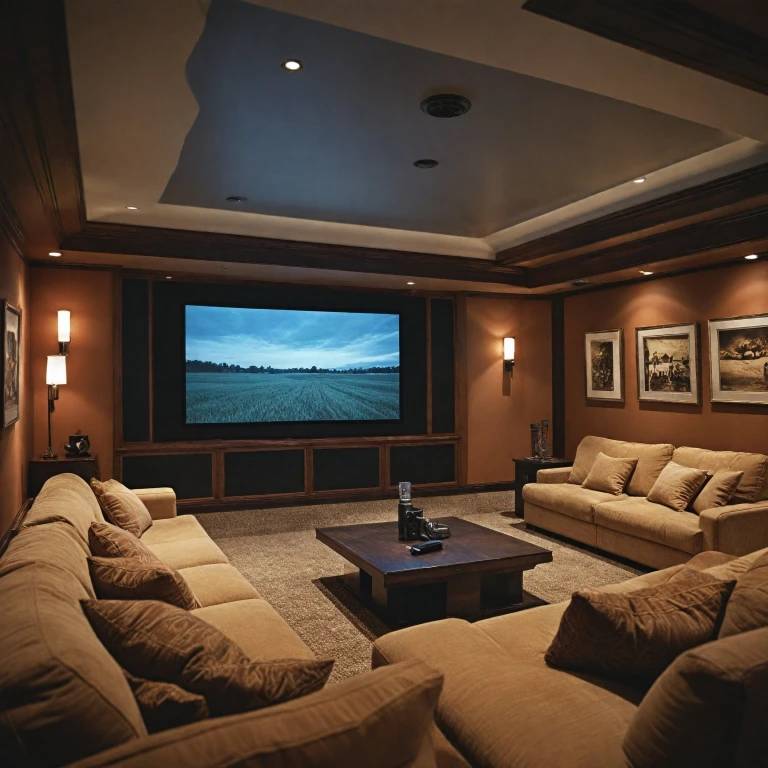
For anyone delving into the nuances of home theater setups, a ceiling tile projector mount presents itself as a crucial component. Understanding how these mounts integrate with a drop ceiling is essential in ensuring not just aesthetic appeal, but also optimal functionality. These
projector mounts are specifically designed to be suspended, providing a seamless integration that's both sturdy and visually unobtrusive.
When considering a ceiling tile projector mount, attention must be paid to the various options available in the market. Whether it's a universal projector model or those favored by professional installers, such as Chief's offerings, each has something unique to offer. The mounts often come in kit form, available in both white and black, allowing for a match with any decor.
These mounts come equipped with adjustable features—like extension options and adjustable columns—to accommodate different projector sizes and distances from the screen. For instance, the ability to modify the drop and angle can be crucial in achieving the perfect projection on your screen.
Customer reviews often highlight the ease of installation, which is further simplified by the inclusion of ceiling kits. These kits often feature the requisite accessories, including a ceiling plate and mounting hardware, to ensure a secure installation. With options that include free shipping and competitive pricing, it's easy to find a solution that fits both your needs and your budget.
Ultimately, selecting the right projector mount involves understanding not only its physical attributes but also the potential challenges and solutions that may arise during installation. Whether you are dealing with a basic tile height or a more complex suspended ceiling structure, knowing your environment will guide your choices. By doing so, you set the stage for an enhanced cinematic experience, aligning perfectly with the design and functionality expectations of your home theater setup.
Benefits of Using a Ceiling Tile Projector Mount
Advantages of a Ceiling Tile Projector Setup
When it comes to upgrading your home theater system, employing a ceiling tile projector mount offers numerous benefits that enhance both the functionality and aesthetic of your space. Here's how:
- Space-Saving Solution: Opting for a ceiling tile mount is an excellent choice to maximize your room’s usable space. By mounting your projector on the ceiling, you keep the floor clear of equipment, allowing for a tidy and organized environment.
- Optimal Viewing Angles: With an adjustable column, the mount provides flexibility in projector positioning. This adaptability ensures you achieve the perfect angle, delivering a crisp image across your screen.
- Enhanced Aesthetics: Maintaining the sleek look of your home theater is achievable with a concealed projector. Many ceiling tile mounts come in neutral tones such as white and black, seamlessly blending into any decor style.
- Increased Stability: Ceiling mounts securely attach to your suspended ceiling, offering a stable platform for your projector. This stability minimizes the impact of vibrations, ensuring a smoother viewing experience.
- Customizable Installs: Whether utilizing an adjustable extension or pre-designed ceiling kit, many mounts cater to custom installations. You can tailor your setup according to your projector’s size and your specific theater layout.
- Wide Range of Compatibility: Many models like the universal projector mounts are designed to suit various projector brands and dimensions, making it easier to adapt to existing equipment without extensive alterations.
- Ease of Access for Maintenance: Designed with practicality in mind, ceiling mounts facilitate easier bulb changes and cleaning procedures compared to ground or wall-mounted alternatives. The ceiling plate and tile suspended configurations allow quick access for periodic maintenance.
- Value and Affordability: Consideration of msrp price points and free shipping options enhances value for money. Various projector mounts come at competitive prices, with some customer reviews indicating affordability without compromising on quality.
If you're keen on enhancing your home theater experience with a ceiling-mounted projector, exploring additional insights on this dedicated topic can further guide your decision-making process.
Enhancing Your Home Theater Experience with a Ceiling Mounted Projector provides valuable perspectives on how a ceiling tile setup can elevate your viewing experience.
Choosing the Right Projector Mount for Your Ceiling
How to Select the Best Projector Mount for Your Ceiling
Choosing the right projector mount for your ceiling requires careful consideration of several factors. It’s crucial to ensure compatibility with your specific setup and requirements.
Firstly, understand the type of ceiling you have. A suspended ceiling or a drop ceiling may require a different approach compared to a flat ceiling. In suspended ceilings, a ceiling tile projector mount will be necessary, while flat ceilings might accommodate a simpler kit.
Compatibility with your projector model is key. Universal projector mounts often offer adjustable features to cater to various projector sizes and weight capacities, but it’s important to verify the mount supports your unit. Look for mounts with adjustable columns to neatly align with the screen.
The color of the mount may be a minor detail, but it can impact aesthetics. Consider options like kit white or black mounts that might better blend with your interior. Products from reputable brands like Chief provide options with various finishes and reliable performance assurance.
Moreover, consider the projector's installation height. With adjustable extension columns, you can ensure your projector mount places the unit at an optimal level for projection. Mounts covering a range of extension inch options cater to different ceiling heights.
Pricing is naturally a concern. Some mounts come with a higher MSRP price, but these may include enhanced durability or additional features, often justified by customer reviews. For budget options, check if retailers offer free shipping, which can effectively reduce overall costs.
Finally, evaluate the installation kit. A comprehensive installation guide, along with supporting hardware like drop ceiling tiles or ceiling plates, can greatly simplify the installation process. Access TM1 and speed connect mechanisms can help with easier mounting.
For more in-depth insights on understanding converters and how they enhance home theater experiences, check out this
blog post. Ensuring your projector setup is correctly connected can significantly enhance your home theater.
Installation Tips for Ceiling Tile Projector Mounts
Getting Started with Proper Set-Up
Positioning your ceiling tile projector mount correctly is crucial for optimal viewing experience. Start by determining the central point of your screen, which helps to align your projector accurately. Always ensure the adjustable column of your mount can handle the weight of the projector to prevent any accidental drops.
Setting up a projector ceiling mount can be relatively straightforward with the right tools. Gather your installation kit which might include mounting brackets, screws, and a ceiling plate. A drill with proper bit size to fit screws, a stud finder for secure placement, and a spirit level for maintaining alignment can make the process smoother and safer.
Making Adjustments for Perfect Positioning
Once the ceiling projector mount is in place, you may need to make slight adjustments for the best picture quality. Consider the projector screen size and projector throw distance. Utilizing an adjustable extension in your mount can provide flexibility for slight variations. Keep in mind that projector mounts available in black or white can match your decor, providing a seamless look.
Ensuring Safety and Stability
Safety should never be an afterthought. If using a tile suspended ceiling, confirm that the ceiling mount supports both the projector and the ceiling type. For heavier mounts like the Chief or the universal projector mount, double-check that all connections are secure. Remember, customer reviews often highlight the importance of professional installation, especially for larger models.
Final Touches and Testing
After installation, power up your projector and test the setup. Align it with your screen and make any last-minute tilt adjustments with the help of your adjustable projector column. Be ready to make small tweaks until the picture is just right. Always consider checking the manufacturer's guidelines and customer insights to avoid common pitfalls.
Common Challenges and Solutions
Overcoming Installation Hurdles
When installing a ceiling tile projector mount, several challenges may arise, even if you have a top-rated drop ceiling setup. Newly added mounts need careful handling, especially if they're of an adjustable variety. Here’s how to tackle common issues:
- Weight Limits and Structure: Ensure your ceiling tile can support the projector mount. Ideally, check both the weight capacity of your ceiling tiles and the adjustable column to accommodate projectors, especially universal projector models.
- Height Adjustments and Extensions: If you have a suspended ceiling, extension kits come in handy. Make sure to choose a ceiling mount that offers adjustable settings to match your requirements. Extensions can add versatility as they allow you to adjust the projector's height, enhancing your viewing angle on screens.
- Aligning Properly: Proper alignment is critical for a clear picture. Whether you have a black or white ceiling plate, securing it correctly affects the projector's precision. Use tools to align the projector mount accurately to avoid any tilt, which can distort images on screen.
- Cable Management: Having a clean setup requires efficient management of cables. Utilize the ceiling kit white or black covers to hide cables, ensuring a neat and tidy appearance. This increases the aesthetic and functional aspect of your home theater projector setup.
- Price Considerations: While higher-end models offer more features like speed connect, the msrp price might be higher. Strike a balance between cost and necessity. Customer reviews can provide insights into whether the price justifies the features offered by the mount.
It's important to review the installation kit materials thoroughly as each step in the setup process can be influenced by minor variables in your installation environment. For new customers venturing into ceiling projectors, free shipping offers might also be a good incentive to assist in overall savings.
Maintenance and Care for Your Projector Mount
Keeping Your Projector Mount in Optimal Condition
Regular care and maintenance of your ceiling projector mount are essential to ensure longevity and consistent performance. After investing in a drop ceiling projector mount, understanding its maintenance needs can dramatically extend its lifespan and reliability.
- Routine Dusting: Over time, dust tends to accumulate on your projector mount, particularly when installed in suspended ceilings. Use a soft cloth or a brush to lightly dust the mount, being careful around sensitive components.
- Tighten Loose Components: Regularly check if any part of the mount has come loose due to vibration or movement. Use the appropriate tools to tighten any screws or bolts, particularly on adjustable mounts and ceiling plates.
- Check the Adjustable Mechanisms: For adjustable column mounts, ensure that all mechanisms are functioning smoothly. If you notice any stiffness or difficulty in adjusting, inspect the joints for dust or impediments that may have accumulated over time.
- Evaluate the Suspension Setup: If your projector is attached to a tile suspended system, inspect the integrity of your installation kit. Ensure that the suspended ceiling tiles are correctly placed and that all attachments remain firmly in place.
- Cable Management: Proper cable management helps in maintaining the aesthetic appeal and minimizes the risk of damaging cables that might disrupt your projector's connection. Make sure that all cables are neatly secured and free from the risk of snagging.
Incorporating these routine maintenance tasks into your schedule can help you avoid common challenges and any unforeseen performance issues with your projector mount. The right attention to care can maximize its function, ensuring that your investment continues to support your home theater experience for years to come.