Understanding the Basics of Projector and Screen Compatibility
Understanding the Basics for a Top-notch Viewing Experience
When setting up a home theater, ensuring compatibility between a projector and screen is fundamental. The projector’s throw distance, meaning the distance between the projector and the screen, must align with the space available in your room. This determines whether you need a standard, short throw, or ultra-short throw projector. Evaluate your room's layout to select a projector that meets your spatial needs without compromising image quality. Choosing the best projector-screen combo may depend on various factors, including the screen material, room lighting, and projector specifications. Each factor influences the overall viewing experience, affecting image brightness, color quality, and clarity. Opt for a screen that complements your projector's abilities and room features. For instance, in rooms with high ambient light, a projector screen designed to reject ambient light can help maintain image integrity. Whether you prefer a fixed frame or a portable, floor-rising screen, it’s crucial to consider how these options fit your lifestyle. Portable screens offer flexibility and are ideal for varied locations, while fixed screens provide a more permanent solution, ideal for dedicated home theater spaces. Understanding the underlying tech specs such as aspect ratio, resolution, and connectivity options like wifi and bluetooth is essential. These elements help you achieve the best image possible, enhancing the immersive experience in your home theater. Enhance your viewing experience by ensuring that your projector and screen are perfectly paired. The right combo will provide vibrant colors and optimal visual satisfaction, making your home theater a source of entertainment joy. Explore this guide to gain more insights into choosing the perfect portable movie screen that enhances your projector setup.Choosing the Right Screen Material and Type
Deciphering Screen Types and Materials
When setting up a home theater, the selection of the projector screen is as crucial as the projector setup, significantly influencing the overall image quality and viewing experience. There are several factors to consider for selecting the right screen material and type, ensuring that the projector's capabilities are fully maximized.
Screen Types: Fixed, Portable, or Motorized
First, identify whether a fixed frame, portable, or motorized screen best suits your needs. Fixed frame screens offer a permanent, elegant solution and often provide the best tension and flatness, ensuring a consistently sharp image. On the other hand, a portable projector screen is perfect for those who need flexibility and space conservation, especially in smaller rooms or shared spaces. Motorized screens, which include electric projector screens, add a touch of luxury by allowing the screen to retract when not in use, preserving your room's aesthetics.
Material Considerations for Optimal Image Quality
Choose screen material wisely. Gain level and color are key factors. A higher gain material reflects more light towards the audience, enhancing brightness, which is particularly beneficial in rooms with ambient light. However, it might also narrow the viewing angle. For a more evenly distributed light reflection, a matte white screen is versatile, often regarded as among the top rated screens for general use.
If you're using a short throw or ultra short throw projector, tensioned screens help maintain a flat surface and reduce any image distortion or warping. Additionally, gray screens can improve contrast, beneficial for rooms where optimal lighting conditions are challenging to manage.
Aspect Ratio Alignment for Seamless Viewing
Lastly, match your screen's aspect ratio with your projector's native aspect ratio to avoid any image cutoff on the sides. Common ratios include 16:9 for most home theaters, accommodating widescreen formats, and 4:3 for older or classic films. Ensuring compatibility aligns with both the projector and the projector screens, enhancing the overall theater display.
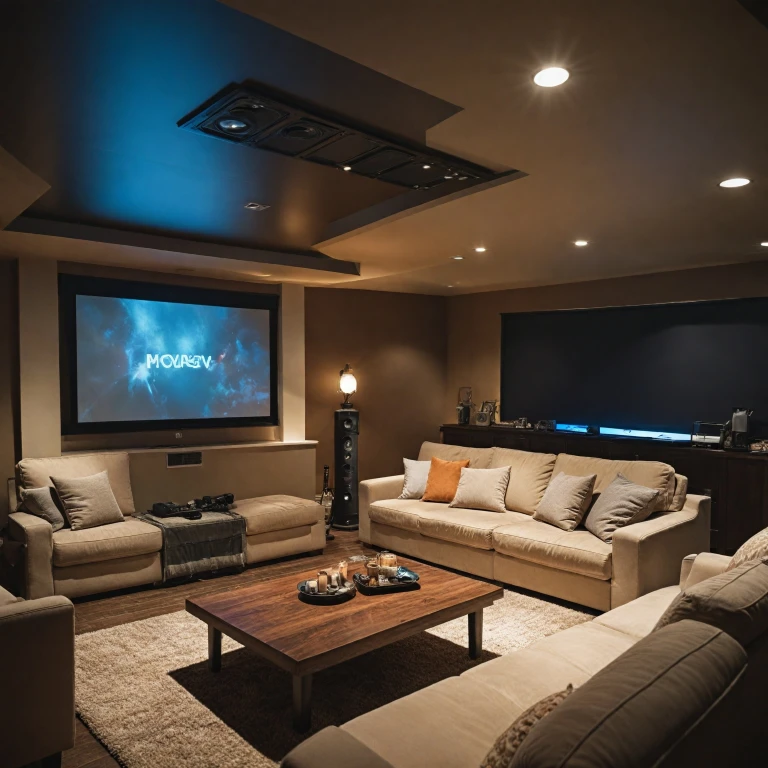
Optimal Room Setup for Your Home Theater
Creating the Perfect Viewing Environment in Your Space
Designing an optimal setup for your home theater involves more than just the right projector and screen. The room itself plays a pivotal role in enhancing the viewing experience and ensuring that the system performs to its top-rated potential. Below are some key aspects to consider:- Ambient Light Control: The best image quality is achieved when ambient light is reduced to a minimum. Consider using blackout curtains or shades to block external light sources. A room with darker walls and ceilings will also help improve picture quality by minimizing reflections.
- Acoustic Treatments: Quality sound is as important as a sharp image in a home theater. Soft furnishings, carpets, and wall drapes can help absorb sound reflections, creating a richer audio experience. This setup helps to enhance both the clarity and the immersion of the movie soundtracks.
- Room Size and Placement: The projector's throw ratio is crucial for determining where to position both the projector and screen in your room. Short throw and ultra-short throw projectors are ideal for smaller rooms, allowing for closer placement to the screen. In larger spaces, a long-throw projector offers flexibility, but require careful positioning to fill the screen fully.
- Seating Arrangement and Viewing Angles: Aligning your seats so your eyes are level with the center of the projector screen can significantly improve comfort during long viewing sessions. Ensure your seating is neither too close nor too far from the screen, typically maintaining a distance that is 1.5 to 2.5 times the screen's width.
Projector Features to Consider for a Home Theater
Key Features to Elevate Your Viewing Experience
When diving into the world of home theater projectors, it's crucial to focus on certain features that can significantly enhance your viewing experience. Here’s what to consider:
- Resolution and Image Quality: For sharp and vibrant images, opt for projectors with at least 1080p Full HD resolution. If you want to enjoy top image quality, consider 4K projectors for their superior clarity and detail.
- Lumens and Brightness: A projector’s brightness, measured in lumens, determines how well it performs in different lighting conditions. For a room with ambient light, projectors with at least 2,000 lumens are recommended. However, if your walls and curtains can block out most light, fewer lumens may suffice.
- Throw Distance and Type: Consider the throw projector category that suits your setup. Short throw or ultra short throw projectors are ideal for smaller rooms, as they can produce large images from a shorter distance. Portable and mini projectors are perfect for versatility, offering ease of use throughout various house setups.
- WiFi and Bluetooth Capabilities: Opt for a projector with wifi and Bluetooth functionalities to streamline connectivity with multiple devices, enhancing convenience and reducing clutter.
- Projection Technology: Compare DLP, LCD, and laser projector technologies to decide which aligns best with your viewing needs and budget. Laser projectors offer superior color and longevity.
- Aspect Ratio: Ensure the projector you select matches your screen's aspect ratio. The common 16:9 aspect ratio is perfect for movies and TV shows, while 4:3 is suitable for presentations.
Ultimately, the price and your theater room size will steer your projector choice. Exploring options on sale might reveal a top rated deal that fits your vision. Remember, the best projector also harmonizes with your screen material and type to deliver a seamless viewing experience.
Installation Tips for a Seamless Setup
Ensuring a Smooth and Flawless Setup
Creating an immersive home theater experience with your projector and screen combo requires careful attention to the installation process. Here are essential tips to guide you through a seamless setup, whether you're opting for a short throw, ultra short throw, or standard projector.- Choose the Right Location: The placement of your projector and screen is crucial in achieving the best image quality. Consider factors such as throw distance, screen size, and ambient light control when selecting a spot. Minimizing ambient light is key to enhancing color vibrancy and overall viewing experience.
- Install Fixed Frame Screens Properly: Fixed frame screens are highly recommended for a theater-like experience due to their sturdiness and ability to maintain a perfectly flat surface. Ensure the wall is strong enough to support the screen’s weight and follow the manufacturer's instructions to avoid any mishaps.
- Level Your Projector: Use a bubble level when mounting your projector to ensure it's aligned with the screen. This is critical for achieving an even image without distortion or keystone issues, which affect the quality and aspect ratio of the projected vision.
- Consider Ceiling Mounts: If space is tight, a ceiling mount may be beneficial. It keeps the projector out of the way while offering more flexibility in terms of positioning, especially beneficial for short throw projectors.
- Configure Settings: Once installed, take the time to configure your projector’s settings. Adjust the brightness, contrast, and color modes based on your room's unique characteristics to enhance image quality.
- Optimize for Noise Levels: Projectors can emit a certain level of noise, particularly those with built-in cooling fans. Consider installing the projector at a distance that minimizes noise disturbance during your theater sessions.
- Utilize Portable Options if Needed: For those who frequently rearrange their room or host occasional outdoor movie nights, a mini projector or portable projector screen may be the best fit due to their flexibility and ease of transport.
Troubleshooting Common Issues with Projector and Screen Combos
Tackling Common Troubles: Effective Solutions for Projector and Screen Setups
One of the joys of setting up a home theater is the promise of enjoying cinema-quality videos right in your living room. However, projector and screen combos sometimes face a variety of issues that can hinder the overall viewing experience. Here are some typical hurdles and how to overcome them: 1. Image Alignment and Keystone Distortion Uneven images or skewed edges are quite common, especially with portable projectors or in setups where the projector isn't aligned properly with the screen. To rectify this:- Ensure your projector is at the right angle relative to the projector screen – using a fixed frame or mounting it on a wall can ensure stability.
- Utilize the keystone correction feature, which most top-rated projectors include, to adjust the image and achieve a rectangular projection.
- Checking the connection cables between the projector and source device. Inspect them for damage and replace if necessary.
- Ensuring your projector settings cater to the screen material and ambient light in your room. Many projectors have specific modes for different environments that can help improve color accuracy and brightness.
- Adjust the focus ring on your projector until the image appears clear on the screen.
- Make sure the projector is positioned at the optimal throw distance as per your projector's manual. Short throw and ultra short throw projectors have specific distance requirements for maintaining sharpness.
- If you're using a wifi or bluetooth capable projector, check the wifi settings and ensure it's connected to your network properly. For newer devices, integration should be straightforward, so refer to your projector's manual if issues persist.
- For wired connections, make sure all cables are firmly connected, and for HDMI connections, use high-speed cables to avoid signal loss.
- Ensure there is adequate ventilation in your room. Leave enough space around your projector for air circulation.
- Regularly clean the projector's air filter. Dust accumulation can impair cooling, leading to higher temperatures.