Understanding Projector Types and Compatibility
Exploring Different Projector Variants
When it comes to home theater projection, understanding the various types of projectors available is crucial. You'll come across several options including DLP, LCD, and laser projectors, each offering unique benefits. DLP projectors are known for their sharp images and vibrant colors, making them a popular choice for movie enthusiasts. On the other hand, LCD projectors might be preferred for their ability to deliver bright, color-rich visuals. If you're seeking a more modern option, laser projectors provide longevity and consistent brightness, but at a higher price tag.
Ensuring Compatibility with Your Space
Before deciding on a projector, it's important to ensure its compatibility with your designated wall or ceiling space. Consider the projector's weight capacity, often measured in lbs, and the flexibility offered by lens shift features, which can help adjust the image without moving the projector physically. Understanding these parameters will guarantee that the projector is suited to your wall mount or ceiling mount setup.
Identify Your Viewing Preferences
Your choice might also hinge on how you plan to use the projector. For ultimate ease, a universal projector mount could be an ideal solution, offering adaptability in case you upgrade devices. Whether you're looking to fire up a heavy duty ceiling projector or simply mount a projector on a shelf or white wall, identifying your specific viewing needs will streamline your selection process. This will ensure that you achieve the best image results for your circumstances.
Choosing the Right Wall and Location
Selecting the Optimal Location
When determining the ideal wall and location for your projector, several factors can significantly impact the overall experience. Selecting the right spot is crucial for achieving a crisp image and ensuring your setup will be a perfect fit for your space.Assess the Wall's Suitability
Begin by evaluating the wall where you intend to mount your projector. Ensure it's sturdy enough to support the projector's weight, especially for heavy duty models. Using a projector mount shelf can provide additional support. Ideally, choose a wall that enables projections directly onto a projector screen or a white surface, minimizing reflections and maximizing clarity.Check the Room Lighting and Distance
Consider the room’s lighting and distance. A location that allows for some control over ambient light will help you achieve the best image brightness. Keep the long-throw distance in mind as you position your projector; the lens shift feature may help adjust the image without physical relocation.Calculate the Viewing Angle
It's essential for the projector to be mounted at a height and angle conducive to comfortable viewing. The projector should line up with the center of the screen, ideally at an eye level that accommodates seated viewers, avoiding neck strain. Consulting the manufacturer’s details regarding the projector's throw ratio can aid in mounting the projector to match your screen size effectively.Integrate with Existing Setup
Consider any existing components of your home theater, such as bookshelf speakers or a TV stand. The projector wall location should allow seamless integration with these elements, ensuring a cohesive setup. For additional guidance, explore how to enhance your home theater experience with a projector ceiling setup, even if mounted on a wall. Remember, choosing the right location for your projector is pivotal for a successful installation. Taking time to read and anticipate any potential adjustments will set the foundation for a top-tier home theater experience.Essential Tools and Equipment for Wall Mounting
Key Tools and Devices for Installing Your Projector
Mounting a projector on the wall or ceiling requires the right set of tools and equipment to ensure stability and optimal image projection. Before you begin, let's compile a list of the essentials that you'll need during the process. Having everything within reach will make the task more efficient, allowing you to focus on accurately setting up your projector for the best home theater experience.
- Projector Mount: Depending on your preferences, you can choose a wall mount, ceiling mount, or a universal projector mount. These mounts are a critical component and need to support the weight of your projector, often specified in lbs. Ensure you get a heavy-duty option if your projector leans on the heavier side.
- Stud Finder: If mounting to a wall, a stud finder will help locate secure mounting points within the wall studs for maximum stability.
- Drill and Bits: A power drill with the appropriate drill bits is necessary for creating holes to secure the projector mount. Ensure your drill bits match the anchor and screw sizes you plan to use.
- Level: To guarantee your projector is positioned horizontally, a level is essential. This will help prevent any undesirable shift in image.
- Screwdriver: Depending on your mount type, a Phillips or flathead screwdriver will be used to tighten screws and bolts in areas the drill might not access easily.
- Measuring Tape: Accurately measuring distance from the projector to the projector screen and to ensure alignment is key for achieving the best setup.
- Cable Management Solutions: Opt for cable ties or cable clips to organize cords neatly, enhancing aesthetics and preventing any tripping hazards.
With these tools on hand, confidence in tackling the physical installation will be higher, paving the way for a successful projector setup. Keep in mind, addressing any compatibility issues can prevent unnecessary adjustments later. It's also crucial to read the mounting instructions provided with your projector for additional specific requirements.
Step-by-Step Guide to Mounting a Projector
Initiating the Mounting Process
Mounting your projector can turn your home theater into a more immersive experience, but it requires precision to ensure the best image quality. Begin by confirming that the projector mount you have acquired is compatible with your specific projector model. Universal projector mounts often offer the flexibility needed, but it’s vital to double-check these details to avoid disappointment.Securing the Mount to the Wall
Once you have selected a good spot on the wall, align your projector mount according to the directions provided by the manufacturer. It’s crucial to ensure the screws and anchors are appropriately suited to the wall type you are installing on — whether it's drywall, concrete, or wood. Additionally, for a projector weighing more than a few lbs, opting for a heavy-duty wall-mounted design may provide the necessary support.Attaching the Projector to the Mount
With the mount securely in place, the next step is to attach your ceiling projector using the integrated brackets. This usually involves aligning the mounting holes on the projector with the mount’s adjustable arms. It’s a good practice to double-check that everything is tightly secured, ensuring it will work for long uninterrupted viewings.Testing the Projector Installation
Before tightening everything fully, power up the projector to verify the image projects correctly on the wall or screen. Adjust the lens shift if necessary to achieve the desired picture alignment. Read the instruction manual concerning your model’s specifics to best understand any adjustments necessary. A little patience at this stage goes a long way in optimizing for perfection in the final display.Cable Management and Connectivity Solutions
Efficiently Managing Cables for Optimal Connectivity
Ensuring seamless cable management and connectivity solutions is crucial when setting up your home theater projector. A clean and unobstructed setup not only enhances the aesthetic appeal but also optimizes the projector’s performance, ultimately delivering a superior viewing experience on your projector screen.
- Plan Your Cable Pathway: Determine the most efficient route for your cables, considering that the shortest path is often the best. This correlates with choosing the right wall and location for your projector, where accessibility to power sources and other devices is optimized.
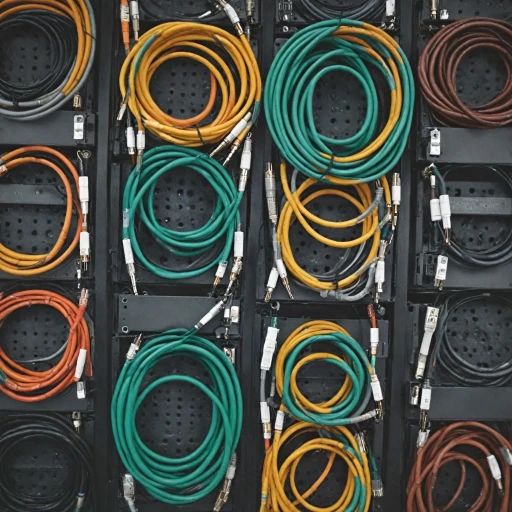
- Use High-Quality Cables: Investing in high-quality cables will ensure long-term reliability and better signal transmission, particularly important for heavy-duty and high-resolution projectors. Plus, opting for color-coded cables can prevent confusion and make maintenance simpler.
- Employ Cable Raceways or Concealers: To keep your setup organized and clutter-free, utilize cable raceways or concealers. These can be mounted along the walls or ceilings, ensuring cables are securely tucked away, maintaining the sleek look of your projector wall.
- Consider Wireless Solutions: Where possible, consider wireless HDMI adapters. These can minimize the cabling needs, reducing the cable management burden while still ensuring that your projector will work seamlessly with various media sources.
- Regularly Check Connections: Over time, connections can become loose, especially if your projector is ceiling mounted. Regularly inspect these connections to ensure everything remains in working order, maintaining a good image quality, and preventing disruptions.
Troubleshooting Connectivity Issues
Even with careful planning and execution, you might encounter some common installation issues regarding connectivity. Here are a few troubleshooting tips to consider:
- Verify Connections: Always check that cables are securely connected on both ends. Loose connections can often cause issues that mimic more serious problems.
- Test Equipment Compatibility: Ensure that all equipment, from your projector to the source devices, are compatible with each other and capable of handling the data being transmitted.
- Inspect Cable Conditions: Over time, wear and tear can affect cable performance, particularly if they’re bent or twisted. Regularly inspect cables for visible damage.
For more detailed guidance, refer to the specific setup instructions provided with your projector and other equipment. This will offer more precise solutions that are tailored to your system’s requirements.
Troubleshooting Common Installation Issues
Addressing Installation Hiccups for Smooth Viewing
Even with a thorough understanding of projector types, mounting options, and the necessary equipment, issues can still occur during or after installation. Here’s a breakdown of some common challenges and how to tackle them:
- Alignment and Positioning Problems: If your projector’s image isn’t fitting perfectly onto your screen, adjustments may be needed. This could be a simple case of using the lens shift feature if available, or repositioning the mount itself. Ensure the wall and ceiling projectors are aligned to avoid image distortion.
- Blurry or Distorted Image: Inconsistent or poor image quality could relate to the focus setting of your projector. Additionally, check the projector’s distance from the screen and whether it matches the manufacturer’s recommended throw distance.
- Connectivity Issues: When your projector will not connect with other devices, review your cable management setup. Verify that all connections are secure and cables are compatible with your projector's ports. For more complex systems, a universal cable solution may help.
- Stability Concerns: If your projector mount feels unstable, it might be carrying more weight than it should. Ensure the mount is rated for the projector’s weight (usually in lbs) and that it’s installed on a proper wall or ceiling surface. Heavy duty options may be necessary for certain models.
- Technical Setup Adjustments: Even after mounting, you might need to readjust settings for optimized performance. Check the resolution and brightness settings for a good viewing experience. Fine-tune these choices based on your projector model and room light conditions.
By addressing these common issues, you can ensure that your projector is not just mounted properly but is also operational for the best screen experience. For more detailed diagnostics, referring to your projector’s manual can also be a good resource.

