Understanding Your Projector's Specifications
Analyzing Projector Features for Optimal Installation
Before embarking on the journey of ceiling mounting, it's essential to familiarize yourself with your projector's specifications. Although projectors share common traits, each model comes with unique features that can influence the effectiveness of your setup.
- Throw Ratio: This vital specification tells you the relationship between the distance from the projector to the screen and the width of the screen. Understanding the throw ratio will guide your decisions on mounting distance, ensuring your images are sharp and appropriately sized.
- Lens Shift: Not all projectors have this feature, but it allows for minor adjustments in the image positioning without moving the projector physically. It's especially useful when fine-tuning screen height and width alignment.
- Weight and Size: The weight projector you choose will directly impact your choice of ceiling mounts. Heavier models may require robust mounting hardware, such as lag bolts, to securely anchor the unit in place.
- Installation Manual: Be sure to thoroughly review your projector's manual to familiarize yourself with specific installation guidelines and recommended mounting height.
With these factors in mind, you'll be ready to explore the best options for ceiling mounts that suit your theater room setup. For a deeper dive into projector features and mounting strategies, explore our detailed guide on Understanding the Chief Offset Fixed Ceiling Plate for Home Theater Projectors which provides valuable insights.
Choosing the Right Ceiling Mount
Selecting the Optimal Ceiling Mount for Your Projector
Choosing the right ceiling mount is crucial for ensuring your projector is securely installed and functions optimally. Here are some key considerations to help you make the best choice:
- Weight and Compatibility: Ensure the mount can support the weight of your projector. Check the projector's manual for its weight and compare it with the mount's specifications.
- Adjustability: Look for mounts that offer flexibility in terms of tilt, swivel, and rotation. This will help you achieve the perfect alignment with your screen.
- Throw Distance and Lens Shift: Consider the throw distance and lens shift capabilities of your projector. The mount should allow for adjustments to accommodate these features, ensuring the image fits your screen perfectly.
- Installation Ease: Some mounts come with detailed instructions and necessary hardware like lag bolts, making the installation process smoother. Check if the mount includes these features to avoid additional purchases.
- Durability and Material: Opt for mounts made from sturdy materials that can withstand the weight and provide long-term stability.
For more insights on choosing the right mounts, you might find this article on enhancing your home theater experience with Chief TV mounts helpful.
Once you've selected the appropriate mount, you'll be better prepared to determine the ideal placement and proceed with the installation process.
Determining the Ideal Placement
Finding the Sweet Spot for Projection
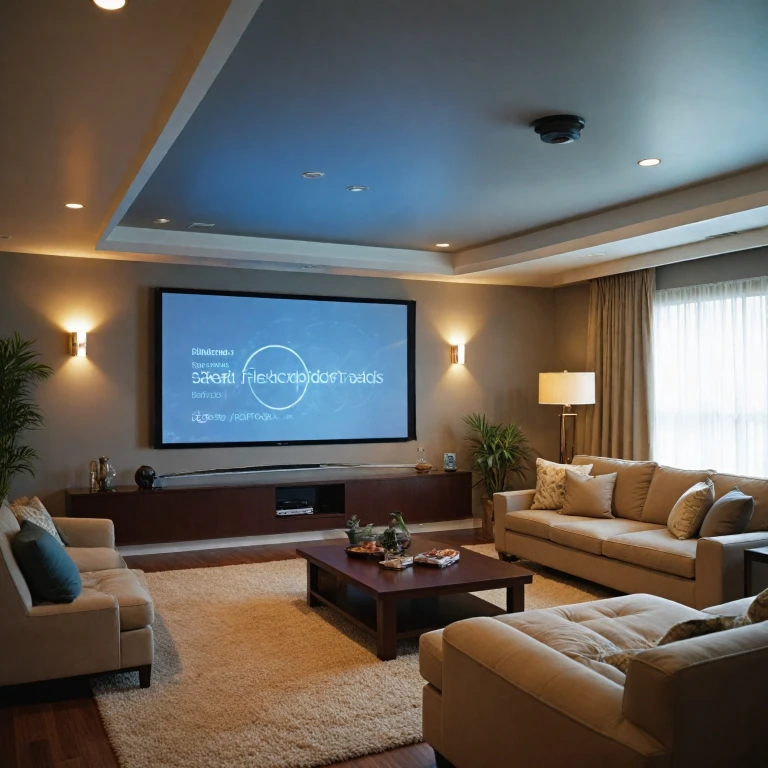
Determining the optimal placement for your ceiling projector is crucial to achieving a high-quality viewing experience. The position where you mount the projector will significantly impact the image's sharpness and alignment on the screen.- Throw Distance: First, understand the throw distance, which is the space between the projector's lens and the screen. Different projectors have varying throw ratios, which dictate the range of screen sizes that can be projected from specific distances. Typically, your projector's manual will provide guidance on the ideal throw distance for your setup.
- Projection Height: The mounting height of the projector is another vital consideration. Ideally, the lens should be in line with the top edge of the projector screen. Using the lens shift feature, if available, can help adjust the image without physically repositioning the ceiling mount.
- Room Dimensions: Assess the room size to ensure there is enough distance from the wall where the screen will be situated to the projector’s placement on the ceiling mount. This also includes taking into account any furniture or obstacles that could obstruct the viewing path.
- Screen Size: Match the projector's capability with your desired screen size. A larger screen needs more installation space between the mount and the wall, whereas a smaller screen allows for closer positioning.
- Center Alignment: To avoid distortion, the projector needs to be centered horizontally with the projector screen. Misalignment can lead to complications in achieving the best image quality.
Installation Tools and Preparation
Gather Necessary Tools and Equipment
Before diving into the installation of your projector, it's crucial to gather all the necessary tools and equipment to ensure a smooth process. Having these at hand will prevent any unnecessary interruptions and streamline the setup process:
- Ceiling Mount Kit: Ensure you have the correct ceiling mount for your projector's size and weight. This typically includes the mounting bracket, lag bolts, washers, and possibly a mounting plate.
- Drill with Appropriate Drill Bits: A drill is essential for creating holes in the ceiling for mounting. Make sure to select the correct drill bit size based on the lag bolts provided.
- Screwdrivers: Both Phillips and flathead screwdrivers will be useful for various parts of the installation.
- Stud Finder: Important for locating wooden or metal supports in the ceiling where the mount can be securely attached.
- Level: To ensure your projector will be installed evenly, reducing any image distortion on the projector screen.
- Measuring Tape: Necessary for measuring the throw distance and ensuring ideal projector placement in relation to the screen.
- Ladder: Depending on the height of your ceiling, a ladder is essential for safely reaching the mount location.
- Pencil: To mark drilling points and measurements on your ceiling.
- Cable Management Tools: Items like cable covers, clips, or zip ties can help keep cables organized and out of sight, creating a tidier appearance.
With all these tools and equipment ready, you're in an excellent position to proceed to the next step of the installation. Ensure each tool is functioning correctly to avoid any interruptions during the mounting process. It's also recommended to read through your projector and ceiling mount manual to familiarize yourself with any specific instructions or precautions.
Step-by-Step Installation Process
Installation Steps for Your Ceiling-Mounted Projector
Mounting a ceiling projector in your home theater can greatly enhance your viewing experience, but it's important to follow each step diligently for the best results. Below is a detailed guide on how to install your projector on the ceiling, ensuring optimal performance and safety.- Mark the Drill Holes - Start by ensuring you know where you want your projector. Use a measuring tape to determine the distance from the screen, considering the throw ratio of the projector for accurate placement. Mark the spot on the ceiling where you will install the projector mount, keeping in mind the center of the screen for alignment.
- Attach the Ceiling Mount - Use the pre-marked holes to attach your ceiling mount securely. Make sure it's aligned parallel with the projector screen. Tighten the lag bolts into the ceiling joists for support. Ceiling mounts vary, and it’s recommended to refer to your mount's manual for specific instructions.
- Position the Projector - With the ceiling mount installed, attach the projector. Pay attention to the weight capacity of your ceiling mount to prevent sagging. Connect the projector securely and check from all angles to ensure it's straight and centered.
- Adjust Projector Settings - Once mounted, adjust the projector settings to fit your screen size. Use the lens shift feature if available to fine-tune the picture without moving the projector. Check the image alignment by projecting onto the screen, adjusting the height and throw distance accordingly.
- Connect the Wiring - Carefully connect your power and HDMI cables. Conceal them within the ceiling for a clean look or use cable covers. Ensure there's enough slack in the cables to prevent any strain or accidental disconnections.
Troubleshooting Common Issues
Resolving Typical Challenges Post-Installation
After mounting your projector, you may encounter a few common issues which, fortunately, have straightforward resolutions.- Image Distortion: If your projector displays a trapezoidal effect instead of a rectangular screen, you may need to adjust the keystone settings. This issue is often due to the angle of the ceiling mount. Utilize the lens shift feature, if available, to correct the image alignment without compromising image quality.
- Focus Problems: Blurry images can detract from the viewing experience. Ensure the throw distance matches the projector's specifications for the screen size. Adjust the focus ring on the projector until the image sharpens.
- Screen Size Issues: If the image is too large or small for the projector screen, revisit the mounting height and distance settings. Adjust as necessary based on the projector's throw ratio. Refer to the projector's manual for specific guidance on optimal distances.
- Mount Stability: A ceiling mount should be securely affixed using suitable lag bolts matching the weight of the projector. Check all mounting projector points to ensure there is no wobble or movement, as this could affect the image stability.
- Connectivity Problems: Ensure all cable connections between your projector and media sources are tight and secure. If using a laser projector, verify that all HDMI cables are correctly positioned.