Understanding Motorized Projection Screens
Motorized Projection Screen Basics
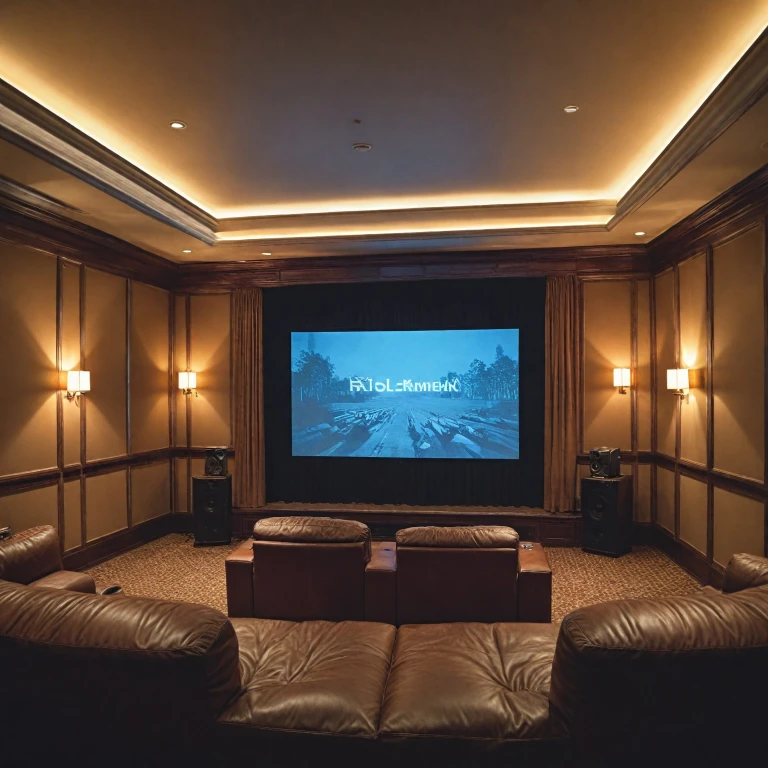
When planning to enhance your home theater setup, understanding the fundamentals of a motorized projection screen is crucial. These electric screens stand out from regular mounted screens due to their ability to be retracted at the push of a button, offering convenience and a clean aesthetic. With an array of options available, selecting the right screen depends on various factors including price, quality, and the intended use.Motorized screens can be ceiling mounted or wall ceiling mounted, adapting to diverse room layouts. One of their notable advantages is the effortless concealment, allowing for a more streamlined space when the screen is not in use. Brands such as Draper and Grandview offer high quality options in both white and light tensioned versions to suit different preferences.
For those hosting a video or HDTV event, incorporating a truss can significantly stabilize the motorized screen setup. The truss ensures consistent screen tension, providing a superior viewing experience akin to a professional cinema. Popular choice screens like the fast fold and screen quick can be further enhanced with the stability and precision of a truss, integrating seamlessly into various entertainment environments.
The motor of a motorized screen plays an essential role, ensuring the screen operates smoothly with low noise. Whether opting for a budget-friendly solution or a top-tier product, considering a motor with low noise can make a substantial difference in the overall ambiance of your home theater.
For those looking to delve deeper into enhancing their home theater setup, check out this insightful article on retractable cinema screens.
Benefits of Using a Truss for Your Projection Screen
Leveraging Truss Systems for Projection Screens
When it comes to setting up your home theater, the choice of supporting structures can significantly impact both the aesthetics and functionality of your projection system. One such option that's gaining popularity is the screen truss. These systems not only provide a sturdy frame for your projection screen but also enhance the overall viewing experience.Why Opt for a Truss?
Utilizing a truss system brings several advantages:- Strength and Stability: Trusses, with their sturdy construction, offer reliable support for electric projection screens. Whether it's a heavy motorized model or a lite tensioned version, a truss ensures your screen remains taut and stable.
- Adaptability: With the ability to mount a screen in various positions, trusses allow greater flexibility in your home theater arrangement. You can even opt for a ceiling mounted setup that integrates seamlessly into your space.
- Ease of Installation: Trusses simplify the installation process. Regular and motorized projection screens can be quickly and securely attached, saving both time and effort.
- Versatility in Design: For those concerned about aesthetics, trusses can be customized to match any decor. Whether it's for a regular viewing session or a special event, they provide an elegant solution.
Cost-Effectiveness and Quality
Balancing budget and quality is crucial when dealing with projection screen installations. Trusses are a cost-effective choice, offering a premium setup at a regular price. The combination of high quality materials with low maintenance requirements makes them a valuable investment. Moreover, whether you're using a popular choice like a fast fold system or a more customized option, trusses can accommodate all types of electric screens and projectors. You achieve optimal video quality without compromising on style. For more information on how to enhance your viewing experience with a roll-up projector screen, visit Enhance Your Viewing Experience with a Roll-Up Projector Screen. This guide provides insights into screen choices that complement a truss system, ensuring a comprehensive home theater setup.Choosing the Right Projector for Your Setup
Finding the Perfect Projector for Your Home Theater Setup
Selecting the right projector is pivotal for creating an immersive home theater experience. The ideal choice will depend on several factors, including room size, intended use, and budget. Here's a guide to help you navigate these considerations:- Understand Screen Size and Throw Distance: The projector you choose should work harmoniously with your motorized projection screen. Consider the dimensions of the room and the screen truss setup. Opt for a projector with a throw distance that matches your space and provides a clear view at a comfortable distance.
- Brightness and Image Quality: Look for projectors with high lumens for a bright, vivid display. This is especially important for rooms that are not completely dark. Coupling an HDTV-capable projector with electric projection screens can enhance image clarity and color accuracy, providing a true cinematic experience.
- Resolution Matters: To fully enjoy your video content, a projector with at least 1080p resolution is recommended. However, with the decreasing price of 4K projectors, upgrading to a higher resolution could be a wise investment for sharper image quality and future-proofing your setup.
- Consider the Motor: The motor in the motorized projection setup can affect the projector choice too. A motor low in noise is preferable to ensure the sound quality of your home theater remains unaffected. Align the motorized projection screen with a quiet motor for optimal results.
- Budget and Brand: Factor in the regular price and potential deals on popular choices like Cad Grandview or Fast Fold projectors. Often, these brands provide high quality and reliable options, ensuring a seamless integration into your ceiling mounted or wall ceiling setup.
Installation Tips for a Motorized Screen on a Truss
Setup and Installation Made Easy
When it comes to setting up a motorized projection screen on a truss, achieving that seamless viewing experience requires careful planning and execution. Here's a concise guide to simplify the installation process:- Choose the Right Location: Ensure the truss is appropriately positioned for optimal viewing angles and minimal obstructions. This could be mounted on the ceiling or a wall ceiling hybrid, depending on your space and preferences.
- Assemble with Care: Begin by securing your screen truss. Electric projection screens often come with user manuals that detail the assembly process. These screens typically offer an electric motor that provides smooth operation, whether you opt for a fast fold or other configurations. Check if components like the motor low or cad grandview are included and functional.
- Secure the Screen: Carefully mount the motorized projection screen on the truss, ensuring it's well-aligned for an even picture. Consider using lite tensioned screens as they ensure reduced creasing and provide a high quality, professional look for your video or hdtv content.
- Check Connectivity: Ensure all cables and connections are secure and concealed where possible, to maintain a clean setup that doesn’t distract from the projection screen's view.
- Calibration: Once mounted, adjust screen settings using the remote control or manual switches to perfect your setup. Many electric screens allow customizable settings for picture clarity and size, so test with different inputs to optimize quality.
- Regular Maintenance: To ensure longevity and prevent common issues, regularly inspect your setup. This includes checking for dust, motor function, and the screen’s tension and alignment.
Optimizing Your Home Theater Experience
Maximizing the Enjoyment in Your Home Cinema Setup
Creating the ideal home theater experience involves more than simply selecting the right projector and motorized screen. Here are some considerations to enhance your viewing:- Screen Positioning: Ensure your projector screen is properly aligned with your viewing area. The motorized screen, when mounted on a truss or wall ceiling, should provide an optimal view without obstructions.
- Lighting Control: Implement blackout curtains or shades to reduce ambient light interference, enhancing image quality. For electric projection screens like a draper, adjusting for room lighting conditions is essential.
- Audio Considerations: Pair your high-quality visual setup with an equally impressive audio system. The sound should match the scale of your projection screen whether it’s a regular price setup or a higher price CAD grandview.
- Seating Arrangement: Position seating at a distance that allows full immersion into the video. Be mindful of screen size when considering distance to maintain comfort without straining your eyes.
- Regular Maintenance: Keep your motorized projection screen and projector clean. The electric screens require minimal motor low maintenance but regular cleaning helps maintain screen white quality.
- Advanced Features: Utilize features like lite tensioned and fast fold screens for flexibility in different viewing situations, whether for a casual home event or a cinema-style experience.
Troubleshooting Common Issues
Resolving Common Motorized Screen Issues
When it comes to enhancing your home theater with a motorized projection screen, occasional hiccups can occur. Here are some common issues and how to troubleshoot them effectively:
- Screen Not Lowering or Raising: If your electric projection screen is not responding, check the power source first. Ensure the motor is receiving power by verifying connections and testing the outlet. If the issue persists, consult the manual for motorized projection screens for specific troubleshooting steps.
- Uneven Screen Movement: An uneven roll can affect the quality of your video display. This might be due to an obstruction in the screen path or a misalignment in the motor. Inspect the screen path for any blockages and ensure the screen is properly aligned with the truss.
- Screen Wrinkles or Waves: Over time, screens can develop wrinkles, impacting the viewing experience. Consider using a lite tensioned screen to maintain a smooth surface. Regular maintenance and proper installation on a truss can help prevent these issues.
- Remote Control Malfunctions: If the remote control is not working, check the batteries first. If the problem continues, try resetting the remote or consult the manufacturer’s guidelines for troubleshooting electric screens.
- Motor Noise: A noisy motor can be distracting during an event or movie night. Ensure the motor is securely mounted and not vibrating against the ceiling or wall. If noise persists, it might be time to consult a professional for motor low adjustments or replacements.
By addressing these common issues, you can ensure your motorized projection screen remains a popular choice for high-quality home theater experiences. Regular maintenance and proper installation on a truss will help maintain the screen's performance and longevity.