Understanding Back Projection Technology
The Science Behind Back Projection Systems
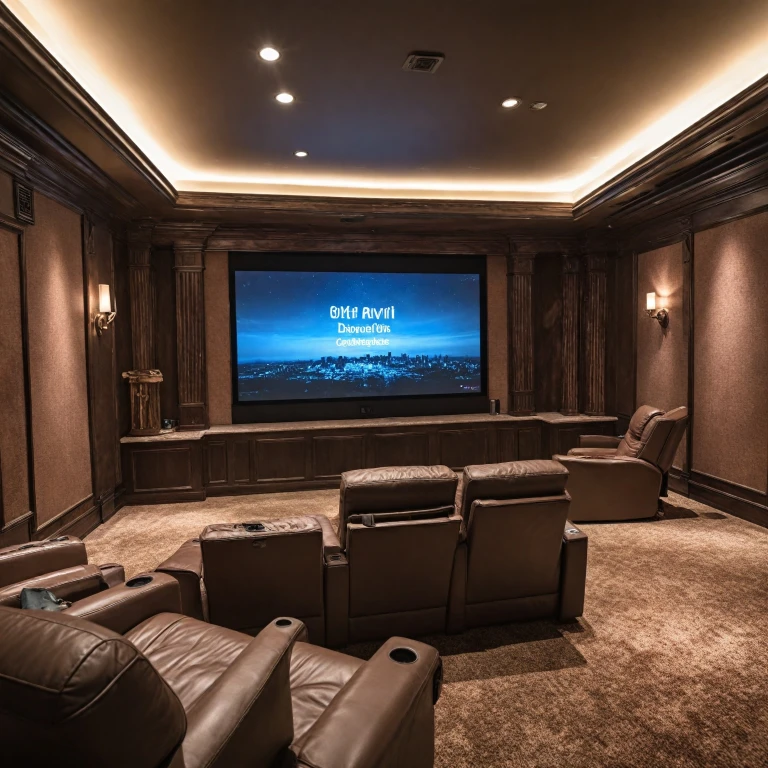
When delving into the world of home theaters, one might hear about back projection technology. It’s a type of display system where the projector is located behind the screen, offering unique advantages and presenting some challenges. Back projection systems use screens that allow light to pass through from the rear, creating vivid images. This is unlike front projection, where the projector casts an image directly onto the screen from the front. The subtle differences in these setups can impact factors like light diffusion and viewing angles. In front and back projection systems alike, the projector plays a crucial role. Some may opt for a rear projector as it allows for the light source to remain out of view, reducing distractions. This setup can transform ordinary spaces into full-fledged theaters with the right equipment and adjustments. Selecting an appropriate projection screen is crucial. Options range from portable projector screens that are great for indoor outdoor use, to more permanent installations like the Yard Master and other elite screens. These choices influence the quality of your image, directly impacting your viewing experience. A popular choice within back projection setups is the short throw or even ultra short throw projector. These projectors can be positioned close to the screen, saving valuable space and often providing a wider field of view. However, an essential consideration in choosing this technology is ambient light. Unlike in settings optimal for front projection, ambient light can affect the image clarity on a rear projection screen. It’s important to control lighting conditions to maximize your setup's potential. Ultimately, understanding how back projection works is the first step toward creating a stunning home theater setup. With the right adjustments, it delivers a seamless integration of image, screen, and space, promising an enhanced entertainment experience. For a deeper dive into optimizing your viewing experience, consider exploring our writing about the AEON CLR 3 AR123H-CLR3.Advantages of Back Projection Screens
Unlocking the Benefits of Rear Projection Systems
Rear projection screens bring several advantages to your home theater experience, creating an immersive and high-quality viewing ambiance. When compared to front projection, rear projection offers some distinctive benefits, making it an appealing option for both indoor and outdoor setups. One of the primary advantages of rear projection systems is the flexibility in projector placement. With rear projection, the projector can be positioned behind the screen, preventing any obstruction in the viewing area. This results in a clean and uncluttered theater space, crucial for both aesthetics and functionality. As a result, you gain a seamless and cinematic image quality, enhancing every movie night or viewing session. Moreover, rear projection excels in environments with ambient light. Unlike front projection screens that may struggle in brightly lit rooms, rear projection screens can maintain vibrant and sharp images. This makes them a favored choice for settings where managing light levels is challenging, such as outdoor environments or indoor settings with large windows. Portability is another aspect where rear projection shines. With products like the Yard Master Portable Series or the Elite Screens', you can effortlessly set up projection in different locations. Whether it’s an impromptu outdoor gathering or an indoor celebration, portable rear projection screens offer adaptability, allowing you to create a theater atmosphere in various settings. Cost considerations often play a significant role in choosing between front and rear options. While rear projection screens can be on the higher end of the spectrum, it's essential to weigh these costs against the long-term benefits and versatility. The initial price may be higher, but investing in a product with a dedicated screen surface will ensure enduring image quality and satisfaction. Ultimately, the choice of a rear projection setup comes down to evaluating your theater's specific needs and environment. Whether it's for a professional indoor cinema or a casual outdoor movie night, rear projection systems have the potential to elevate your viewing pleasure, leaving audience members captivated by the vivid imagery and immersive experience. For more insight into enhancing your viewing experience with large screens, consider exploring large projection screen benefits on the Home Theater Projector Guru blog.Choosing the Right Screen Material
Key factors for optimal projection surface
When it comes to rear projection screens, choosing the right screen material is pivotal in obtaining the best image quality. Different screen types offer various benefits, hence matching the material with your specific projection setup is crucial. Here, we'll delve into aspects that help determine the most appropriate screen for your home theater needs.
Firstly, consider the screen surface. High-gain surfaces can enhance brightness in rooms with more ambient light, while a matte finish may help reduce glare, offering better image visibility and color accuracy in darker settings. The size of your projection screen, often measured in inches, should align with your projector’s specifications, ensuring a suitable fit for your viewing distance and room size.
A major consideration is the light environment where your projector will be deployed. If you plan to use your projector in diverse environments, such as both indoor and outdoor settings, a portable projector screen or screens yard that can adapt to varying light conditions and settings, becomes particularly important. Additionally, an ultra short throw projector can reduce shadow obstruction compared to traditional front or rear projectors.
For those prioritizing a seamless integration into living spaces, considering products like the Yard Master or solutions from Elite Screens can provide high quality and versatility. The screen stand capability of these options allows for flexible use and easy storage. For a more permanent solution, investigating the most suitable mounting option can further optimize viewing pleasure. Delve into ongoing discussions about how to choose the perfect material for your media space.
Finally, balance your needs with your budget. Understanding price points and what each product delivers in terms of quality and features ensures you make sound investments. Being informed about cost-effective options among projector screens aids in achieving an enhanced cinematic experience without breaking the bank.
Setting Up a Back Projection System
Steps to Set Up Your Back Projection System
Creating the ultimate home theater with a back projection setup involves several key steps to ensure high image quality and an immersive viewing experience. Here's how to get started:
- Selecting the Right Space: Choose an area with controlled lighting conditions to minimize issues with ambient light interference. Whether indoors or outdoors, ensuring the right light setting will significantly impact the projected image quality.
- Choosing Your Projector: Decide between a short throw or standard rear projector depending on your available space. Short throw projectors are ideal for smaller spaces as they require less distance between projector and screen.
- Setting Up the Screen: Install your screen ensuring it's positioned correctly for rear projection. An excellent choice could be a portable projector screen or screens with a screen stand for flexibility, especially if you plan to use it both indoor and outdoor.
- Calibrating the Projector: Adjust the projector settings to optimize image contrast and sharpness. Align the projector so that the image fills the screen without distortion. Fine-tuning color and brightness can help achieve the desired clarity, even on screens up to 100 inches.
- Considering Screen Surface: Select a screen surface designed for back projection to enhance image brightness and contrast. Products from elite screens and other reputable brands may offer specialized surfaces for such purposes.
- Evaluating Your Setup: Test the system with different video content. Check if there are any adjustments needed in terms of projector positioning or screen angle to improve the delivery of the image.
This process can also be applied to outdoor settings, where a yard master or screens yard setup might be employed to deliver a cinematic outdoor experience. Remember, every element from projector selection to projection screen type will influence the overall performance of your home theater system.
Common Challenges and Solutions
Troubles You Might Encounter in Rear Projection Systems and How to Fix Them
Setting up a rear projector system can be a great way to enhance your theater space, whether it's indoor or outdoor. However, as with any technology, there are potential challenges that might arise. Below, we'll discuss some common issues and offer practical solutions.Dealing with Ambient Light Interference
Ambient light can greatly affect the image quality on a projection screen, particularly in an indoor setup. If your screen surface is not optimized for such conditions, you might experience dim or washed-out images. To mitigate this, consider using projection screens with ambient light rejection (ALR) technology. These are designed to reflect the projector's light back to the viewer while minimizing ambient light interference. Additionally, using draper curtains can help control the light entering your theater, enhancing the delivery of vibrant pictures.Addressing Short Throw and Ultra Short Throw Projection Issues
Short throw and ultra-short throw projectors are popular for their ability to project large images from a short distance, making them ideal for small spaces. However, incorrect calibration can lead to distortion or keystone effects. Ensure your projector is correctly aligned with the projector screen, and use the projector’s settings to adjust for any image distortion. Portable projector stands can also assist in achieving the right setup.Tackling Rear Projection Screen Setup Complications
Rear projection screens can deliver stunning visuals, but the setup might pose challenges, especially with portable systems. Proper alignment and avoiding obstructions behind the screen are key. Make sure you have a clear, unobstructed space for your projector and screen, potentially utilizing a screen stand or mounting system for stability. The Yard Master series, known in the market for its robust design, can offer mobile flexibility while maintaining a high-quality viewing experience.Handling Costs and Budget Constraints Effectively
One crucial aspect is ensuring the entire projection setup fits within your budget. Prices can vary based on the system complexity, including elite screens, rear projectors, and related products. To manage costs, you can start with affordable products and upgrace as your needs expand. It's also wise to explore different delivery options that cater to both front and rear projection screens, including various inch projector sizes, from the cost-effective 100-inch displays to more expansive options tailored for large theater experiences. Navigating these challenges successfully requires understanding your specific theater requirements, choosing the right products, and strategically setting up your projector system for the best image quality. Ensuring appropriate planning and setup will enhance both the indoor and outdoor viewing experiences in your home theater.Cost Considerations and Budgeting Tips
Evaluating Expenses and Making Smart Purchases
Investing in a rear projection system for your home theater can be a substantial financial commitment, but with careful planning, you can maximize the value of every dollar spent. When considering costs, think about the following aspects:- Initial Investment: The price of projection screens and rear projectors varies greatly based on features and quality. While portable projector solutions offer flexibility, options like Elite Screens provide high-quality images but may come at a premium cost. Opt for a product that balances both budget and needs, ensuring that the screen material and surface are conducive to the intended projector.
- Additional Components: You might need screen stands, a Yard Master for outdoor use, or an ultra short throw projector for indoor setups. These additional pieces factor into the overall budget and delivery expenses.
- Operating Costs: Rear projectors may consume more power, and replacement of projector lamps can add to the maintenance expenses. Consider these ongoing costs while budgeting.
- Space Considerations: The dimension, such as 100 to 120-inch screens, and how many inches of throw distance you can accommodate, aren't just space questions—they also affect cost. Indoor and outdoor settings may require different screen needs.
- Projection Setup Environment: Rooms with significant ambient light might need higher quality screens to enhance image clarity, potentially raising costs. On the other hand, properly adjusting the screen, whether for front projection or rear projection, can mitigate such effects without added expenditure.