Understanding the Basics of Golf Simulator Projectors
Deciphering the Fundamentals of Golf Simulator Projectors
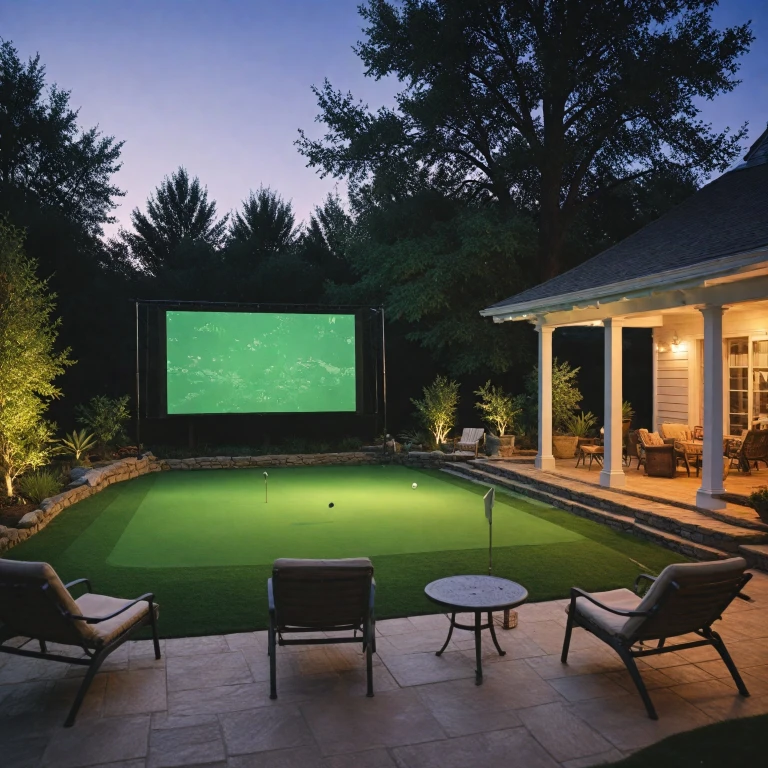
When embarking on the journey to enhance your golf simulator with the perfect projector, it's essential to grasp the basics. Understanding what makes a golf simulator projector stand out begins with recognizing the importance of its key attributes, such as throw distance, resolution, and brightness. A "throw projector," specifically a "short throw projector," proves crucial due to space constraints often found in home environments. These projectors are designed to project a large image from a short distance, ensuring you can fill your "impact screen" effectively without needing an extensive "throw distance." "Brightness," measured in "lumens," plays a pivotal role. Ideally, projector models with higher "benq lumens" can serve well in varying lighting conditions, crucial if your golf simulator isn’t in a completely darkened room. Opting for a projector with robust lumens output can immensely enhance your "projected image." "Resolution" is another cornerstone of the ideal golf simulator experience. A higher resolution projector ensures a crisp and clear display, vital for seeing every detail on your "screen," ultimately refining your swing and performance. Furthermore, the "aspect ratio" and "throw ratio" are key dimensions influencing your choice. Choosing a projector that maintains the "best" aspect and throw ratios compatible with your "golf simulator" setup guarantees seamless integration and performance. With the variety of projectors available, from "projector golf" models optimized for indoor use to powerful "laser" projectors, your selection should harmonize with the specifics of your available space, enhancing your golf experience. Considering options can feel overwhelming. Weighing factors such as "keystone correction," "input lag," the type of "light source," and whether it will require specific considerations like how to "mount projector," can determine your success in assembling a top-notch golf simulation setup. Ultimately, choosing between a projector and a smart TV for your home theater might also cross your mind. For insights, explore this projector vs. smart TV guide to inform your decision-making process.Choosing the Right Projector for Your Space
Key Factors to Consider When Selecting a Simulator Projector
When setting up your golf simulator, the choice of a projector is crucial to enhance your experience. Start by considering your space and throw distance. This will help you determine whether a short throw projector is suitable, as it allows for placement closer to the screen, reducing shadows and maximizing use of your room.
Assess the brightness level you need. Typically measured in lumens, brightness is vital for clear image quality. For golf simulators, look for projectors between 2,000 and 3,000 lumens. Models from brands like BenQ often offer this range, ensuring vibrant images even in well-lit environments.
Resolution and aspect ratio are also significant factors. A resolution of at least 1080p is preferable for a sharp projected image, while knowing the aspect ratio of your screen - usually 16:9 - ensures the image won't appear stretched or compressed.
Consider the throw ratio, which affects the size of the image at a given distance. A lower throw ratio means a larger image from a shorter range, ideal for restricted spaces. Additionally, keystone correction is a useful feature to look for, as it allows you to adjust the image to be square and straight, even if the projector is mounted at an angle.
Lastly, think about the type of light source. Laser projectors, although more expensive, offer longer lifespan and consistent brightness compared to their lamp counterparts. And don’t forget to check the input lag, especially if you plan to use the projector for gaming or fast-paced simulations.
Comparing Projector Technologies
Exploring the Different Technologies in Projectors
Selecting the ideal projector for your golf simulator involves understanding the array of technologies available. These technologies not only influence the projected image but also affect the overall performance of the simulator. Let’s break down the differences to guide you toward the best choice for your space.Laser vs. Lamp Projectors
Laser projectors are gaining popularity due to their long-lasting light source and consistent performance. They offer superior image brightness and require less maintenance over time compared to traditional lamp projectors. On the other hand, lamp projectors might be initially less expensive, but they often need frequent bulb replacements, affecting the overall cost. For those curious about an in-depth comparison, consider checking more about laser and lamp projectors for your simulator setup.Brighten Your Game with Lumens
The projector’s brightness, measured in lumens, plays a pivotal role in ensuring a clear and vivid golf simulation experience. A higher lumen projector, such as those offered by BenQ, ensures that your simulator can deliver bright, impactful images, even in well-lit rooms.Resolution and Aspect Ratios
High-resolution projectors guarantee crisp, detailed images which are crucial for realistic golf simulators. Additionally, understanding the aspect ratio of your projector is essential to ensure the image fully occupies your impact screen without distortion.Short Throw vs. Standard Throw Projectors
Short throw projectors are ideal for limited spaces, allowing the device to be placed closer to the screen while still providing a large image. By offering a reduced throw distance, short throw projectors reduce shadowing which can be a distraction during your game. Whereas, standard throw projectors need a greater distance, which could require more space in your setup. As you weigh these options, take into consideration the space you have dedicated to your golf simulator and your budgetary constraints. Each of these projector types can provide solid performance, but the right choice depends on your specific needs.Setting Up Your Golf Simulator Projector
Setting Up for Success
When configuring your golf simulation experience, properly setting up your simulator projector is key to achieving the best results. Begin by determining the optimal throw distance and throw ratio for your projector. This is essential not only to fill the impact screen effectively but also to ensure that the projected image maintains optimal resolution and aspect ratio. Before mounting your projector, consider if a short throw or long throw projector will suit your space better. Short throw projectors are ideal if you have limited space, as they can project large images from a shorter distance, minimizing shadow and maximizing your golf simulation environment.Finding the Right Mount
To mount the projector, choosing between ceiling or floor mounting depends on your room configuration, ceiling height, and average throw distance. Ensure that once mounted, the projector is aligned with your impact screen to avoid distortions. Many modern projectors, including models from BenQ, come with keystone correction and lens shift features to help adjust and maintain the desired image formation.Adjusting Brightness and Resolution
When setting up your simulator projector, brightness is a crucial factor. Lumens determine how well the image will perform under various lighting conditions. For golf simulators, a projector with a minimum of 3000 lumens is recommended to combat ambient light and ensure clarity. Look out for projectors that support high resolutions; 1080p or even 4K resolutions are best for a detailed simulation experience.Addressing Input Lag and Connectivity
Lastly, evaluate the projector's connectivity options and input lag, as these will affect your interactive experience. Lower input lag is vital for real-time responsiveness during golf simulation. Ensure HDMI or other relevant ports are available for seamless connection with your simulation equipment. By adhering to these setup guidelines, you'll create an immersive golf simulator experience that stands out in both performance and longevity.Maintaining Your Projector for Longevity
Regular Cleaning and Dust Management
To keep your golf simulator projector running smoothly, regular cleaning is essential. Dust can accumulate on the lens and internal components, affecting the projected image quality. Use a microfiber cloth to gently wipe the lens and ensure the projector's vents are free from dust. This helps maintain optimal brightness and resolution.
Monitor the Light Source
The light source, whether it's a lamp or laser, is crucial for maintaining the projector's brightness. Check the lamp hours regularly if your projector uses a lamp. Replacing it before it burns out can prevent sudden interruptions during your golf simulation sessions. For laser projectors, ensure the cooling system is functioning well to extend the light source's lifespan.
Adjusting the Throw and Aspect Ratio
Maintaining the correct throw distance and aspect ratio is key to a seamless golf simulation experience. Regularly check that your projector is properly aligned with the impact screen. Adjust the throw ratio and keystone correction settings to fill the screen accurately, ensuring the best image quality.
Software and Firmware Updates
Keep your simulator projector's software and firmware up to date. Manufacturers like BenQ often release updates that improve performance and fix bugs. Regular updates can enhance the projector's functionality and compatibility with golf simulators.
Inspecting Mounts and Connections
Regularly inspect the projector mount and all cable connections. A secure mount prevents misalignment, while checking cables ensures a stable connection, reducing input lag and maintaining a smooth projected image. This attention to detail can significantly enhance your golf experience.
Troubleshooting Common Projector Issues
Identification of Typical Projector Problems
A well-set-up golf simulator projector can elevate your game, but like any technology, projectors come with occasional hiccups. By identifying common issues early, you can minimize downtime and maintain an optimal setup.
Visual Problems: Poor Image Quality
Image quality issues often arise due to projector placement or settings. Ensure your projector's throw distance and throw ratio are appropriate for your space to optimize the projected image size. If your simulator uses a short throw projector, precise positioning is key. Projector technology, like laser sources, often offers stable brightness levels and acceptable resolution over time. Regularly adjusting keystone correction can help maintain the projector’s squared and proportional image on the screen.
Light and Brightness Issues
Projectors, such as those from BenQ, offer varying lumens levels, which is a determinant of brightness. If the image appears dim, check the lamp's condition, or consider increasing your light source. Over time, projector lamps dim, which can affect brightness. It's often necessary to replace the lamp or consider upgrading to a higher lumens projector for that daylight golf simulator experience.
Technical Challenges: Connectivity and Setup
Connections for golf simulators can introduce challenges. Ensuring all cables are secured tightly can resolve input issues. Always inspect the HDMI or other input ports for wear or dust. Minimizing input lag requires the latest firmware updates; manufacturers often address common software issues through updates.
Environmental Impact: Space and Setup
Your simulator's space and screen setup can impact the performance. An impact screen of the right aspect ratio is vital for a smooth projected image. Assess your room's acoustics and lighting conditions actively, as ambient light can lead to washed-out images. Adjusting your room setup or using projector mounts can provide more flexibility with visual aspects.
Routine Maintenance Tips
Maintain your simulator projector by keeping it clean and dust-free. Regular cleaning of filters and fans prolongs the lifespan of the projector's components. Engaging in monthly checks of key settings such as the throw distance, aspect ratio, and brightness levels can ensure you extend your projector's lifespan significantly.
Seek Professional Help When Needed
Some problems may persist despite your best efforts. In such cases, seek expert assistance. Professionals familiar with projector installation can provide insights or even potentially recommend upgrades tailored to your golf simulation needs.