Understanding Dry Erase Projectors
Unveiling the Connection Between Whiteboards and Projectors
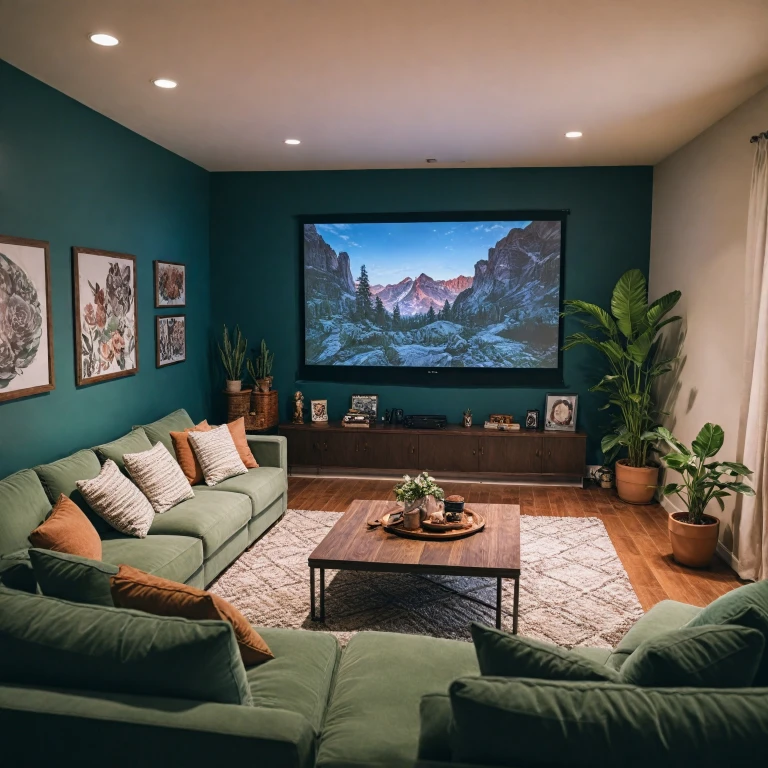
When stepping into the realm of home theaters, traditional concepts of projectors and screens have evolved with the introduction of dry erase projectors. A pioneer in cross-functional technology, these projectors merge the projection capabilities of conventional systems with the interactive engagement of whiteboard surfaces. Unlike standard projector screens, a dry erase projector offers a dual-purpose solution that not only enhances visual presentations but also adds a layer of interactivity akin to a smart board. In essence, this product transforms a regular screen into an interactive whiteboard, allowing users to annotate and interact with the content seamlessly, blending the familiarity of erase boards with projection screen sophistication. The screens used can vary from elite screens to fixed frame options, offering diverse choices in projection surfaces to suit any home setup. While the initial price point may seem higher given its multi-functional nature, the long-term benefits of integrating digital whiteboard capabilities into your entertainment space can outweigh the cost, making it an enticing investment for tech enthusiasts. Various brands, such as Epson and their PowerLite series, cater to this hybrid approach, providing not just projection but interactive engagement and digital touch functionality. The technology doesn't skimp on quality either. With short throw and ultra short throw projectors, these solutions ensure vibrant images without the limitations of space, offering a solution that's not only smart but practical. Ultimately, understanding dry erase projectors paves the way for making informed decisions about integrating this cutting-edge technology into a home theater setup, where interactivity and advanced digital projection become the standard. For those seeking a deeper dive into how to choose the ideal projector, whether for home theater or other experiences, explore further insights on choosing the ideal projector for your golf simulator experience.Key Features to Consider
Essential Aspects to Evaluate for Your Dry Erase Projector
When considering a dry erase projector for your home theater, there are several key features you'll want to delve into to ensure the perfect viewing experience. Whether you're aspiring for a cinematic feel or an interactive setup, understanding these elements can guide you to the right product.
Projection Surface Compatibility
The screen or projection surface is crucial for any home theater system. You need to consider whether you'll be using a whiteboard, projection screen, or interactive whiteboard as your main display surface. These screens, especially dry erase boards, can provide a dual function as they serve for both projection and writing.
Throw Distance and Setup
Understanding throw distances is another pivotal factor. Short throw and ultra-short throw projectors allow you to project large images even in tight spaces, which is ideal for home entertainment areas.
Interactive and Smart Features
For those seeking advanced technology, consider interactive capabilities. Some smart boards or whiteboard projectors offer digital interaction, making it easier to control and interact with your projector seamlessly.
Product Pricing and Brand Options
Price points are significant when choosing your whiteboard projector. Brands like Epson and Elite Screens offer a variety of models at different price levels. You might want to consider renting a projector to try before you decide on the investment.
Feedback and Customer Service
Don’t forget to look into customer feedback and service options. Keeping a close eye on what other users are saying about certain products can give you unparalleled insights, often revealing details about the projection quality and customer service experience, especially for brands offering projectors with a fixed frame or a thin edge.
Comparing these aspects among different projectors can ensure you make a well-informed decision aligned with your home theater needs.
Installation and Setup Tips
Getting Started: Installation with Precision
Setting up your dry erase projector to get the best out of it requires more than just pointing it at a wall. Understanding your installation options can significantly impact your viewing experience. Many modern projectors, including those with interactive capabilities or short throw features, offer flexibility in how they can be positioned in your home theater setup.Begin by evaluating your projection surface. For optimal clarity, a quality projector screen or a dry erase screen specifically designed for projection is recommended. This not only enhances picture quality but also helps in maintaining your equipment. Whiteboards or projection screens with a thin edge and light rejecting materials are excellent for preventing light distortion and enhancing image brightness.
- Location Matters: Position your projector for the best angle and distance. Consider if a fixed frame screen fits your room layout better or if a portable option like an elite screen is more practical.
- Wiring and Connectivity: Plan your wiring carefully to connect your ultra short throw projectors or whiteboard electronic interfaces effectively. Wireless connectivity can also be an option for some high-tech models, reducing the clutter of cables and wires.
- Mounting and Adjustment: Ensure your screen and projector are securely mounted. An adjustable or motorized mount can add flexibility to viewing angles, especially with interactive whiteboards or boards that need to double as a smart board.
- Calibration and Settings: After physical setup, calibrating your projector using feedback controls is crucial. Utilize adjustable settings for brightness, contrast, and keystone correction to get the clearest picture.
Enhancing Your Viewing Experience
Optimizing Your Viewing Environment
To truly enhance your viewing experience with a dry erase projector, it's crucial to optimize the environment where you plan to set up your home theater. Start by selecting a suitable projection surface. A high-quality projector screen or a specialized whiteboard can significantly improve image clarity and brightness. Consider using a light rejecting screen to minimize ambient light interference, ensuring vibrant visuals even in well-lit rooms.
Choosing the Right Projector
When it comes to selecting the right projector, options like short throw projectors or ultra short throw models can be beneficial. These projectors allow you to place the device closer to the screen, which is ideal for smaller spaces. Brands like Epson and Elite Screens offer a range of projectors and projector screens that cater to different needs and budgets. Look for features such as interactive whiteboard capabilities if you want to use your setup for more than just movies.
Integrating Interactive Features
Enhance your home theater setup by integrating interactive features. A whiteboard projector or digital whiteboard can transform your viewing space into a multifunctional area. These interactive whiteboards allow you to engage with content dynamically, making them perfect for presentations or educational purposes. Ensure your whiteboard electronic setup is compatible with your projector for seamless integration.
Feedback and Adjustments
Once your system is set up, gather feedback from viewers to make necessary adjustments. This could involve tweaking the projection settings or repositioning the screen for optimal viewing angles. Regularly update your equipment's firmware and consult customer service if you encounter any issues. Keeping your setup well-maintained will ensure a consistently high-quality viewing experience.
Maintenance and Care
Regular Cleaning and Maintenance
Maintaining your dry erase projector is crucial for ensuring its longevity and optimal performance. Regular cleaning of the projector's lens and the projection surface, such as a whiteboard or screen, is essential. Dust and smudges can affect image clarity, so use a microfiber cloth to gently clean the lens and the surface. Avoid using harsh chemicals that could damage the projector or the screen.
Proper Ventilation
Projectors, including dry erase models, generate heat during operation. Ensure that your projector is placed in a well-ventilated area to prevent overheating. This not only prolongs the life of the projector but also maintains the quality of the projection. Consider using a projector with a built-in cooling system or placing it in a location with adequate airflow.
Regular Software Updates
For interactive whiteboards and smart board projectors, keeping the software up-to-date is vital. Manufacturers like Epson and Elite Screens often release updates that enhance functionality and fix bugs. Regularly check for updates to ensure your projector operates smoothly and efficiently.
Feedback and Customer Service
Engage with customer service for any technical issues or queries. Brands like Epson PowerLite and Elite Screens offer robust support and can provide guidance on maintenance and troubleshooting. Reading customer feedback can also offer insights into common issues and solutions.
Replacing Consumables
Projectors have components that may need replacement over time, such as bulbs or filters. Keep track of the usage hours and replace these items as recommended by the manufacturer. This ensures that your projector continues to deliver high-quality images and operates efficiently.